-
![]()
Daisy
Daisy is the Senior editor of the writing team for EaseUS. She has been working in EaseUS for over ten years, starting from a technical writer to a team leader of the content group. As a professional author for over 10 years, she writes a lot to help people overcome their tech troubles.…Read full bio -
Jane is an experienced editor for EaseUS focused on tech blog writing. Familiar with all kinds of video editing and screen recording software on the market, she specializes in composing posts about recording and editing videos. All the topics she chooses …Read full bio
-
![]()
Alin
Alin is an experienced technical blog writing editor. She knows the information about screen recording software on the market, and is also familiar with data cloning and data backup software. She is expert in writing posts about these products, aiming at providing users with effective solutions.…Read full bio -
Jean is recognized as one of the most professional writers in EaseUS. She has kept improving her writing skills over the past 10 years and helped millions of her readers solve their tech problems on PC, Mac, and iOS devices.…Read full bio
-
![]()
Jerry
Jerry is a fan of science and technology, aiming to make readers' tech life easy and enjoyable. He loves exploring new technologies and writing technical how-to tips. All the topics he chooses aim to offer users more instructive information.…Read full bio -
![]()
Rel
Rel has always maintained a strong curiosity about the computer field and is committed to the research of the most efficient and practical computer problem solutions.…Read full bio -
![]()
Gemma
Gemma is member of EaseUS team and has been committed to creating valuable content in fields about file recovery, partition management, and data backup etc. for many years. She loves to help users solve various types of computer related issues.…Read full bio -
![]()
Shelly
"I hope my articles can help solve your technical problems. If you are interested in other articles, you can check the articles at the bottom of this page. Similarly, you can also check my Twitter to get additional help."…Read full bio
Page Table of Contents
Alin
Updated on Jun 09, 2026
0 Views |
0 min read
When there are some critical things on your iPhone 13 to be taken down, recording and saving them on your device is a great way. Maybe you are playing a game, want to show off something cool you can do with your new iPhone, or you are watching something that cannot be directly saved to your phone. The recording function can do you a favor.
In case you can't use this function due to some reason, we also give you the steps to screen record on iPhone 13 with third-party apps. Just read ahead, choose a recorder and follow the tutorials to start recording.
PAGE CONTENT:
- How to Screen Record on iPhone 13
- Screen Record on iPhone 13 with Screen Recorder+
- Screen Record with Screen Recorder - Fast Recorder
- Bonus Tip. How to Screen Record on Windows and Mac
- FAQs about Screen Recording on iPhone 13
Part 1. How to Screen Record on iPhone 13
iPhone 13 has a built-in screen recorder feature. You can easily record your activities from your phone with this feature. All you need to do is enable the feature in the Control Center and make sure your phone is updated to iOS 15.
The recorder will count down from 3 before actually starting recording your screen. After recording, you can find the file in your camera roll and edit a voice recording. The following steps show you how to record iPhone 13 screen with a few clicks.
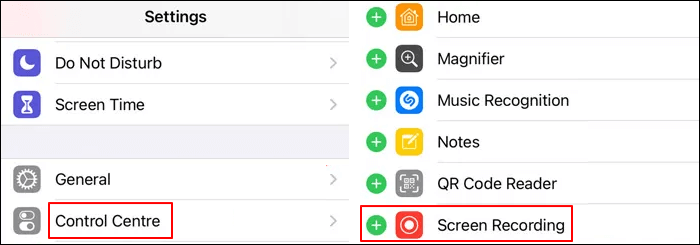
Step 1. First, you need to add the "Screen Recording" function to "Control Center". Just go to "Settings" > "Control Center" and tap "+" next to "Screen Recording".
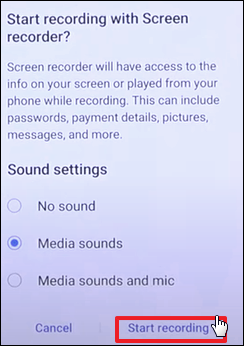
Step 2. Next, go to the app or action you want to record and swipe to open "Control Center". Tap the screen recording icon to start recording. You can also click on the "Microphone" sign to record it.
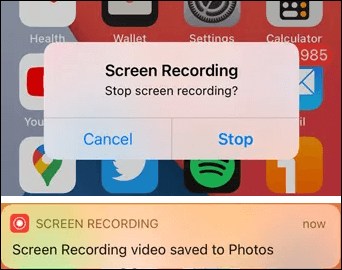
Step 3. When you want to stop the screen recording, open "Control Center" and tap the screen recording icon again. By default, the recordings will be saved in the "Videos" album in the "Photos" app.
Part 2. Screen Record on iPhone 13 with Screen Recorder+
Besides the built-in iOS tool for screen recording, there is another feasible app to screen record iPhone 13 - Screen Recorder+ (also called RECGO). As one of the best apps to record screen on iPhone, it allows you to record game videos, apps, or video calls on your iOS device.
After recording your screen, you can use the powerful video editing features to edit the recordings. For example, you can crop and trim videos easily, add hundreds of music and sound effects to make your video more interesting, rotate your videos at 90-degree angles, etc. Now, let's see how you can use it to record the screen of your iPhone 13.
Step 1. Install Screen Recorder + on your iPhone and launch it.
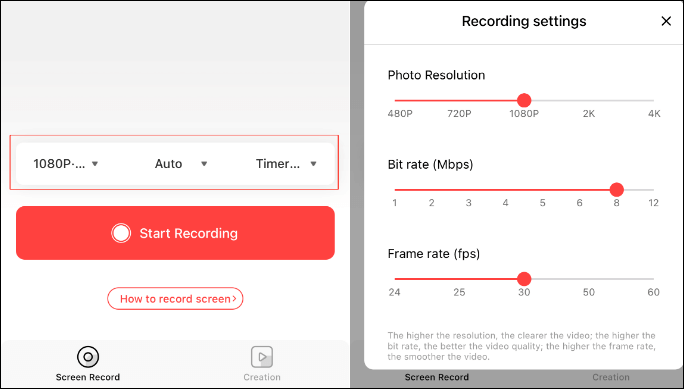
Step 2. Go to the window you want to record, click "Start Recording", tap "Continue" and "Start Broadcast". Then the screen will be recorded for 3 seconds.
Step 3. Once you want to stop recording, click the red box. And tap "Stop Broadcast" to stop the recording. The recordings saved can be found easily in the next interface.
Part 3. Screen Record with Screen Recorder - Fast Recorder
Screen Recorder - Fast Recorder is the last mobile app we want to introduce to you. This application stands out in the list of best iOS screen recorders. It's a reliable and popular screen recorder for iPhone users. With this app, you can not only record the screen but also edit your recorded copies to trim, crop, add music, insert text, and more.
In addition, it lets you extract recorded files as GIFs, making them easier to share on social platforms. Note that it is only compatible with iOS 11.0 or later. If your iPhone is not running with these systems, it may not work. Now, let's take a look at how to operate it correctly.
Step 1. Download and install the app on your iPhone.
Step 2. Open the window you want to record, and launch the app by double-clicking.
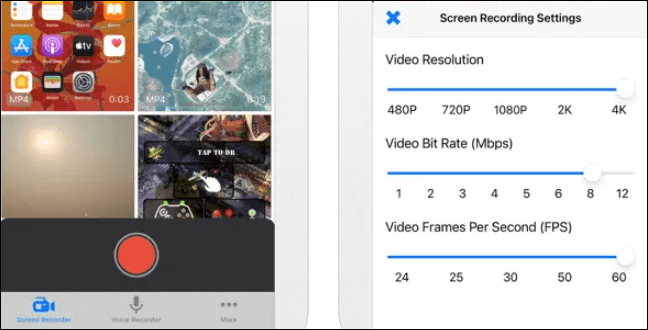
Step 3. Choose "Screen Recorder" or "Voice Recorder" based on your needs and click on the red button to start.
Step 4. When you recorded the content you wanted, click the red button again to stop recording.
Bonus Tip. How to Screen Record on Windows and Mac
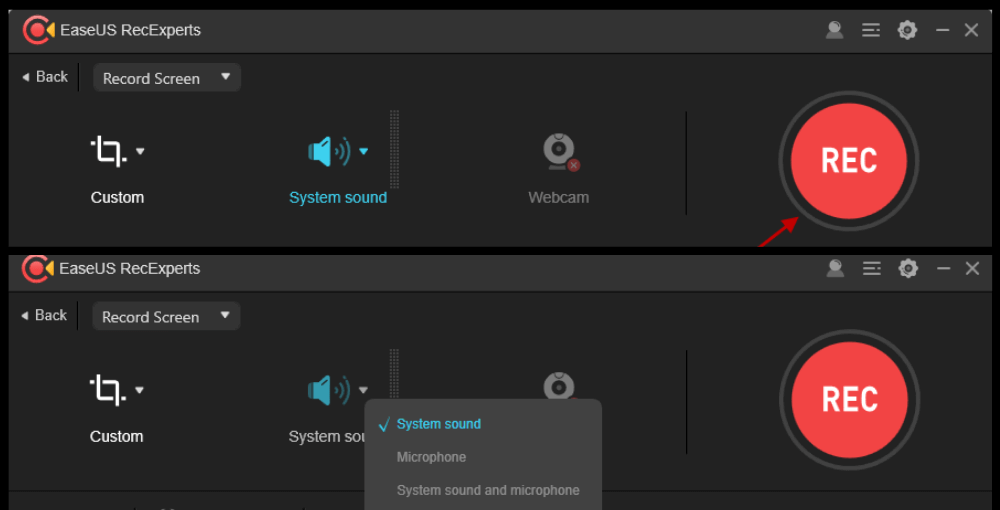
If you want to record the screen of your Windows and Mac computers, the apps mentioned above are helpless. In this case, you will need EaseUS RecExperts. As screen recording software, it can record full screen on Windows 10, record a specific window, record the webcam with audio, record the microphone, and even record the webcam.
All in all, it records all the things you want. Moreover, it can be used to take a partial screenshot on Windows at any time you want. Since it is designed for people without professional skills, you can handle it even have no experience in screen recording. Now, let's see what else it can do for you.
Main Features:
- Record a Zoom meeting without permission
- Screen record on HP laptop in one click
- Record gameplay and webcam at the same time
- Play third-party videos and audio smoothly
- Trim or cut a video after recording
FAQs about Screen Recording on iPhone 13
Here we gathered some questions related to screen recording on iPhone 13. Check the answers.
1. How do I screen record?
This depends on what devices you are using. If you are using an iPhone, you may try the default screen recorder or the apps we give you in this article. However, if you are using a Windows or Mac computer, you may download and use EaseUS RecExperts.
2. How do I secretly record on my iPhone 13?
You may use the built-in screen recorder to do so. Just follow the steps below:
- 1. Enable screen recording in "Control Center".
- 2. Open "Control Center" with a swipe up from the Home screen. Click on the red button to start.
- 3. When you want to stop recording, just click on the red button again.
Conclusion
In this tutorial, we showed you how to screen record on iPhone 13, Windows, and Mac computers. Just pick one tool you like to use. For Windows and Mac users, we suggest you download and use EaseUS RecExperts since it can record your screen and edit the recordings simply.