-
![]()
Daisy
Daisy is the Senior editor of the writing team for EaseUS. She has been working in EaseUS for over ten years, starting from a technical writer to a team leader of the content group. As a professional author for over 10 years, she writes a lot to help people overcome their tech troubles.…Read full bio -
Jane is an experienced editor for EaseUS focused on tech blog writing. Familiar with all kinds of video editing and screen recording software on the market, she specializes in composing posts about recording and editing videos. All the topics she chooses …Read full bio
-
![]()
Alin
Alin is an experienced technical blog writing editor. She knows the information about screen recording software on the market, and is also familiar with data cloning and data backup software. She is expert in writing posts about these products, aiming at providing users with effective solutions.…Read full bio -
Jean is recognized as one of the most professional writers in EaseUS. She has kept improving her writing skills over the past 10 years and helped millions of her readers solve their tech problems on PC, Mac, and iOS devices.…Read full bio
-
![]()
Jerry
Jerry is a fan of science and technology, aiming to make readers' tech life easy and enjoyable. He loves exploring new technologies and writing technical how-to tips. All the topics he chooses aim to offer users more instructive information.…Read full bio -
![]()
Rel
Rel has always maintained a strong curiosity about the computer field and is committed to the research of the most efficient and practical computer problem solutions.…Read full bio -
![]()
Gemma
Gemma is member of EaseUS team and has been committed to creating valuable content in fields about file recovery, partition management, and data backup etc. for many years. She loves to help users solve various types of computer related issues.…Read full bio -
![]()
Shelly
"I hope my articles can help solve your technical problems. If you are interested in other articles, you can check the articles at the bottom of this page. Similarly, you can also check my Twitter to get additional help."…Read full bio
Page Table of Contents
Rel
Updated on Jun 09, 2026
0 Views |
0 min read
PAGE CONTENT:
Discord today is much more than just a voice chat application. You can make private groups, live stream various apps, and join AI servers like MidJourney. The OBS studio is the best for screen recording and live streaming, whether on Mac or Windows. Many streamers and content creators make Discord servers and do private streams with premium subscriptions. If you know how to stream OBS to Discord, you can combine the powerful features of these two apps.
You may know how to stream OBS to Discord just as a screen, but in this post, we will see how to stream OBS Studio on Discord with various tweaks in video quality, overlays, and many more. We will also provide the greatest OBS alternative: EaseUS RecExperts, in our "pro tip". You can directly click the link below to find the most suitable content for you:
How to Set Up OBS Before Streaming on Discord
However, according to the OBS Studio review, the OBS Studio auto-configures itself, but it is important to set it up according to your needs and system specs to churn out an optimal performance while streaming on Discord or any other application.
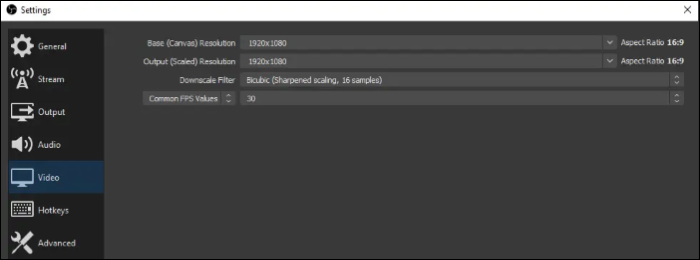
OBS Studio Video Settings
Step 1. Download the OBS app and open the settings. Then navigate to the Video section. If you are using a PC/Mac with good specs, you can go with 1080p resolution and 60 fps, or you can drop down to 720p and 30 fps.
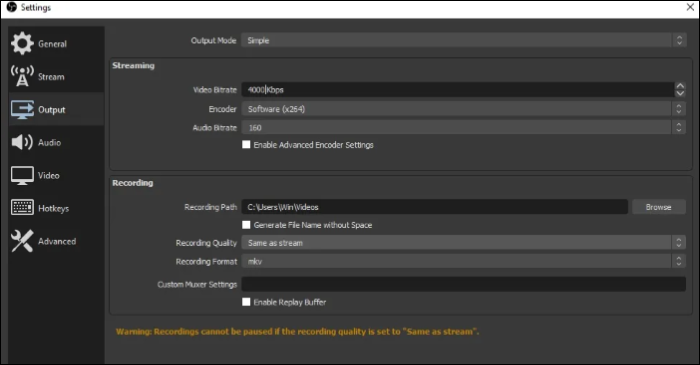
Step 2. Click on the Output for additional video settings like Bitrate and Encoder. To render high-quality output videos, the bitrate should be between 4000 to 6000 Kbps. And for the Encoders, the x264 ones are pretty good and work well to churn out optimal video quality.
- Pro Tip:
- Internet speed and computer specs play a major role in video quality. Make sure your video settings do not go overboard with what your PC can handle and do not forget to update the graphics cards to the latest version to avoid choppy or laggy streaming.
Now, we move onto the critical part while settings up the OBS for Discord or any other platform.
OBS Studio Audio Settings
Many get confused or forget to add audio sources to capture the desktop audio or microphone.
Step 1. Navigate to Audio in Settings.
Step 2. Select your "Desktop Audio" and "Mic/Auxiliary Audio" and set every other source to default.

Add Sources to OBS Studio
The next thing you need to set up is the sources you want on your stream. In simple words, when you are streaming, the things you want your viewers to see and hear. You can add Game Capture, browser windows, apps, or your screen.
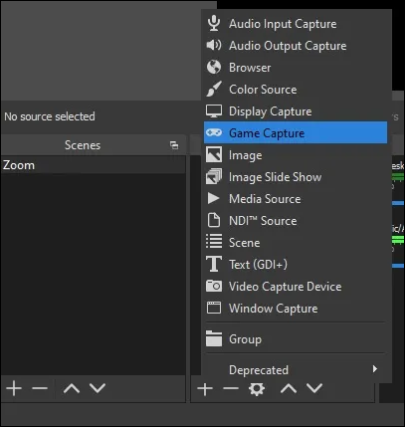
Click on the Plus (+) sign next to the Sources. You will see a list of sources you can add, and select what you want. Additionally, you can see the respective properties of sources, which you can tweak. If you are gaming, and using 3rd part overlays, just add Game Capture as your source, navigate to its properties, and tick the checkbox as shown in the picture.
Now you can set up OBS before streaming on Discord in the right way. But do you know what the best OBS settings for streaming are? Just click in and check the answer!
How to Stream OBS to Discord with Sound on PC
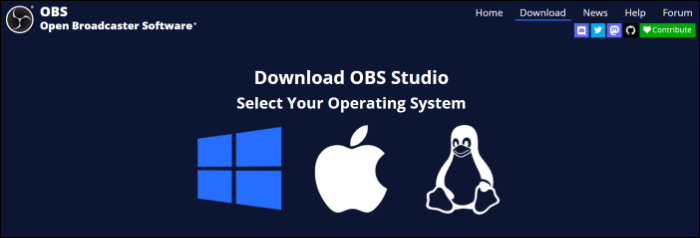
Step 1. Download OBS and Create Accounts.
You might have already done it, but make sure you visit the official Discord and OBS Studio websites and download the application. Install the apps and create your account.
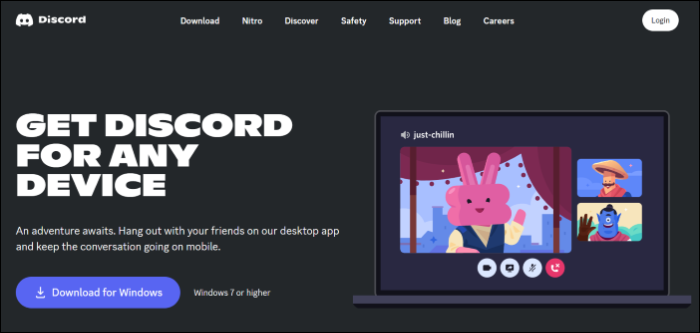
Step 2. Download Discord and Join or Create a Server on Discord.
Once, you are done with creating accounts. Open the Discord app. Look for the Plus (+) button on the left sidebar and click on it. Here, a list of options appears. Select Create my own, name it, and put a photo.
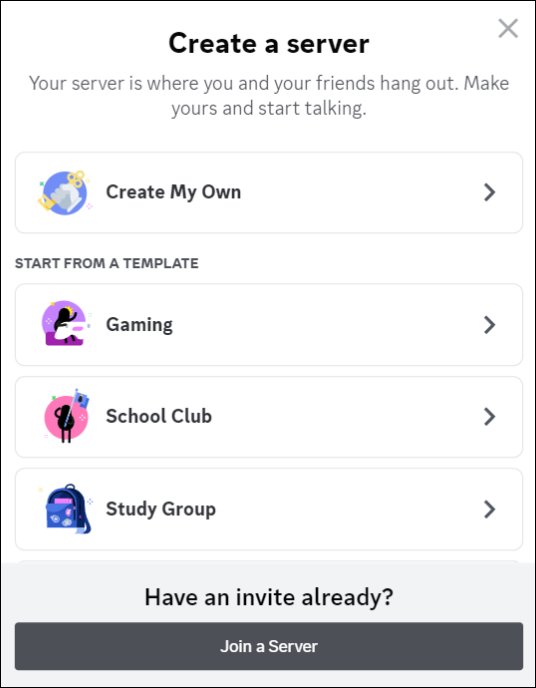
After creating your server, it will appear with a set of text and voice channels, depending on your options. You can add more of them later and even edit the existing ones.
Step 3. Configure your Discord account for streaming.
To start streaming, enter a "voice channel" in your server, and you can find the Screen button, right above your profile at the bottom left corner. Click on it. There's nothing much to do since the program configures itself. All you have to do is select what you want to stream, whether a window, app, or any browser.

Step 4. Click on Go Live to start streaming.

If you are not seeing the Screen button, remember, to stream from Discord, you have to buy "Discord's Nitro" Subscription, which costs $9.99 a month.
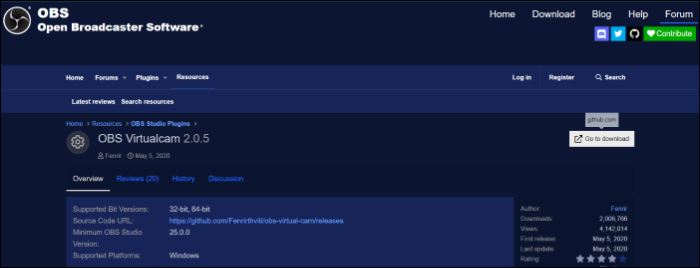
Step 5. Install OBS Virtualcam Plugin and set up with Discord.
To send the OBS Studio signal to Discord, you have to download OBS Virtual Plugin and add it to Discord. Close the OBS app. If you have it open, navigate to this OBS Virtualcam Plugin page and click on Go to Download.
Now, open the OBS Studio app again and follow the instructions below to get your Virtualcam onto Discord:
- Select Tools > VirtualCam in the main Window.
- Press the Start button and close the dialog.
- Open Discord, go to Settings > Voice & Video, and select OBS-Camera as your webcam under the video section.
This action sends everything that is happening on your OBS screen to OBS VirtualCam, and you can use it in Discord.
Finally, select OBS Studio after clicking on the Screen button to stream on Discord.
If your OBS streaming is not recording your screen, you can go to the passage below to fix the situation:
OBS Not Recording Screen - How to Fix?
Do you know how to fix OBS not recording screen issue? If you do not know, you have come to the right page.
How to Stream to Discord Using OBS and PlayStation/Xbox/Nintendo Switch
To stream to Discord using OBS and a gaming console, you will need a PC, OBS VirtualCam Plugin, and a video capture software. Follow the steps below.
Step 1. Turn on your PC and gaming console (PlayStation/Xbox/Nintendo Switch).
Step 2. Connect the HDMI from your gaming console to the video capture device and set up your microphone, lights, camera, etc.
Step 3. In OBS Studio, click on the Plus (+) sign and add "Video Capture Device" to bring gameplay from your console to the OBS.
Step 4. Set up everything like video and audio quality, and make sure everything is perfect.
Step 5. If you want to add any external overlays, download the Streamkit Overlay for Discord to OBS.
Step 6. Install the OBS VirtualCam and connect Discord with OBS.
Step 7. Open Discord, enter a channel and start streaming with OBS Studio.
How to Fix OBS Discord Stream No Audio
If you are sharing your entire screen on Discord, it will not pick up your desktop sound. And if you want to fix OBS recording with no audio, you will either have to troubleshoot some basics on the OBS or PC settings. Here are a few fixes you can follow to fix the OBS Discord stream with no audio.
- Fix 1. Unmute OBS Studio in the Volume Mixer
- Fix 2. Modify the OBS Audio Settings
- Fix 3. Check the System's Sound Settings
- Fix 4. Make Speakers your Default Audio Device
Fix 1. Unmute OBS Studio in the Volume Mixer
If the OBS app is muted in the Volume Mixer, it is impossible for any sources to pick up the audio. So, follow the steps below to unmute OBS, and try the same for Discord to enable the sound.
Step 1. Right-click on the Speaker button on the bottom-right corner of your taskbar.

Step 2. Click on the "Open Volume Mixer."

Step 3. Now, click on the Speaker icon below the OBS to unmute the app.
Fix 2. Modify the OBS Audio Settings
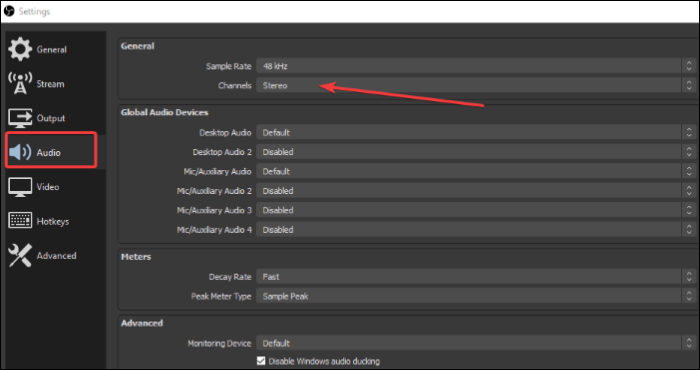
Step 1. Open OBS, click on File, and click Settings.
Step 2. Navigate to Audio settings. Under General, select "Stereo" next to the Channels option.
Step 3. This is important. The "Global Audio Devices" has all your audio sources. So makes sure you select the respective sources to align audio for both Desktop Audio and Mic/Auxiliary Audio.
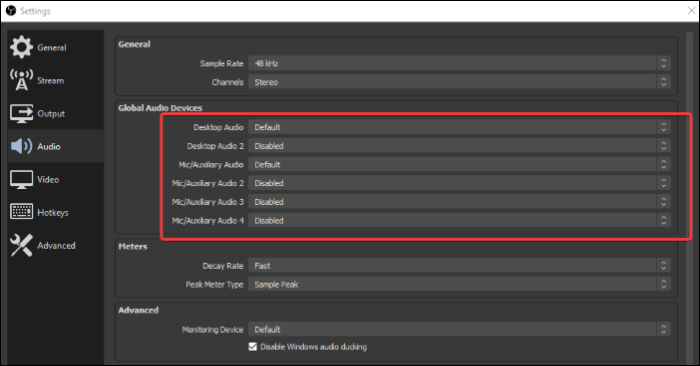
Step 4. For other sections, if you have no audio sources, make sure they are set to default so that the system configures the default sound devices for them.
Step 5. Click Apply and OK. Restart OBS and Discord to see the changes.
Fix 3. Check the System's Sound Settings
If the OBS is unable to pick up Discord audio, it may be due to disabled speakers, microphones, or headphones. This causes the app to fail to identify them, hence resulting in no sound. This issue is even more peculiar with Windows 11 users.
Step 1. Click the Windows key, search for Control Panel, and open it.
Step 2. Click on Hardware and Sound for Windows 10 users, and expand Sounds. For Windows 11 users, just click on Sounds.

Step 3. Right-click anywhere in the window, and tick Show Disabled Devices.
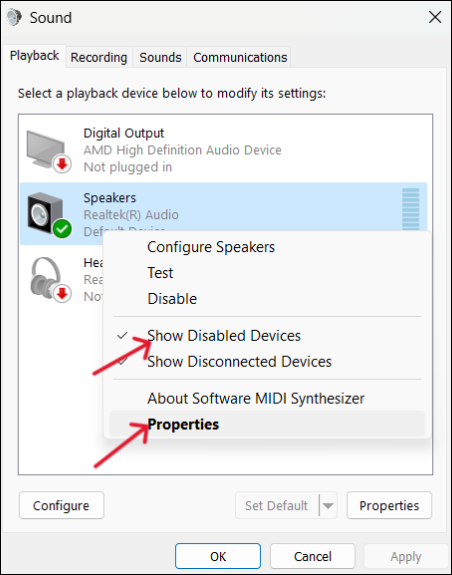
Step 4. To select your audio device, navigate to the playback tab, and click Properties.
Step 5. In this tab, make sure you have the levels to your preference.

Step 6. Now, navigate to the Advanced tab, and uncheck the "Allow applications to take exclusive control of this device."

Step 7. Click OK to save changes.
Step 8. Click your audio device and configure. Now, a new dialog box pops up. Select Stereo from the menu. Restart both apps and check if the audio is being detected and recorded.
Fix 4. Make Speakers your Default Audio Device
Setting your desktop speakers as the default audio device will overwrite all the audio issues with apps.
Step 1. Open the Control Panel, and Open the Sounds settings as discussed in the above method.
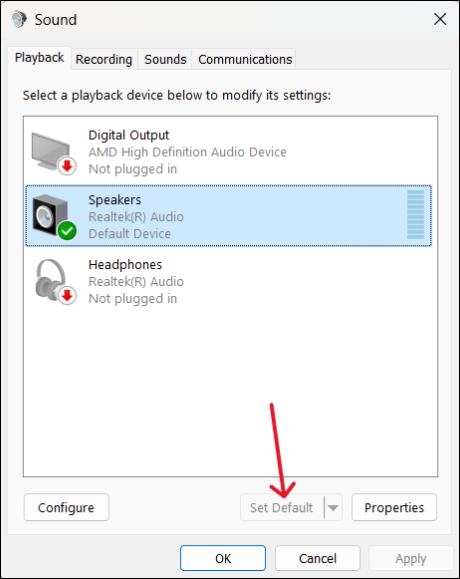
Step 2. Navigate to the playback tab, select Speakers, and choose the "set default" option.
Step 3. Click Apply button to save the changes.
Pro Tip: The Best OBS Alternative for Recording on PC
The OBS configuration and setup process is quite difficult, especially if you are a beginner, and if sound issues arise, it only results in even more messy situations to stream with OBS. What if there is an alternative, which configures itself with settings depending on your devices and provides various screen-sharing modes for your to stream with Discord? EaseUS RecExperts, a professional screen recording software, is the perfect OBS alternative.
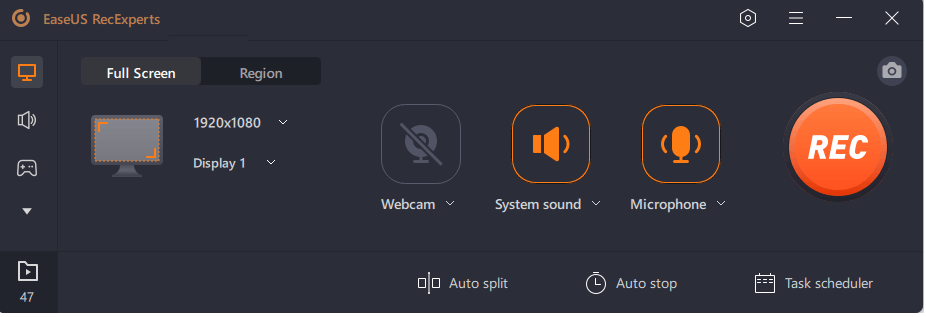
EaseUS RecExperts has great features to screen record on Windows in various modes. You can record gameplay, educational content, or any encrypted video. Even more, you can edit and trim videos to enhance the output. For gamers, you can record the screen and webcam at the same time with ease.
✨Key Features of EaseUS RecExperts:
- Wide range of screen recording options like full-screen, a part for your screen, multi-screen, and many more;
- Ability to add a webcam overlay and schedule recording;
- The inbuilt video editor and cutter;
- Audio recording and extraction with audacity noise reduction feature;
- Record videos of 4K/8K resolution of up to 144 fps with no lag.
FAQs
1. How to use OBS Virtual Camera on Discord?
Follow the steps below to use OBS Virtual Camera on Discord.
1. Open OBS, and go to the Sources box at the bottom. Click the Plus + sign, in the drop-down menu, select Display Capture or Video Capture, and choose your webcam. At the end, click Start Virtual Camera.
2. Now, on Discord, go to the App settings and open Voice & Video section. Scroll down to video settings and click on Camera under video preview. Select OBS Virtual Camera here to see the virtual camera feed on your stream.
2. Where is the stream key in Discord?
There is no such Stream Key feature in Discord. But you can share your screen using the Screen Share option to stream content on your Server. Follow the steps below to Screen share on Discord.
1. Join a voice channel on your server.
2. You will find the Screen icon right above your profile near the bottom left corner.
3. In the new window, select what you want to share and the video settings.
4. Press the Go Live at the end to share your screen or stream.
Conclusion
The process of how to Stream OBS to Discord is tiresome, but all you have to do is be well-versed in the necessary settings to get going. This post details "How to Stream OBS to Discord" with all the necessary details to make it easy for a beginner to set up OBS to Discord. If you want a better OBS alternative, you can go with EaseUS RecExperts. The setup and ease of use make it one of the best screen recording apps for gameplay and all screen recording needs.