-
![]()
Daisy
Daisy is the Senior editor of the writing team for EaseUS. She has been working in EaseUS for over ten years, starting from a technical writer to a team leader of the content group. As a professional author for over 10 years, she writes a lot to help people overcome their tech troubles.…Read full bio -
Jane is an experienced editor for EaseUS focused on tech blog writing. Familiar with all kinds of video editing and screen recording software on the market, she specializes in composing posts about recording and editing videos. All the topics she chooses …Read full bio
-
![]()
Melissa Lee
Melissa Lee is an experienced technical blog writing editor. She knows the information about screen recording software on the market, and is also familiar with data cloning and data backup software. She is expert in writing posts about these products, aiming at providing users with effective solutions.…Read full bio -
Jean is recognized as one of the most professional writers in EaseUS. She has kept improving her writing skills over the past 10 years and helped millions of her readers solve their tech problems on PC, Mac, and iOS devices.…Read full bio
-
![]()
Jerry
Jerry is a fan of science and technology, aiming to make readers' tech life easy and enjoyable. He loves exploring new technologies and writing technical how-to tips. All the topics he chooses aim to offer users more instructive information.…Read full bio -
Larissa has rich experience in writing technical articles. After joining EaseUS, she frantically learned about data recovery, disk partitioning, data backup, screen recorder, disk clone, and other related knowledge. Now she is able to master the relevant content proficiently and write effective step-by-step guides on various computer issues.…Read full bio
-
![]()
Rel
Rel has always maintained a strong curiosity about the computer field and is committed to the research of the most efficient and practical computer problem solutions.…Read full bio -
![]()
Gemma
Gemma is member of EaseUS team and has been committed to creating valuable content in fields about file recovery, partition management, and data backup etc. for many years. She loves to help users solve various types of computer related issues.…Read full bio
Page Table of Contents
Rel
Updated on Apr 19, 2024
0 Views |
0 min read
You can click the below quick navigation and learn how to record Destiny 2 on PC.
- Record Destiny 2 with EaseUS RecExperts
- Record Destiny 2 with Xbox Game Bar
- Record Destiny 2 with Nvidia GeForce Experience
- Record Destiny 2 with AMD Radeon
- Record Destiny 2 with OBS Studio
On March 1, 2023, according to the data provided by Steam, with the release of Destiny 2: Lightfall, this game's maximum number of online users exceeded 300000.
Destiny 2 is a first-person shooting game that supports personalized appearance and has an extremely special game style. The exquisite picture of the game and the curious game-playing methods are the keys to its high popularity.

With the beginning of the new season, many players want to record the wonderful clips in the game and share them on YouTube, Facebook, and other platforms. So how to record Destiny 2?
This article will bring you 5 different ways to help you achieve your goals. You can easily get the recorded video that satisfies you through the detailed steps and clear screenshots we provide.
Record Destiny 2 with EaseUS RecExperts
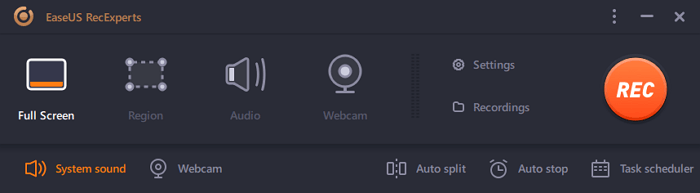
First, let's meet EaseUS RecExperts, a powerful screen recorder for Windows and Mac. It is very suitable for game players to clip their playing highlights. With its help, you can schedule a recording without lag and any watermark.
you can record the Destiny 2 gameplay with one click and offer users with professional video trimming function to edit the recorded video.
Its main features are shown below:
- Simple operation interface
- No time limit
- No lag
- Supports 4K resolution
- Can record the part of screen, full screen, or a little window
- Supports recording with webcam and audio
Now follow the method below and record Destiny 2 with EaseUS RecExperts.
Step 1. Launch the gameplay that you want to record. Next, open EaseUS RecExperts and click on the "Game" button on the left.
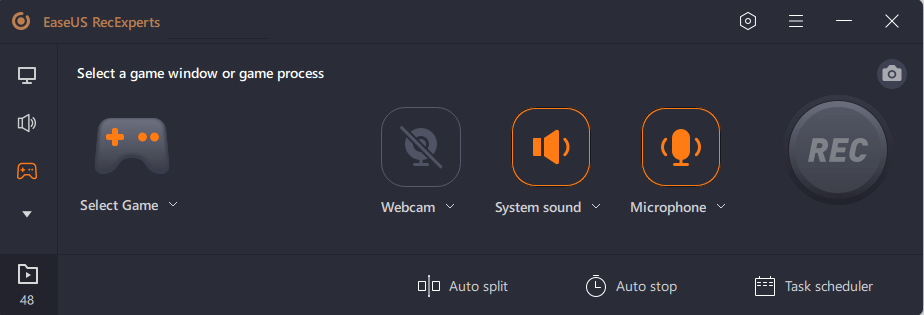
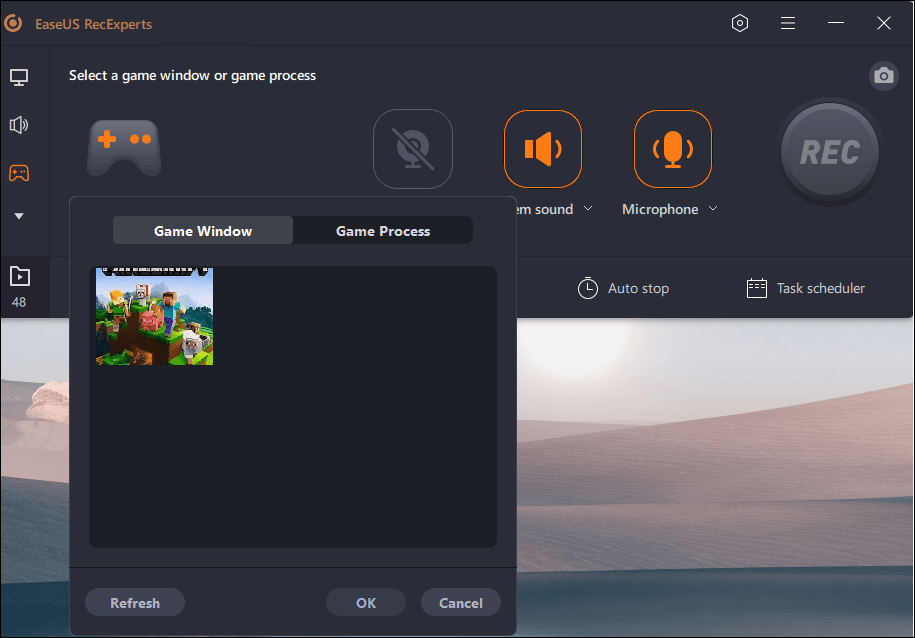
Step 2. Click on the "Select Game" option to choose a Game Window or Game Process. Then, you can enable the audio and webcam recording if needed. When all are done, click the big REC button to start the gameplay recording.
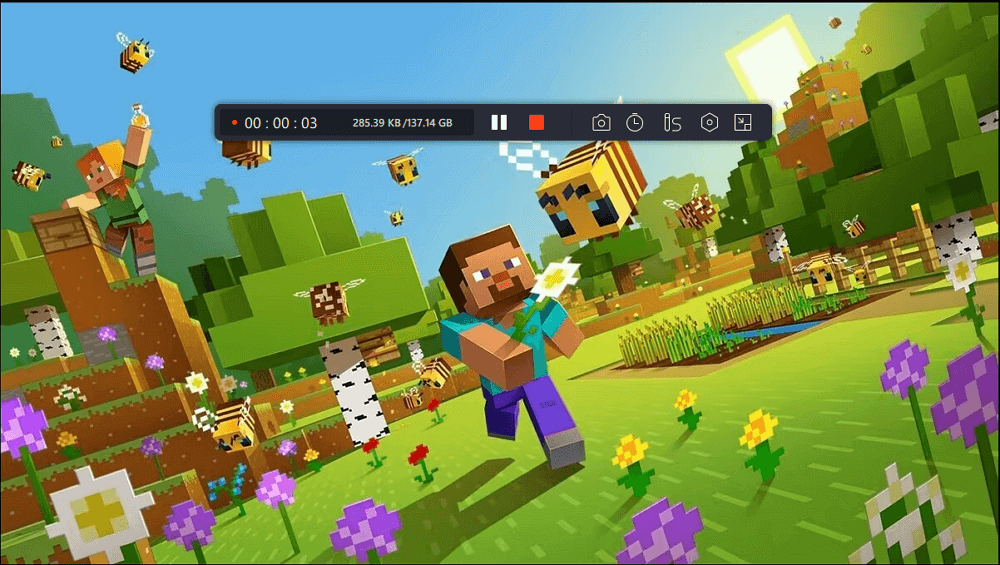
Step 3. A floating toolbar will appear, and you can pause or stop the recording. Besides that, the camera icon enables you to take a screenshot, and the timer icon lets you stop the recording automatically.
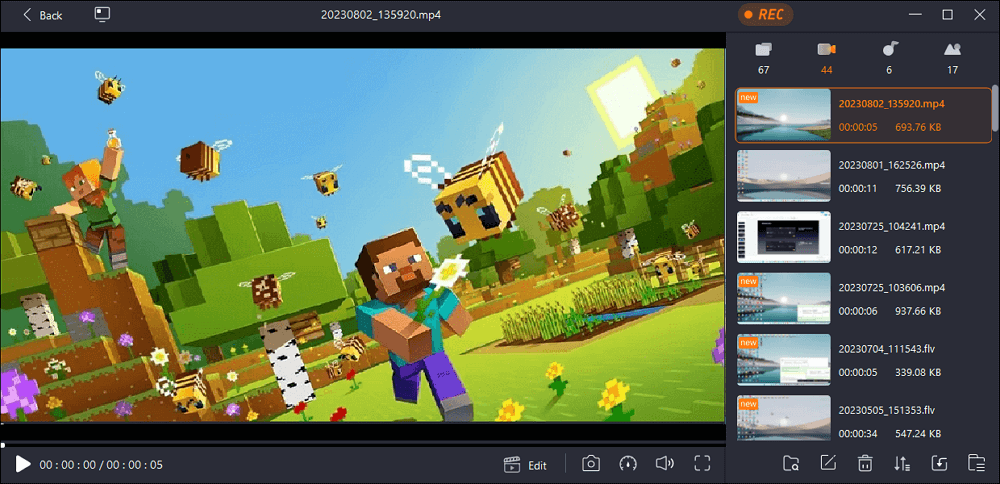
Step 4. After saving the recorded gameplay video, a media player will pop up. It gives you a built-in tool to trim the recording, extract audio from the video, and add an opening & ending part. You can find the tool at the bottom of the player.
Record Destiny 2 with Xbox Game Bar
Xbox Game Bar is the Windows built-in free screen recorder without a watermark. If you have a computer running Windows 10 or Windows 11, using Xbox Game Bar to record Destiny 2 can be a nice choice.

With customized shortcut keys, Xbox Game Bar can support you to record gameplay easily. Its intuitive and easy-to-use interface and great recording functions are also the reasons why Xbox Game Bar is a good helper for recording Destiny 2.
Let's follow the simple steps below.
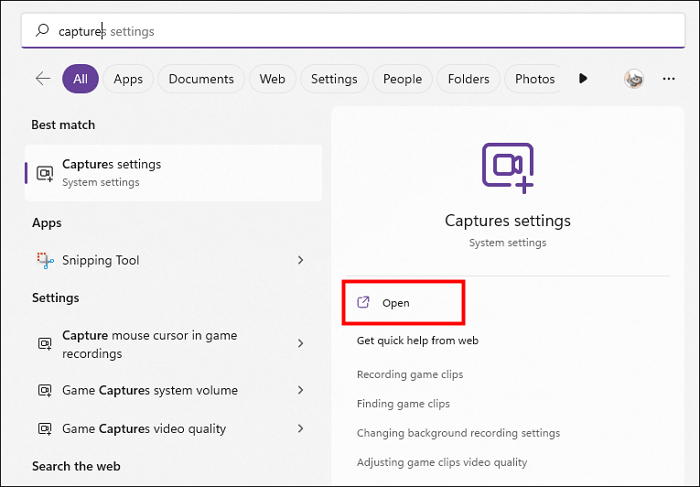
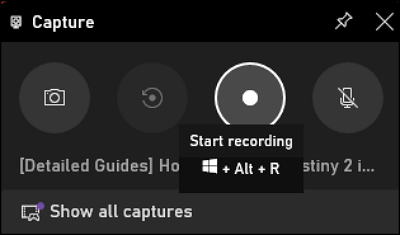
Step 1. Open the Capture settings app.
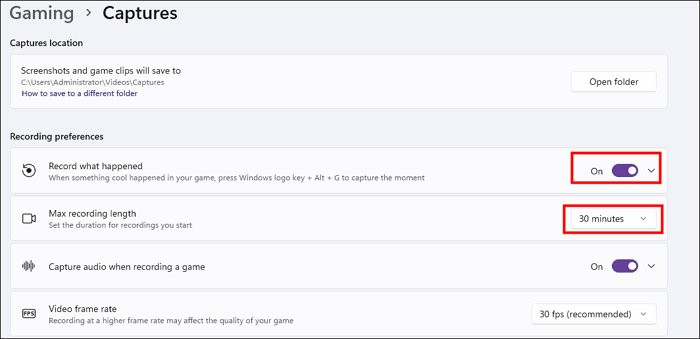
Step 2. Turn on the Record what happened option and now you can press the Windows + Alt + G keys to capture the highlight moment. Also, you can set the max clip length you want here.
Step 3. Run Destiny 2 and press Windows + Alt + R keys to start the recording process now. And click the Stop button to end.
Record Destiny 2 with Nvidia GeForce Experience
If you’re an Nvidia graphics card user, you should try an efficient clipping software for gaming - GeForce Experience.
This recorder is provided by Nvidia, you can download it on your PC configured with an Nvidia graphics card. It supports you to record Destiny 2 with great effect. You can monitor the FPS, change the video resolution, and capture a screenshot with its useful functions.
Follow the guide below and record Destiny 2 with Nvidia.
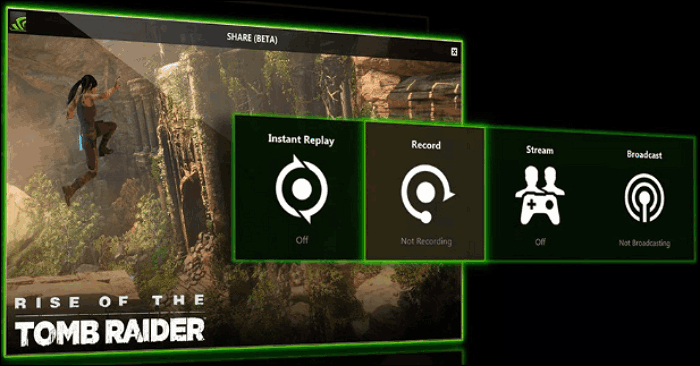
Step 1. Download GeForce Experience first. Then launch GeForce Experience and Destiny 2.
Step 2. Customize the recording settings according to your requirements on the GeForce Experience main page.
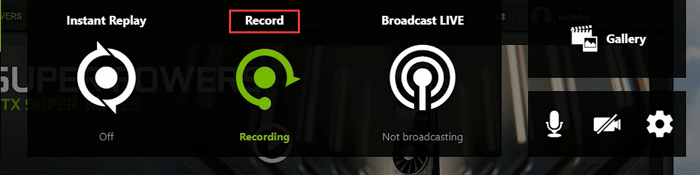
Step 3. Press Alt + F10 keys and the GeForce Experience overlay will pop up. You can see the Record button on your screen now. Hit it and record Destiny 2.
Record Destiny 2 with AMD Radeon
Like Nvidia Geforce Experience, if your PC is equipped with an AMD graphics card, you can download the Radeon Software offered by AMD to record Destiny 2.
Record gameplay with Radeon can help you finish your work efficiently. The whole recording process will not sacrifice the FPS, and you can get wonderful game clips with no lag.
Let's see how AMD Radeon records Destiny 2.
Step 1. Right-click on your desktop and run the AMD Radeon Software.

Step 2. Hit the Gear icon> General option on the pop-up software window.

Step 3. According to your needs, configure recording options and remember or reset the Toggle Recording hotkeys.
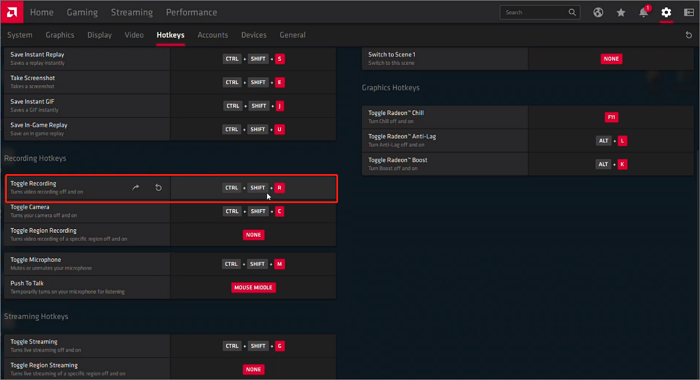
Step 4. Now press the hotkeys and start recording Destiny now.
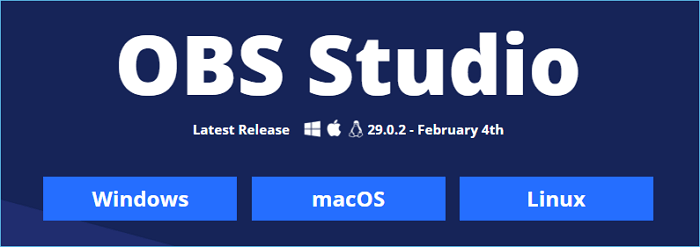
Record Destiny 2 with OBS Studio
For Windows, Mac, or Linux users, the OBS Studio, as an open-source screen video recorder, is the last good choice for you to record Destiny 2. Also, OBS is one of the most friendly helpers for you to stream games too.
Now follow the simple tutorial we provided below and record your game with great ease.
Step 1. Download and install OBS Studio on your PC.
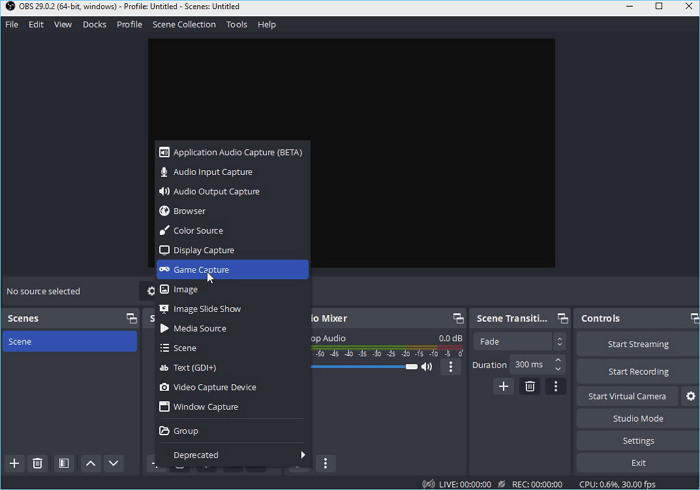
Step 2. Run Destiny 2. Now launch OBS and hit the Plus button on the lower left quarter to click the Game Capture option.
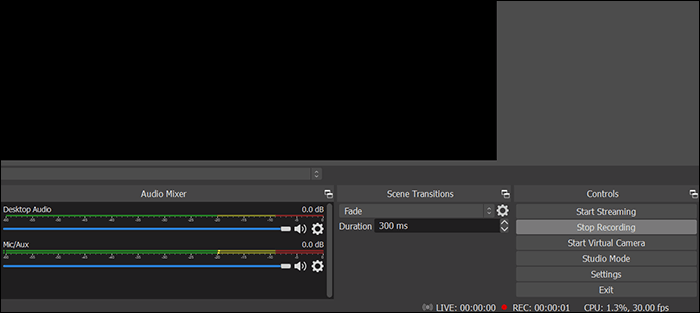
Step 3. Click the Start Recording option to start the Destiny 2 gameplay recording. You can hit another button to stop the recording at any time you want.
Conclusion
At the beginning of the new Lightfall season, are you ready to clip game video in the face of a new journey? Whether you want to record your excellent operation or collect new solar system scenery, you must find the right tools to record the gameplay. We introduce you to 5 solutions on how to record Destiny 2. You can choose the most satisfactory tool as your recording assistant according to your needs. Among them, we recommend EaseUS RecExperts as your first choice.
FAQs
1. How do I stream Destiny 2?
You can stream Destiny 2 on Twitch. Here are simple steps shared for you.
Step 1. Navigate to the Twitch Stream Manager and choose Extensions.
Step 2. Search to find the right Destiny 2 Official Extension on Twitch
Step 3. Install this Extension and click the Configure option to connect your Bungie.net account
Step 4. Then Sign into Bungie.net using the streamer's platform account, and you can stream Destiny 2 now.
2. How do you record clips in Destiny 2 PC?
You can use 5 recorders to record clips in Destiny 2 on PC.
They are EaseUS RecExperts, Xbox Game Bar, Nvidia GeForce Experience, AMD Radeon, and OBS Studio. Each tool has its advantages and disadvantages. You can choose a preferred tool to record clips in Destiny 2 on PC.
EaseUS RecExperts

One-click to capture anything on screen!
No Time Limit, No watermark
Start Recording