-
![]()
Daisy
Daisy is the Senior editor of the writing team for EaseUS. She has been working in EaseUS for over ten years, starting from a technical writer to a team leader of the content group. As a professional author for over 10 years, she writes a lot to help people overcome their tech troubles.…Read full bio -
Jane is an experienced editor for EaseUS focused on tech blog writing. Familiar with all kinds of video editing and screen recording software on the market, she specializes in composing posts about recording and editing videos. All the topics she chooses …Read full bio
-
![]()
Alin
Alin is an experienced technical blog writing editor. She knows the information about screen recording software on the market, and is also familiar with data cloning and data backup software. She is expert in writing posts about these products, aiming at providing users with effective solutions.…Read full bio -
Jean is recognized as one of the most professional writers in EaseUS. She has kept improving her writing skills over the past 10 years and helped millions of her readers solve their tech problems on PC, Mac, and iOS devices.…Read full bio
-
![]()
Jerry
Jerry is a fan of science and technology, aiming to make readers' tech life easy and enjoyable. He loves exploring new technologies and writing technical how-to tips. All the topics he chooses aim to offer users more instructive information.…Read full bio -
![]()
Rel
Rel has always maintained a strong curiosity about the computer field and is committed to the research of the most efficient and practical computer problem solutions.…Read full bio -
![]()
Gemma
Gemma is member of EaseUS team and has been committed to creating valuable content in fields about file recovery, partition management, and data backup etc. for many years. She loves to help users solve various types of computer related issues.…Read full bio -
![]()
Shelly
"I hope my articles can help solve your technical problems. If you are interested in other articles, you can check the articles at the bottom of this page. Similarly, you can also check my Twitter to get additional help."…Read full bio
Page Table of Contents
Jean
Updated on Jun 09, 2026
0 Views |
0 min read
Microsoft Teams offers users a straightforward way to record webcam and screen at the same time, helping hosts and participants gather essential materials to create walkthrough guides, make training videos, capture presentations, or track essential personal meeting notes.
Do you know whether you have permission to record on MS Team? Is there a way to perform Teams screen recording as an attendee? How to record yourself on Teams alone? Let's delve into this post to figure these questions out.
Who Can Start or Stop a Recording on Microsoft Teams?
Before you learn how to record a Teams meeting with yourself, have you ever thought a question: Can you record a video of myself in Teams? There are some requirements for you to record Teams meeting. Let's have a look.
1️⃣Have a qualified license. Licenses with Office 365 Enterprise E1/E3/E5/F3/A1/A3/A5, M365 Business, Business Premium, or Business Essentials are able to use the recording feature on Teams.
2️⃣Get a recording license from an IT Admin.
3️⃣You need to be the meeting organizer/host or from the same company. Persons from other organizations, guests, and anonymous attendees are not granted recording permission.
💡Note: If you are the host or a person from the same company, you can use the Teams' native recording feature to record yourself presenting in the Teams meeting; if you are a participant outside the organization, use a professional third-party screen recorder.
Share this post to help more people!
How to Record Yourself on Teams with the Built-in Screen Recorder
Since you have met all the above requirements, you can use the integrated Microsoft video recorder to directly capture the Teams' video, audio, and screen-sharing activity.
This native screen recording feature lets you record on Teams with or without a meeting. That is to say, you can video record yourself in PowerPoint, demo video, or other files whether there are participants or not.
Record Yourself Presenting on Teams with Meeting
Steps for self-screen recording in Teams meetings are pretty easy if you are the organizer or person from the corporation. See how to Microsoft record everything:
Step 1. Download the Microsoft Teams desktop application from the download page or Microsoft Store. Install and launch it on your computer.
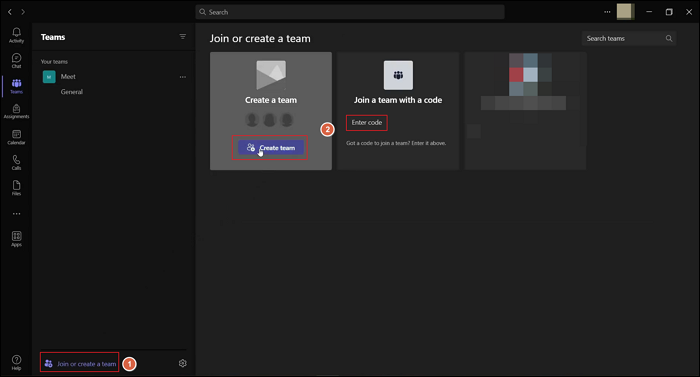
Step 2. Start or join a Teams channel or private meeting.
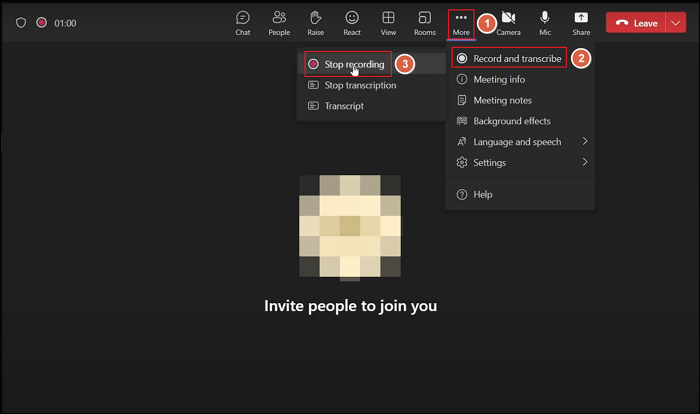
Step 3. In the Teams meeting, click More (three dots) > Record and transcribe > Start recording. The recording session starts now.

Step 4. You can turn on Camera and Mic if necessary. Once your webcam is enabled, you can see your face on the screen. Click Share to select to share which screen with the participants.

Step 5. To end your desktop webcam and screen capture activity, click More (three dots) > Record and transcribe > Stop recording.
Step 6. Click Leave to end this meeting if you need to. Recording will continue even if the host leaves the meeting.
The Teams recordings are automatically saved. You can go to the app's Files tab or File Explorer > OneDrive for Business link.
💡Notes:
- The maximum PowerPoint file size that MS Teams supports is 2 GB. You cannot share files on Teams if your file exceeds the limit.
- You can record a Teams meeting for up to 4 hours or 1.5 GB. Once your recording length or size has reached the limit, the recording will end and restart automatically.
- One person can record a Teams meeting at a time. When the recording session starts, attendees will be notified automatically.
- The Teams meeting host can manage who is allowed to record the conference. Go to Calendar > New meeting > Add a meeting invitation > More options > Recording & transcript > Who can record and transcribe > Select the participants > Save.
Record Myself on MS Teams Without Meeting
Some users may ask: is there a way to record just yourself on Teams without participants? Rest assured, Teams also offers a way to let you record with yourself alone; no need to start or join a group meeting. Let's see how to record yourself on Teams only without participants.
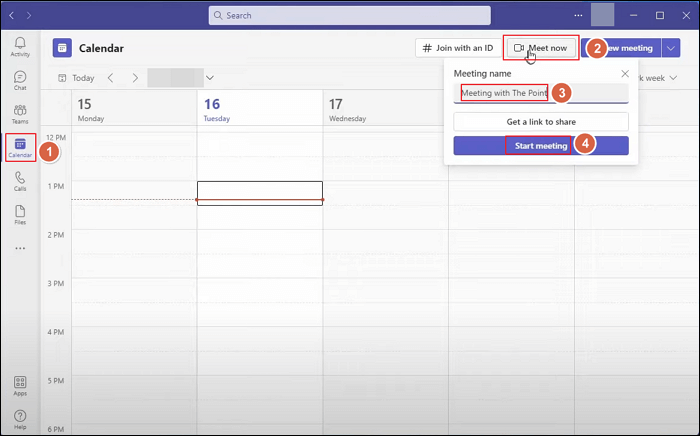
Step 1. Open the Microsoft Teams app on your computer, go to Calendar from the left panel, and click Meet now. Rename the meeting, click Start meeting, and finish the following on-screen instructions.
Step 2. You will enter the meeting channel. Click More (three dots) > Record and transcribe > Start recording. The recording session is initiated now.

Step 3. Turn on Camera and Mic to activate the webcam and microphone recording so that you can record the meeting with your face and voice. Click Share to select a window to share the screen content now.
Step 4. Click More (three dots) > Record and transcribe > Stop recording to end the screen capture activity.
Step 5. Click Leave to end this meeting.
How to Record a Video in Teams Without Any Limits
From what we have discussed above, there are some limitations of Teams' built-in recorder: recording criteria, recording length, sharing file size, number of recorders, and so on.
How to record teams meeting when not host? How to record a Teams meeting without others knowing? What if the recording option is not available in Teams?
If you encounter limits or difficulties when video calling yourself or recording your voice and face on Teams, don't worry. You still have an option: use a free screen recorder for PC without watermark: EaseUS RecExperts.
🌟Key features:
- Video record yourself on Team without notifying people. There is no time limit, no watermark, and no lag.
- Record video with virtual background. Customize your video backdrop easily.
- Schedule recording whatever online meetings you need.
- Trim and edit your recordings. Transcribe the speech to text, reduce the background noise, and more AI-empowered functions.
Download EaseUS RecExperts to your Windows 11, 10, 8.1, 8, and 7 laptop/desktop. Record a video in the Teams app now.
Step 1. Open the video conference you want to record, such as a meeting on Zoom, Microsoft Teams, Google Meet, or Skype. Then, launch EaseUS RecExperts on your device. Choose Full Screen, Custom, or Window to capture the entire meeting window, manually select the specific conference area, or record a specific window without distractions.

Step 2. Select your recording inputs by toggling on the Webcam, Speaker, and Microphone. You can choose to record all sources, just one, or none, depending on whether you want to include your own voice, the speaker's audio, or video feed. This flexibility is helpful when recording online meetings, remote interviews, or training sessions.

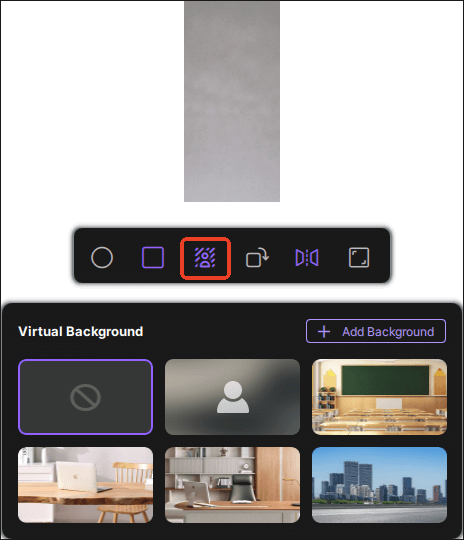
Step 3. If needed, apply the built-in AI background changer after toggling Webcam to customize your webcam view. You can blur your background, replace it with a virtual image, or insert a personalised backdrop, perfect for maintaining professionalism in your video call recordings.
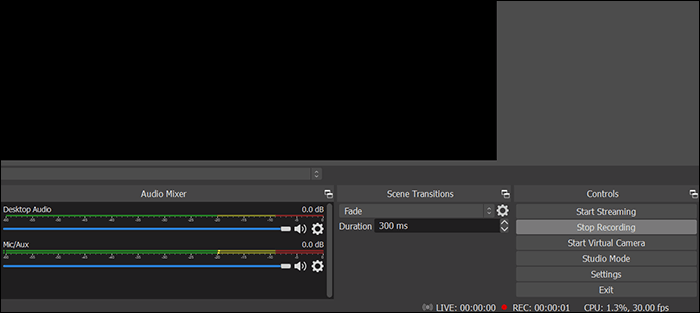
Step 4. Once everything is ready, click the red REC button to start recording. You can also press F10 to pause and F9 to stop the recording quickly.
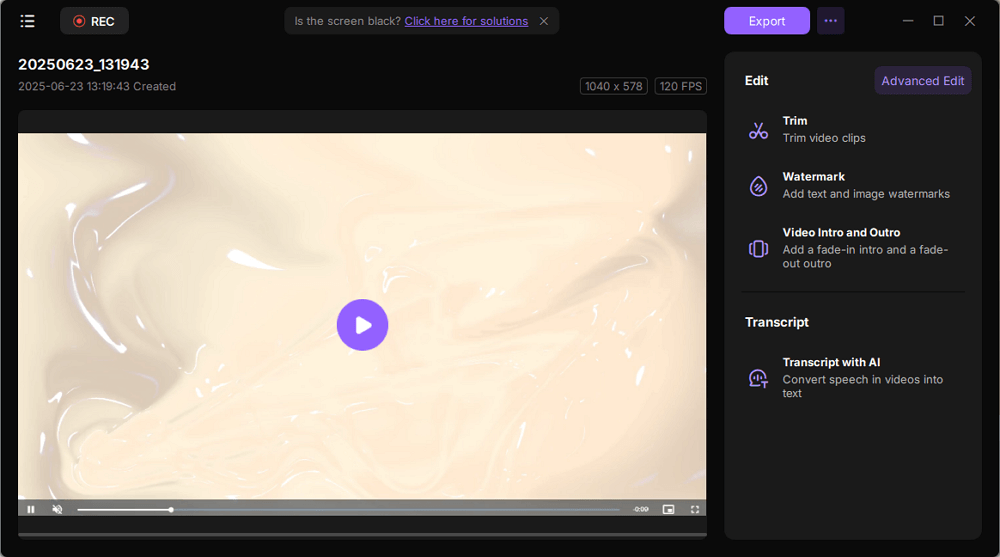
Step 5. After recording, your meeting video will appear in the pop-up recording preview interface. From here, you can play back, rename, or edit the file. If you need a meeting transcript, click Transcript with AI to generate an AI-powered text summary of everything that was said, ideal for post-meeting documentation or sharing with absent team members.
Final Thoughts
Now, you may have a better understanding of how to record yourself on Teams. The default recorder built in Microsoft Teams lets you record just yourself with or without attending a meeting. However, you need to make sure you have met these criteria and know the recording limitations to achieve the best practice.
If you want to find another screen recorder to record yourself in Teams, Google Meet, or Zoom without any limit, download EaseUS RecExperts and give it a shot.
How to Record on Teams FAQs
Check more questions on how to record your voice on Teams.
1. Why can't I record on Teams?
There can be several reasons for the Record button in Microsoft Teams greyed out:
- Your organization's administrator has not enabled the meeting recording ability. Go to Microsoft Teams admin center > expand Meetings > Meeting policies > select a policy > Turn Meeting recording on > Save.
- You do not have the recording permission in Teams.
- You are a guest. Only the meeting organizer and the person from the company who get permission can record on Teams.
- You are using Teams in a web browser. The Teams web version does not support the recording function. Use the Teams desktop app instead.
2. How to enable recording in Microsoft Teams?
To enable the meeting recording feature on MS Teams, ask the organization's administrator go to Microsoft Teams admin center > expand Meetings > Meeting policies > select a policy > Turn Meeting recording on > Save.
3. Does Teams record your screen or just the meeting?
Teams supports you both to record your screen only and record the meeting if you meet the recording requirements.
(1) To record yourself only in Teams:
Step 1. Open Teams app on your computer > Calendar > Meet now > Name the meeting > Start meeting
Step 2. Toggle the camera and microphone on > click Share to select the recording screen.
Step 3. More (three dots) > Start recording.
Step 4. More (three dots) > Stop recording.
(2) To record on Teams app in a meeting:
Step 1. Open the Teams app on your computer > start or join a team > enter the meeting.
Step 2. Toggle the camera and microphone on > click Share to select the recording screen.
Step 3. More (three dots) > Start recording.
Step 4. More (three dots) > Stop recording.
If you fail to record with the native feature of Teams, use Xbox Game Bar or EaseUS RecExperts instead.