-
![]()
Daisy
Daisy is the Senior editor of the writing team for EaseUS. She has been working in EaseUS for over ten years, starting from a technical writer to a team leader of the content group. As a professional author for over 10 years, she writes a lot to help people overcome their tech troubles.…Read full bio -
Jane is an experienced editor for EaseUS focused on tech blog writing. Familiar with all kinds of video editing and screen recording software on the market, she specializes in composing posts about recording and editing videos. All the topics she chooses …Read full bio
-
![]()
Alin
Alin is an experienced technical blog writing editor. She knows the information about screen recording software on the market, and is also familiar with data cloning and data backup software. She is expert in writing posts about these products, aiming at providing users with effective solutions.…Read full bio -
Jean is recognized as one of the most professional writers in EaseUS. She has kept improving her writing skills over the past 10 years and helped millions of her readers solve their tech problems on PC, Mac, and iOS devices.…Read full bio
-
![]()
Jerry
Jerry is a fan of science and technology, aiming to make readers' tech life easy and enjoyable. He loves exploring new technologies and writing technical how-to tips. All the topics he chooses aim to offer users more instructive information.…Read full bio -
![]()
Rel
Rel has always maintained a strong curiosity about the computer field and is committed to the research of the most efficient and practical computer problem solutions.…Read full bio -
![]()
Gemma
Gemma is member of EaseUS team and has been committed to creating valuable content in fields about file recovery, partition management, and data backup etc. for many years. She loves to help users solve various types of computer related issues.…Read full bio -
![]()
Shelly
"I hope my articles can help solve your technical problems. If you are interested in other articles, you can check the articles at the bottom of this page. Similarly, you can also check my Twitter to get additional help."…Read full bio
Page Table of Contents
Alin
Updated on Jun 09, 2026
0 Views |
0 min read
PAGE CONTENT:
Are you fond of gameplay on your system? Then you must be aware of the GeForce Graphics card; its companion app is GeForce Experience. It helps you keep the drivers up to date and also assists with the automatic optimization of settings of your game. Additionally, it provides an effortless way to share fantastic gaming moments with your family and gaming freaks.
However, sometimes you may experience the issue of GeForce Experience only recording 10 seconds. Then how to tackle this issue from the comfort of your home? Stay calm, as even if you are a novice user, we are here to provide seamless ways to deal with the problem. But before moving ahead, let us ponder over the effects it can cause.
What Effects Does It Cause?
There can be many effects that GeForce Experience Only Recording 10 Seconds may bring. These are as follows:
- Sometimes even if you work with a shortcut to initiate the recording, you come to know that the game is not recorded at the end of the game.
- At times, faulty drivers conflict with the software's settings, interfering with each other and causing the issue wherein GeForce Experience becomes defective.
- At times, it is difficult to tell whether the recording of your gameplay is started or stopped, as you can see a gray box with a green dot in the left corner of your screen.
- Sometimes if the game is opened using a full-screen recording does not take place, it may happen because the Desktop Capture function is not enabled.
Record Game with No Time Limit
If GeForce Experience only records 10 seconds, you can switch to an amazing Mac and Windows screen recorder - EaseUS RecExperts. You can use screen recording without a watermark. The advanced tools refine using frame drawing and trimming recorded videos.
The suite comes with exceptional tools for editing to provide proficiency with cutting and trimming footage without any issues. So you can record any area or full screen from the comfort of your desk. Check out its unique features below.
Main features of EaseUS RecExperts:
- Record webcam, gameplay, screen, and audio
- Capture any PC screen area with customized settings
- Add lines, text, and arrows while screen recording
- Delete or manage your recordings
- Schedule recordings to automatically start a recording
Click the button below to download this screen recording software now!
Follow the steps here to start recording your screen without a time limit.
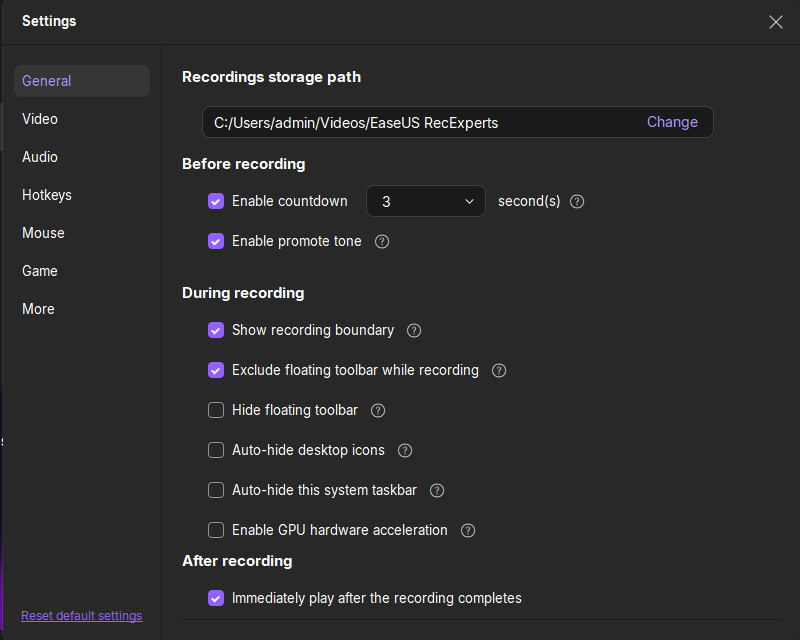
Step 1. Launch EaseUS RecExperts and adjust your recording settings.
Before you start recording, you can customize your settings by clicking the Menu icon (three horizontal lines) in the top-right corner and selecting Settings. From there, you can change the save location, video format, frame rate, audio format, and other preferences. All changes will be saved automatically.
Step 2. Choose a recording mode based on your needs.
On the main interface, you'll see several recording options: Full Screen, Custom, Window, Game, Audio, and Webcam. Simply click the one that matches what you want to record.

Step 3. Set up your webcam and audio sources.
In the toolbar, you can turn the Webcam, Speaker, and Microphone on or off by clicking their icons. If multiple devices are connected, click the small arrow next to each icon to choose your preferred input source.

Step 4. Start and control the screen recording.
Click the red REC button to begin recording. A floating toolbar will appear on your screen, where you can pause the recording using the pause icon or stop it by clicking the red square icon.
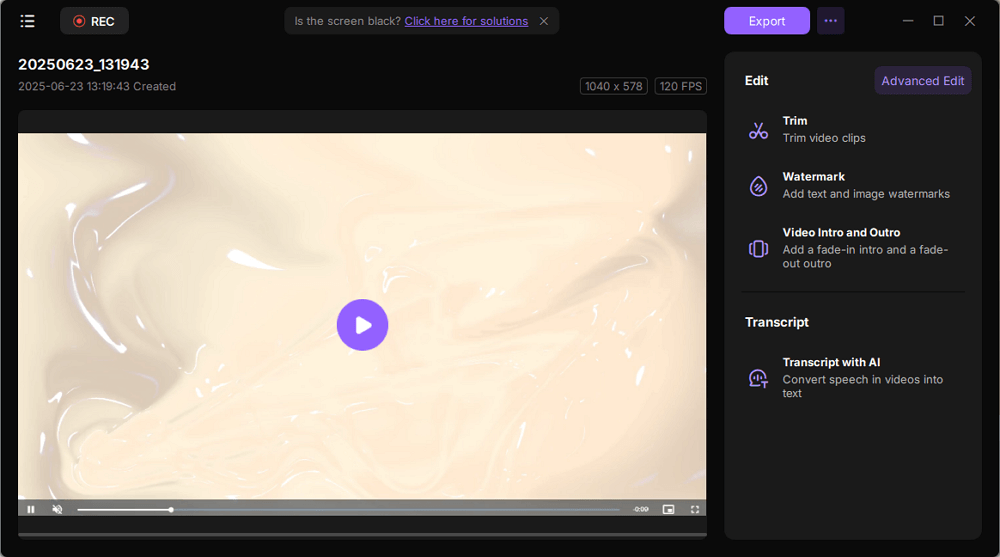
Step 5. Preview, edit, and manage your recordings.
Once you stop recording, you'll be taken to the preview window. Here, you can watch your video, trim it, add watermarks, transcribe audio to text, and organize your recordings. To record again with the same settings, just click the REC button in the top-left corner.
Record Game for a Longer Time
If you are facing Geforce Experience only recording 10 seconds issue and want to check other options for screen recording, then check this. We have listed some more methods for recording games for a long time. Let us check them out below:
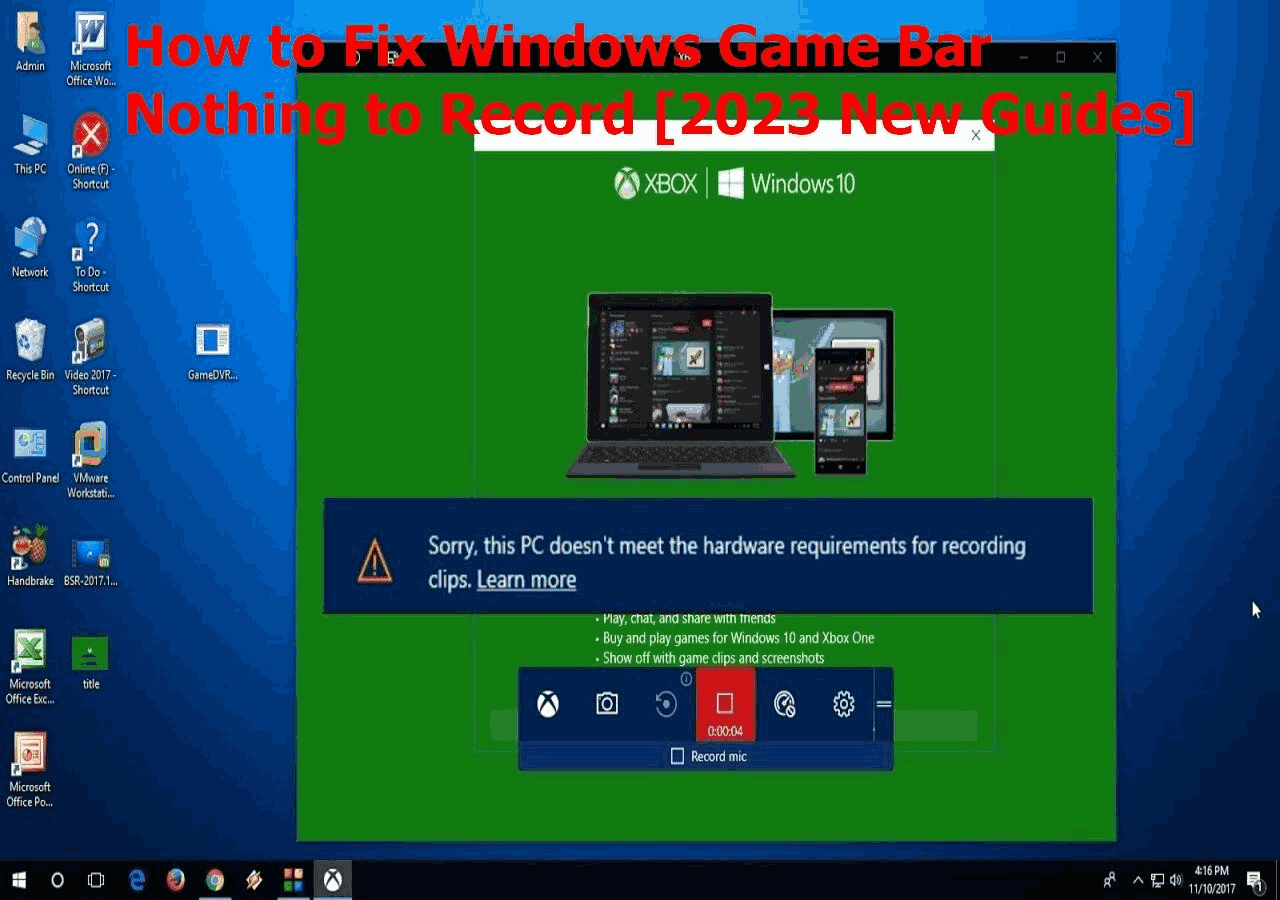
#1. Record the Game with the Game Bar
Are you seeing Geforce Experience only recording 10 seconds of messages on your screen while recording your game? You can use the Xbox Game Bar recording feature as an alternative.
It comes with various shortcuts and makes functioning easier if you know them. However, at times its performance could be more consistent. Before moving with the steps, ensure you have enabled the Xbox Gamebar on your PC.

Steps to Use:
Step 1. Go to the app or game you wish to record.
Step 2. Tap the 'Windows logo key + R+ Alt' keys to start the recording. You will see 'Recording in progress' in the narrator's voice.
Step 3. To toggle the microphone, tap on and off tap on the 'Windows logo key + Alt + M' while recording takes place.
Step 4. If you want to see Game Bar controls, tap on the 'Windows key + G' keys. Once you hear 'Xbox Game Bar Window,' get assured you have reached the controls screen.
Step 5. Play your game until you can see the desired recording. To stop the recording, tap on the 'Windows logo key + Alt + R' keys, and you will hear the narrator say 'Game Clip Recorded.'
You will find your video recorded as an MP4 file in the 'Captures' folder given under the 'Videos' folder. The file contains the game name, recording date, and time.
#2. Record the Game with OBS
OBS is a popular and recognized game recorder that works well for your PC. This multifunctional recorder is free and aids you in recording any screen activities along with gameplay of excellent quality.
Being an open-source screen recorder, OBS provides support for live streaming to distinct platforms even when you have to record gameplay. However, its user interface could be more straightforward for primary users, making them a more accessible option than this one.
Steps to Use:
Step 1. Download and complete the OBS installation on your PC.
Step 2. Make some settings adjustments to get a high-quality recording. After launching OBS from the lower right, fetch the Settings option.
- For Frame rate and Resolution: From the left panel, tap the 'video' button and find the 'Resolution' and 'FPS' options. Change Resolution to 1920 x 1080 and FPS to 60.
- Output Settings: From the left side, locate and tap the 'Output' option. You can opt for default or Advanced modes if you are well-versed with settings.
- Audio: Now make changes to the audio bitrate to change sound quality. Keep it somewhere between 192 and 320. If you need more natural sound, opt for a higher bit rate.
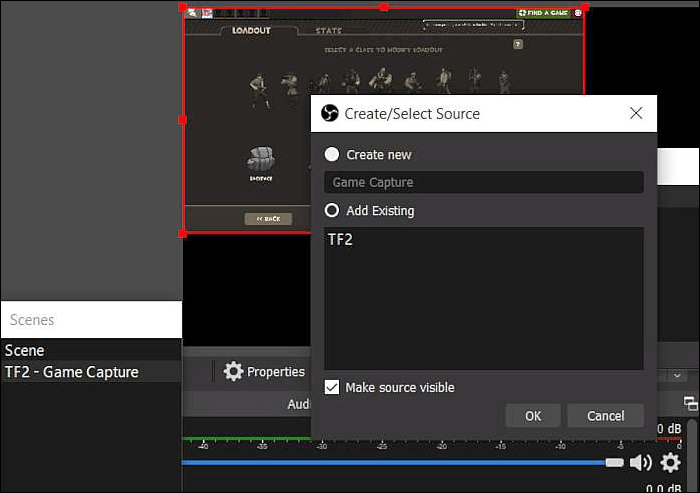
Step 3. Return to the main interface and tap the 'Sources' box. To select Game capture, tap on the '+' icon. Then add the new source that is named after your game.
Step 4. Once you see the Capture specific window' or 'Capture any full-screen application' options on your screen, opt for the desired one.
Step 5. Now tap the 'Start Recording' button to start the recording.
#3. Record the Game with Bandicam
You can use Bandicam if your GeForce Experience only records 10 seconds. Bandicam provides assistance in recording videos and games and an excellent-quality PC screen. It also assists with video compression while recording takes place, making the file size compact and saving space on your PC.
The user interface is easily understandable and has advanced features like recording gameplay on Windows 10, scheduling recording, recording face cam, real-time drawing, etc. However, you cannot use Bandicam on Mac, Android, or Linux devices, as it works only on Windows.
Steps to Use:
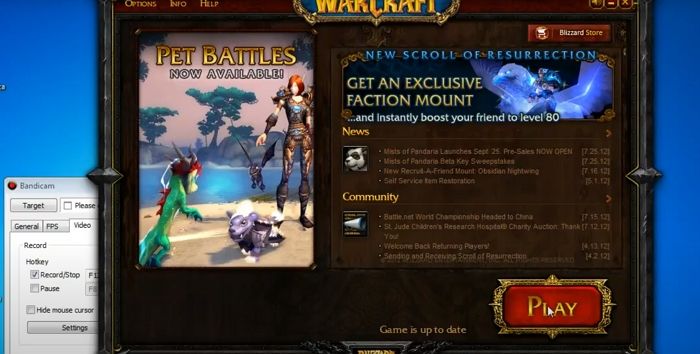
Step 1. Download and install Bandicam from the official website.
Step 2. Make a selection of 'Game Recording Mode.' Then in the windows for User Account Control, tap on the 'Yes' option.
Step 3. Now, it's time to start the recording for the target. As soon as you execute the recording, you will notice a green-colored number for FPS in the left corner on the top.
Step 4. Now tap the hotkey F12 or the 'Record' button to start the recording. Once the recording begins, you will notice the color for FPS changing from Green to Red.
Step 5. Tap the F12 hotkey or 'Stop' button to finish the recording.
Step 6. Then tap the 'Home' and 'Video' options for playing, editing, or uploading your captured videos.
GeForce Experience Only Recording 10 Seconds FAQs
If you have any further queries about GeForce Experience Recording, check out the FAQs below.
1. Why does my GeForce Experience stop recording?
If you want to record your gameplay, then GeForce Experience validates that the game runs in a mode using the entire screen. However, if it cannot do that, it will not be able to process. The main reason behind this issue is the desktop capture feature being off.
2. How do I change the recording length in GeForce Experience?
If you are facing the limit of 20 minutes for recordings, you can change the recording length in GeForce Experience by using the following steps;
Step 1. Start by opening Geforce Experience and look in the top right corner for the 'Share' icon. Tap on it. Alternatively, you can use the shortcut Alt+Z keys for the same.
Step 2. Select 'Instant Replay' in the game overlay and tap on Settings.
Step 3. Then adjust the maximum time length for recording and tap on the 'Save' option.
Step 4. Now start recording using Instant Replay. Make its selection in overlay and tap on the 'Turn On' option.
3. How do I record the last 30 seconds in GeForce?
With Xbox Game Bar, you will be able to record the last 30 seconds in GeForce by using the following steps;
Step 1. Open the Game bar by tapping the 'Win + G' keys.
Step 2. Tap on Widget, then Gear, and then tap on Settings. Then tap on the 'Shortcuts' tab. You will be able to see the default hotkey for the purpose.
Step 3. Tap on the Save button. Then go ahead by launching gameplay or play the video you are looking to clip. After that, utilize hotkeys to record the last 30 seconds of your gameplay.
4. How long can GeForce Experience record for?
GeForce Experience can constantly record in case you turn on the Instant Replay. However, you can save the video only by tapping the 'Alt+F10' keys.
Conclusion
We hope we can provide you with some easy and quick fixes to resolve your issue of GeForce Experience only recording 10 seconds. You can use methods like Bandicam, but it works only on Windows.
Or you can use OBS, an open-source software, but as a novice user, you may need help with its user interface. You can also use the Xbox Game bar as an extra option, but sometimes its performance could be better.
So, as a better and more effective alternative, we suggested EaseUS RecExperts, which aids in unlimited gameplay recording. Download it right now!