-
![]()
Daisy
Daisy is the Senior editor of the writing team for EaseUS. She has been working in EaseUS for over ten years, starting from a technical writer to a team leader of the content group. As a professional author for over 10 years, she writes a lot to help people overcome their tech troubles.…Read full bio -
Jane is an experienced editor for EaseUS focused on tech blog writing. Familiar with all kinds of video editing and screen recording software on the market, she specializes in composing posts about recording and editing videos. All the topics she chooses …Read full bio
-
![]()
Alin
Alin is an experienced technical blog writing editor. She knows the information about screen recording software on the market, and is also familiar with data cloning and data backup software. She is expert in writing posts about these products, aiming at providing users with effective solutions.…Read full bio -
Jean is recognized as one of the most professional writers in EaseUS. She has kept improving her writing skills over the past 10 years and helped millions of her readers solve their tech problems on PC, Mac, and iOS devices.…Read full bio
-
![]()
Jerry
Jerry is a fan of science and technology, aiming to make readers' tech life easy and enjoyable. He loves exploring new technologies and writing technical how-to tips. All the topics he chooses aim to offer users more instructive information.…Read full bio -
![]()
Rel
Rel has always maintained a strong curiosity about the computer field and is committed to the research of the most efficient and practical computer problem solutions.…Read full bio -
![]()
Gemma
Gemma is member of EaseUS team and has been committed to creating valuable content in fields about file recovery, partition management, and data backup etc. for many years. She loves to help users solve various types of computer related issues.…Read full bio -
![]()
Shelly
"I hope my articles can help solve your technical problems. If you are interested in other articles, you can check the articles at the bottom of this page. Similarly, you can also check my Twitter to get additional help."…Read full bio
Page Table of Contents
0 Views |
0 min read
PAGE CONTENT:
Due to its popularity, Minecraft gameplay walkthroughs and videos blow up as soon as they go live. Whether streaming or recording, you need excellent software like OBS to capture your gameplay for live streaming and YouTube. Learn how to record Minecraft with OBS to stream Minecraft gameplay to YouTube, Twitch, or any other social media and streaming platform.
Record Minecraft with OBS - Detailed Steps
Now, let us learn how to set up OBS, one of the open source screen recorders, to record and stream Minecraft games. As OBS is one of the most popular choices for streaming and screen recording Minecraft and other games, let us first dive into the basic setup. It includes adding scenes, sources, audio, webcam, and the game screen. We will start with downloading OBS.
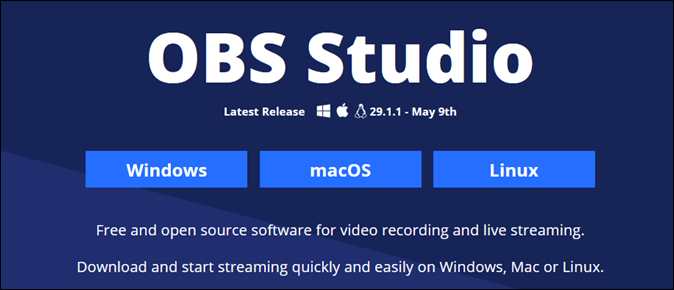
Step 1. Go to the official OBS website and download the Windows/Linux/macOS version for your PC.
Step 2. Open OBS software and click the "+" button to add a Scene (bottom left). You can click on the Scene and name Minecraft or Minecraft Gaming.
Note: A Scene contains all of your sources. Consider it your Desktop screen, containing all the apps, settings, and functions.
Step 3. Now, we will add Sources to the screen. Click on the Sources tab. A list of all the Sources available will appear on your screen.
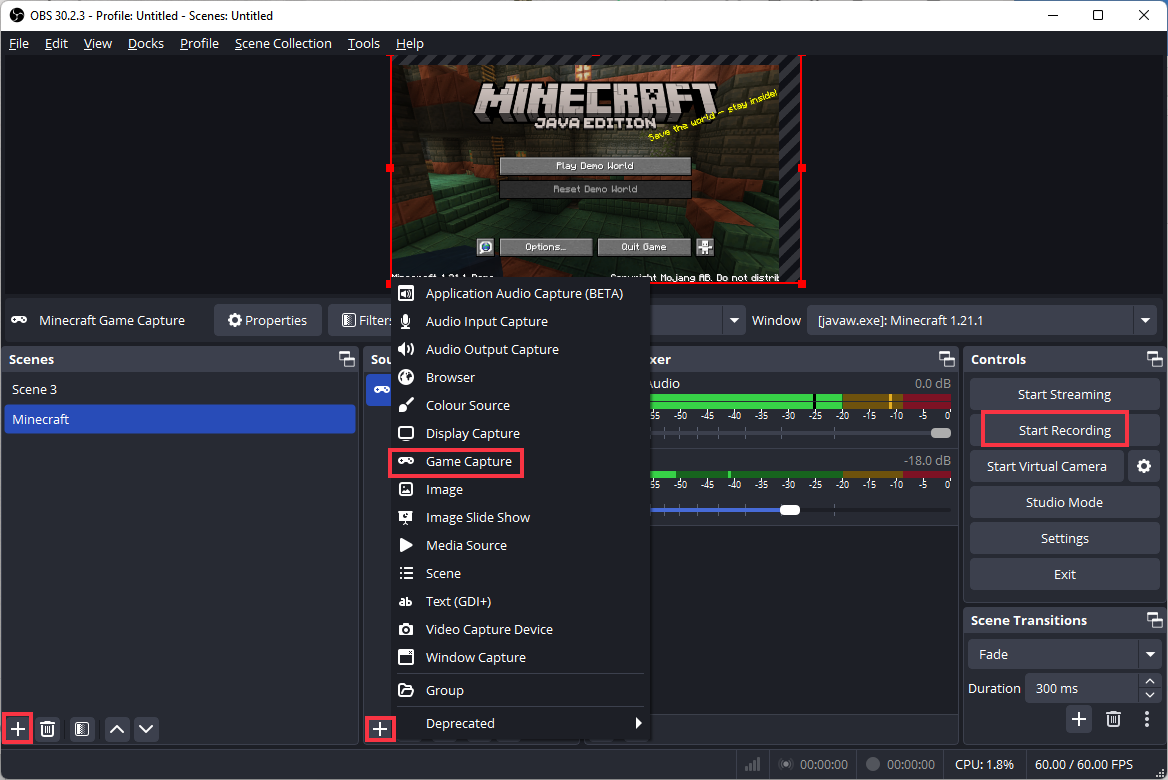
Step 4. The important options are:
- Display Capture: To record your computer screen.
- Game Capture: To capture gameplay walkthroughs and videos.
- Video Capture Device: This is used to record webcam videos.
- Window Capture: To record a single window on your PC.
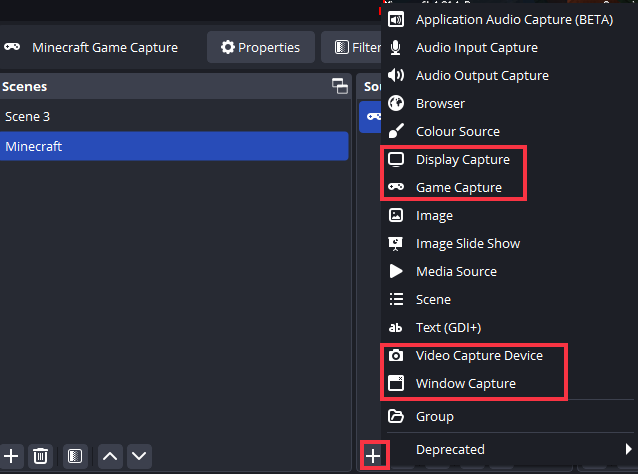
Step 5. To record Minecraft with OBS, add Game Capture and Video Capture Device as sources. Ensure you are playing Minecraft in the background so you can select it.
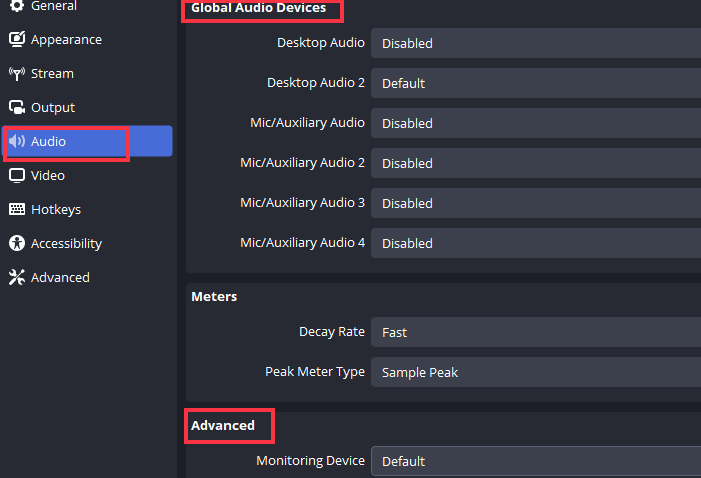
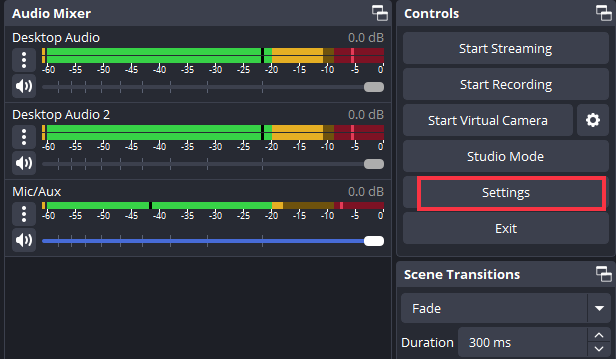
Step 6. We will now add the Desktop and Microphone audio to the OBS screen. Click Settings at the bottom right corner, and navigate to Audio.
Under Global Audio Devices, select Desktop Audio and Mic/Auxiliary Audio using the drop-down. Click Apply, and you can see the details in the Audio Mixer.
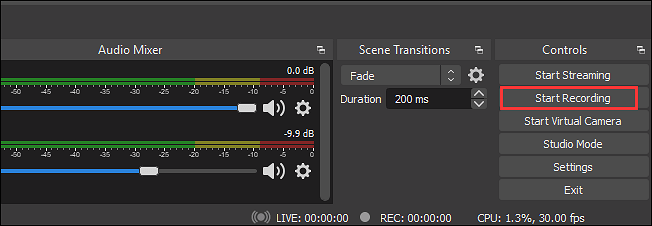
Step 7. Once the basic setup is ready, click on Start Recording to capture Minecraft gameplay with OBS.
The basic setup is ready; now what? The next section will see the best OBS settings for recording Minecraft. You can configure everything from bitrate, FPS, codecs, and more to record professional-grade videos to share your gameplay online.
Share the post on your social media platforms.
Best OBS Settings for Recording Minecraft
The best OBS settings are the right balance of audio, video and output settings. If you are using low settings, it results in bad videos, and high settings result in large videos taking up a vast space or being difficult to share or upload. In this section, we will see standard quality settings to generate high-quality videos on any computer.
👉Video Settings:
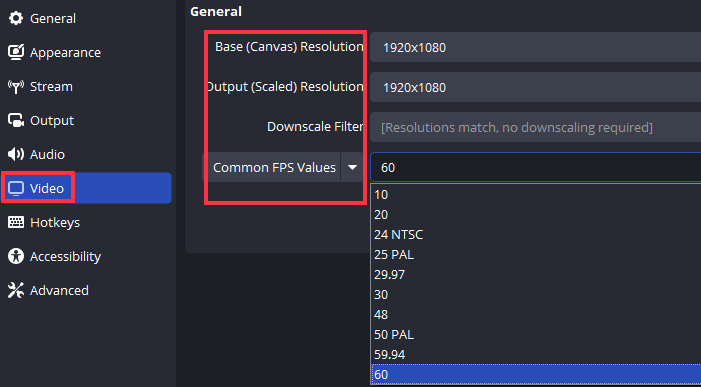
Go to Settings > Video. Here, you can set:
- Base(Canvas) Resolution: The resolution at which the OBS will capture your computer screen. Click on the drop-down and set it to 1920x1080.
- Output(Scaled) Resolution: This is the final resolution of the recording you wish to have. Set it to 1920x1080 so there is no loss of quality.
- Common FPS Values: The frames per second the video will capture. The ideal setting for modern-day computers is 60FPS. If you have high-end processors, you can go up to 90.
👉Audio Settings:
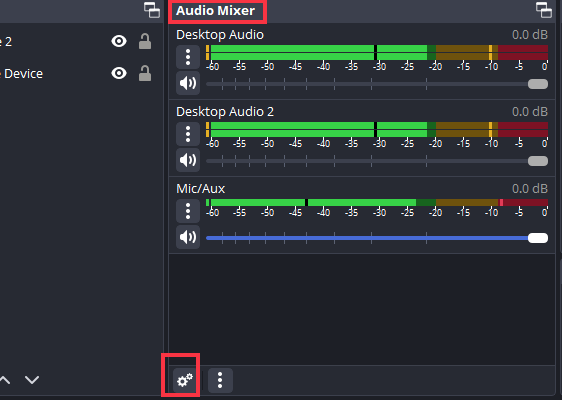
Since we have already added our audio sources, we can make changes using Audio Mixer. Click on the gear icon.
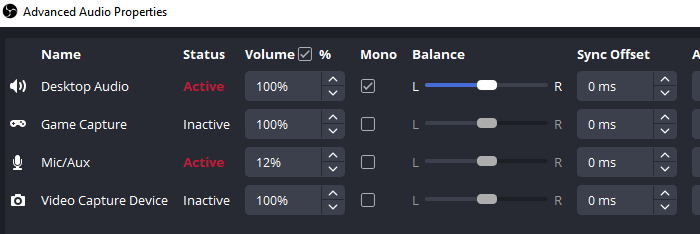
Please check Track 1 for Desktop audio and Track 2 for Mic/aux audio. We are separating the audio for ease of editing.
👉Webcam Settings- Video Capture Device
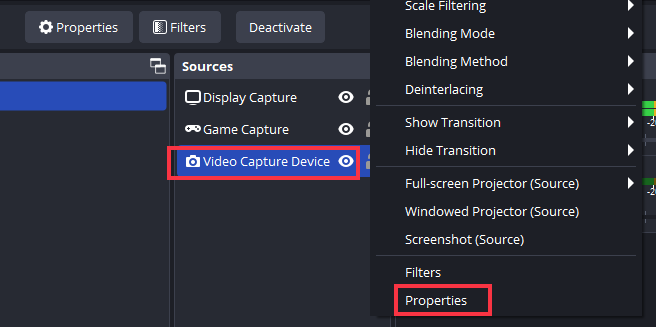
Right-click on the Webcam (Video Capture Device) and select Properties. Select the Capture device (webcam or computer camera). You can also configure Resolution, FPS, and video format. Now, you can record screen and webcam at the same time.
👉Advanced Recording Settings
Switch to the Output section. Initially, the Output mode is set to Simple.
Under streaming, you can see the Audio and Video Bitrate. By default, they are set to low definition. To get standard output quality, change the Video Bitrate to 800 Kbps and the Audio Bitrate to 128 or more. The higher the bitrate, the crisper the sound gets. You can try in the range of 192 to 320 Kbps.
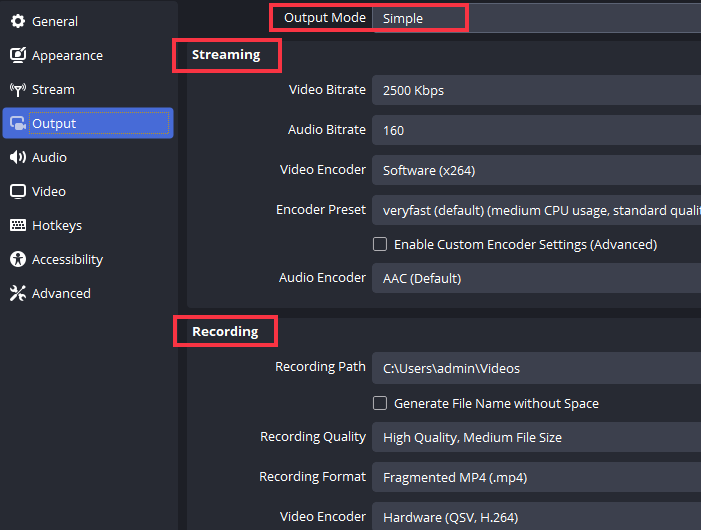
Change it to Advanced and click on Recording.
- Recording Format: The default format is MP4, but you can also use MKV and other formats. If OBS crashes, you won't lose the video.
- Audio Track: Make sure to keep two tracks, each for Desktop and microphone audio. This helps in editing the audio separately.
- Encoder: You can switch to a dedicated graphics card with encoders, but the default CPU (x264) encoders also work.
- Rescale Output: 1920x1080.

👉Hotkeys Settings
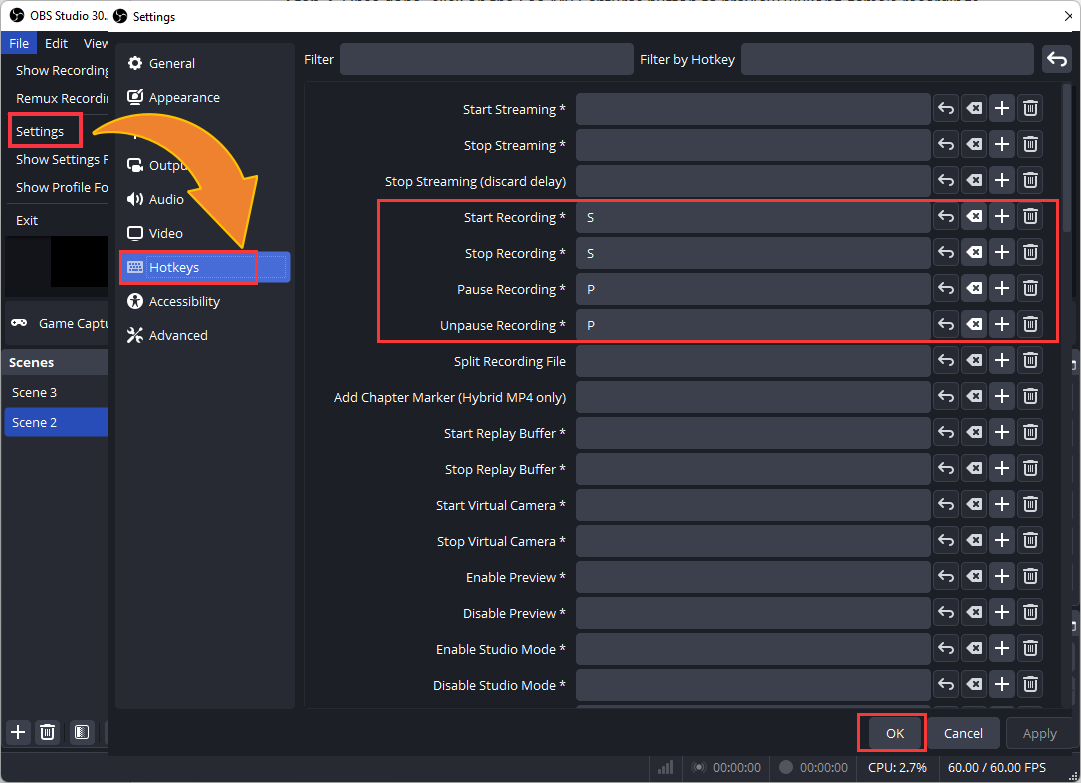
Go to the Hotkeys tab. OBS offers different scenes for setting keys. Click on "+" and add hotkey shortcuts.
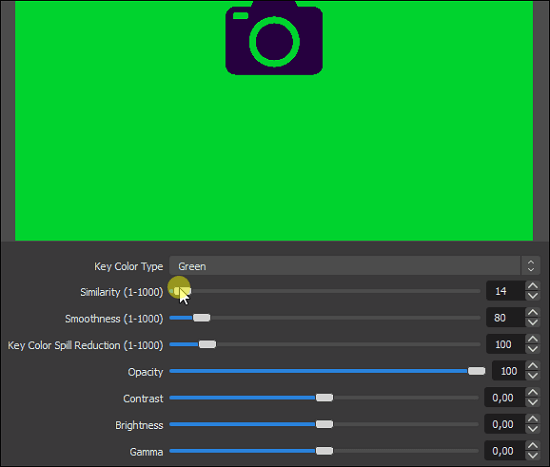
If you also want to learn how to set up green screen in OBS, you can read the post below:
How to Set Up Green Screen in OBS?
In three tasks, you can set up the green screen for streaming. Also, you can learn how to record a green screen webcam in this post.
Better Minecraft Settings for Recording
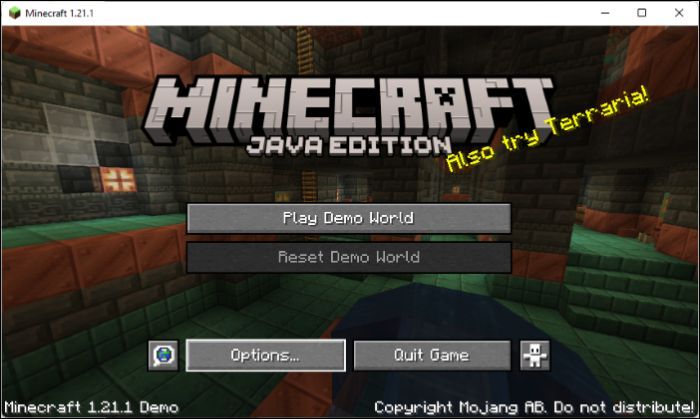
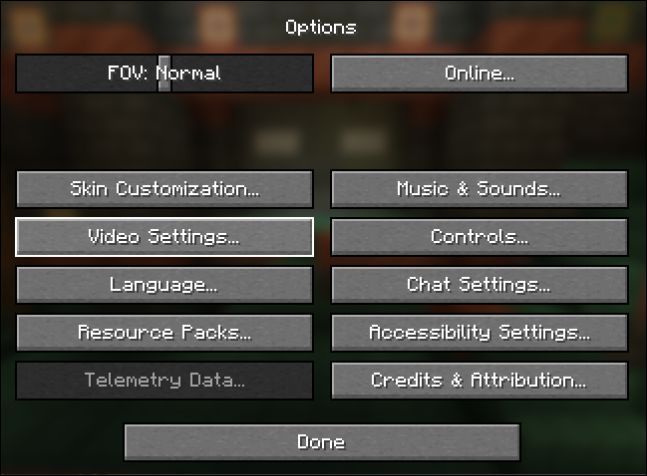
Now, let us adjust Minecraft Video Settings to match your PC specs. Open Minecraft and click on Options > Video Settings.
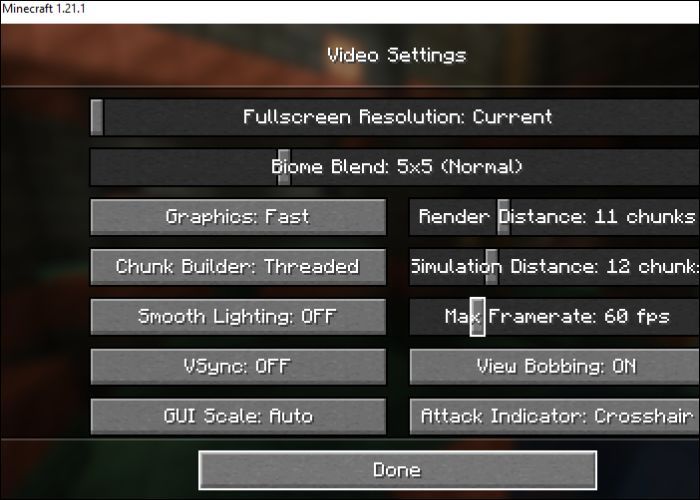
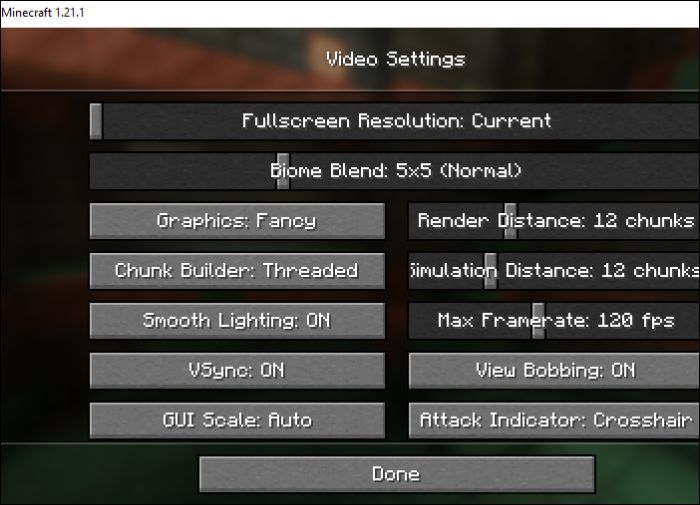
In Video Settings, you can tweak many settings based on your preferences. The ideal settings depend on your PC specs, and you must adjust them accordingly.
- Graphics: You have Fast, Fancy, and Fabulous. For low-end PCs, you can go with Fast; for better PCs, Fancy or Fabulous will render better graphics.
- Render Distance: Render distance decides how far you can see in the game.
- Simulation Distance: This feature controls how far the game actively simulates the game elements. For example, the mob movements, planet growth, redstone functioning, etc.
- Smooth Lightning: Smooth lighting adjusts the quality of shadows and lighting conditions in the game.
- Max Framerate: Decides how fast the game should render the frames per second.
- VSync: VSync decides how well the game's framerate syncs with the monitor's refresh rate.
Here are the best Minecraft settings based on the PCs.
Low-end PCs:
High-end PCs:
Share the post on your social media platforms.
OBS Alternative to Record Minecraft Without Lag
The OBS studio is hard to configure and use for beginners and non-tech-savvy people. If you want to record Minecraft Java on your Windows/Mac, the easiest way is EaseUS RecExperts. RecExperts is a professional screen recorder. The Game recording mode on this screen recorder is designed to capture high-quality gameplay videos with ease.
The Game mode comes with webcam overlays, audio, and video customizations like framerate and FPS to record Minecraft with excellent quality. You can schedule recordings using start and end times, and configure hotkeys to start various features. The built-in editor helps you trim unnecessary parts and external noise.
Additionally, you can adjust the screen size, capture multiple screens, export video in multiple formats, and extract audio. Download RecExperts now, and open Game mode to record Minecraft games in high resolution.
Record Minecraft Gameplay with EaseUS RecExperts:
Step 1. Download and open EaseUS RecExperts on your Windows or Mac.
Step 2. Go to Game Mode, and click Settings (nut icon) to customize your preferences.
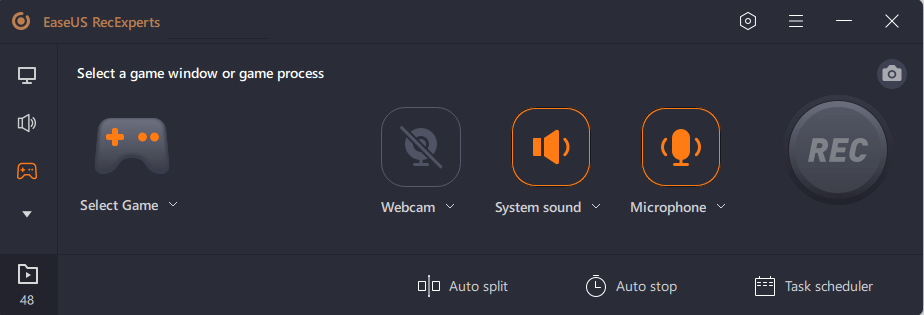
Step 3. Click Video and adjust the format, FPS, quality, etc. Also, the audio sections give options to choose the format, bitrate, etc.
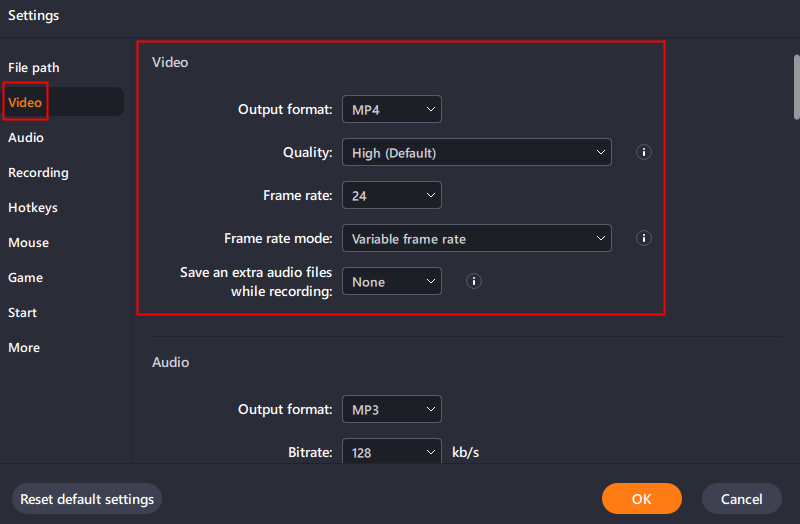
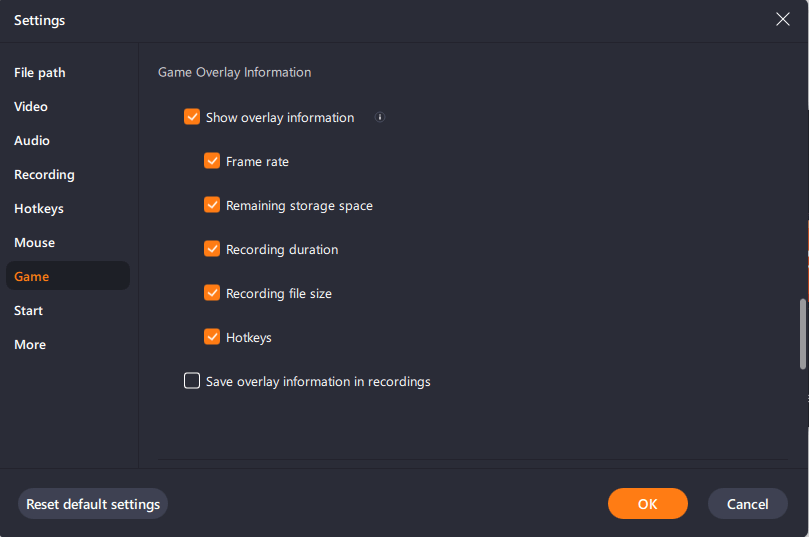
Additionally, you can set up hotkeys, game settings, mouse movements, and more.
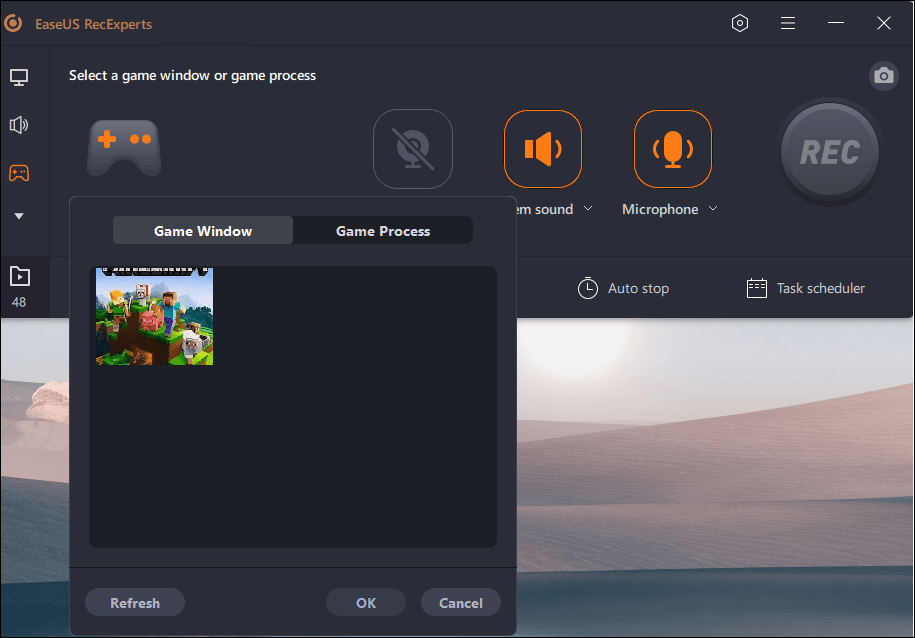
Step 4. Launch Minecraft in the background and click on Select Game to add it to the recording screen. Once, you set up the recording parameters, click REC to begin recording.
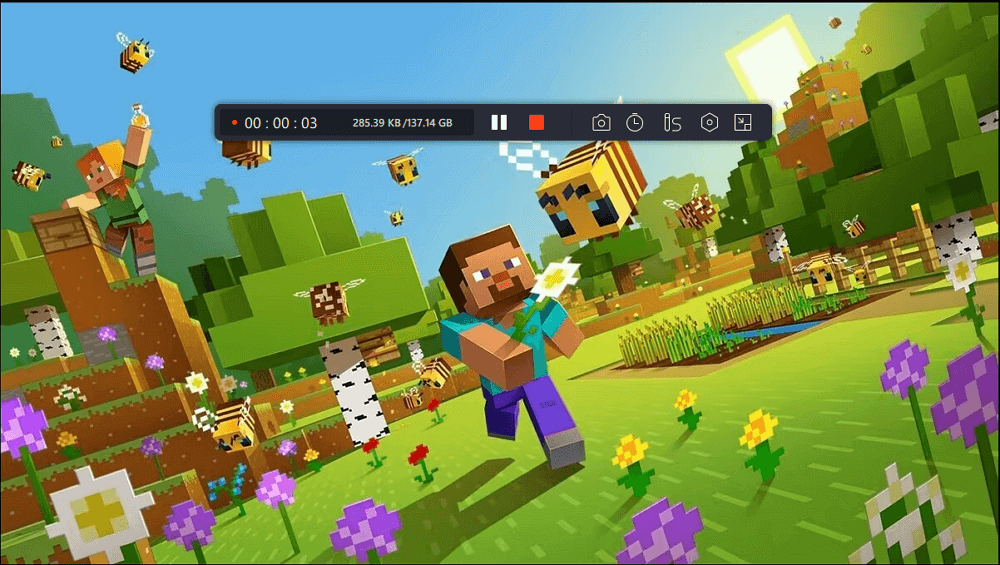
Step 5. The Control widget helps you manage the recording. You can take screenshots, schedule the end time, or even hide it. Don't worry the widget will be invisible in your recordings.
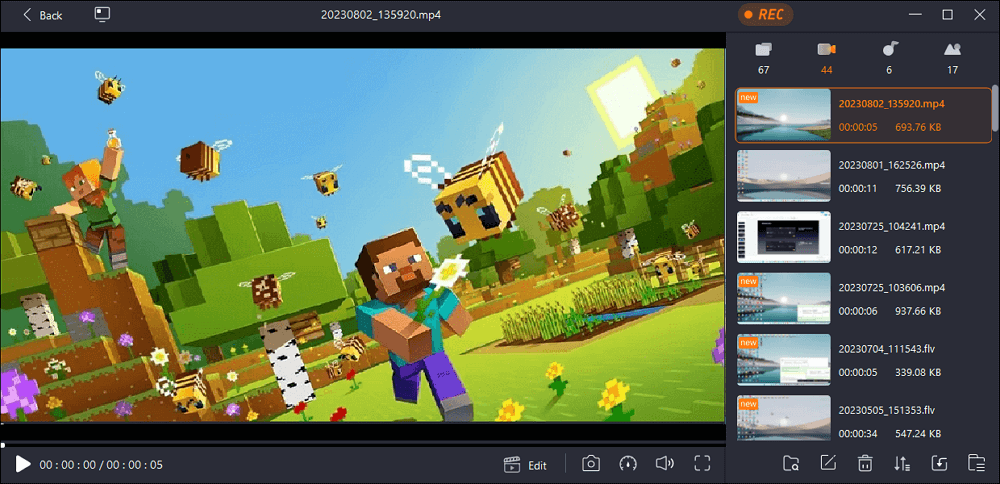
Step 6. Once done, end the recording and your Minecraft videos will be saved in the Recordings tab. Here, you can edit, trim, preview, remove noise, and export the videos to YouTube and media platforms.
Share the post on your social media platforms.
To Wrap Things Up
The gaming industry thrives on immersive gameplay videos. How you record your videos and present them adds a lot of value to your gaming content. So, If you are into Minecraft and wondering how to record Minecraft with OBS, this is the best article. We discuss how to configure the basic setup, the best settings, and everything you need to know about recording Minecraft with OBS.
If you are a beginner or want a simpler OBS alternative, EaseUS RecExperts is ideal for gameplay recording. With a dedicated mode, you have multiple screen sizes, and custom video and audio parameters to capture Minecraft videos in 4K/8K.
How to Record Minecraft With OBS Without Lag FAQs
Here are some frequently asked questions about how to record Minecraft with OBS without lag.
1. How to fix OBS black screen in Minecraft?
To fix OBS black screen in Minecraft, do:
1. Turn off Antivirus programs on the computer.
2. Disable 3D Display mode.
3. Run the game with compatibility mode.
4. Update the Graphics Card Driver
2. How to record Minecraft Gameplay?
To record Minecraft Gameplay, you need third-party software like OBS and EaseUS RecExperts. The professional way is to utilize the OBS studio to capture the game. But, if the setup and UI of OBS feel complex, EaseUS RecExperts is the best OBS alternative to capture Minecraft games.
3. How to stream Minecraft on OBS?
First, configure the OBS setup to add Minecraft, Video Capture Device, Audio, and Game Capture to a Scene. Navigate to Settings > Stream, and copy the Stream key of your preferred platform (YouTube, Twitch, etc). You can now use the stream key to stream Minecraft on OBS.
EaseUS RecExperts

One-click to capture anything on screen!
No Time Limit, No watermark
Start Recording