-
![]()
Daisy
Daisy is the Senior editor of the writing team for EaseUS. She has been working in EaseUS for over ten years, starting from a technical writer to a team leader of the content group. As a professional author for over 10 years, she writes a lot to help people overcome their tech troubles.…Read full bio -
Jane is an experienced editor for EaseUS focused on tech blog writing. Familiar with all kinds of video editing and screen recording software on the market, she specializes in composing posts about recording and editing videos. All the topics she chooses …Read full bio
-
![]()
Alin
Alin is an experienced technical blog writing editor. She knows the information about screen recording software on the market, and is also familiar with data cloning and data backup software. She is expert in writing posts about these products, aiming at providing users with effective solutions.…Read full bio -
Jean is recognized as one of the most professional writers in EaseUS. She has kept improving her writing skills over the past 10 years and helped millions of her readers solve their tech problems on PC, Mac, and iOS devices.…Read full bio
-
![]()
Jerry
Jerry is a fan of science and technology, aiming to make readers' tech life easy and enjoyable. He loves exploring new technologies and writing technical how-to tips. All the topics he chooses aim to offer users more instructive information.…Read full bio -
![]()
Rel
Rel has always maintained a strong curiosity about the computer field and is committed to the research of the most efficient and practical computer problem solutions.…Read full bio -
![]()
Gemma
Gemma is member of EaseUS team and has been committed to creating valuable content in fields about file recovery, partition management, and data backup etc. for many years. She loves to help users solve various types of computer related issues.…Read full bio -
![]()
Shelly
"I hope my articles can help solve your technical problems. If you are interested in other articles, you can check the articles at the bottom of this page. Similarly, you can also check my Twitter to get additional help."…Read full bio
Page Table of Contents
0 Views |
0 min read
Roblox, one of the online gaming platforms around the world, immerses gamers in the game world with unlimited creativity and rich and varied game worlds. With this, the demand for recording Roblox games has also been rising. Recording Roblox isn't only about preserving those unforgettable moments, it also allows you to create tutorials, show off your gaming skills, or share the highlights with your friends.
Do you know how to record Roblox on Macbook Pro, Macbook Air, or other Mac devices? Don't worry. This article will show you how to record Roblox on Mac easily with powerful game recorders and share some tips for recording Roblox gameplay in HD.
How to Record on Roblox on Mac with Built-in Recorder
Can you use Roblox's built-in recording feature on a Mac? The answer is: Yes!
In a recent update, Roblox removed the restriction that the native recording feature could not be used on macOS. Mac users can capture videos on Roblox with this built-in function easily. Please note that Roblox Captures is a basic feature, only allowing you to record gameplay clips up to 30 seconds long. It cannot capture in-experience sounds or voice chat.
Here are the steps on how to record Roblox on Mac with the built-in Roblox recorder:
Step 1. Enter the game where you want to record video, then click the three horizontal lines icon in the top left corner.
Step 2. Click "Captures," and you'll see the Screenshot and Video Capture icons on the right side of the screen. Click the video capture icon to start recording.
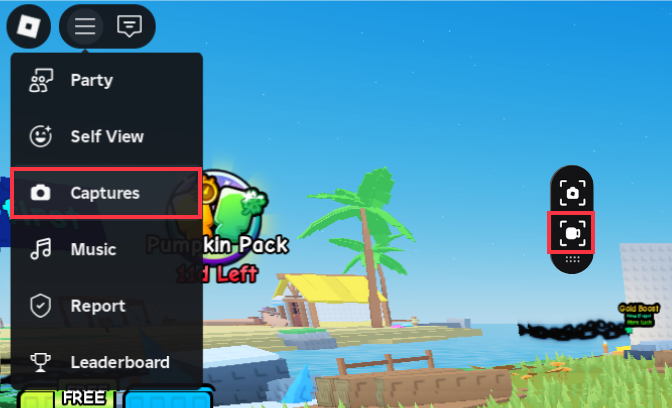
Step 3. To stop, click the icon again.
Step 4. You can also click the Roblox logo in the top left corner, select Captures, and then click the Captures option to preview and download your recordings.
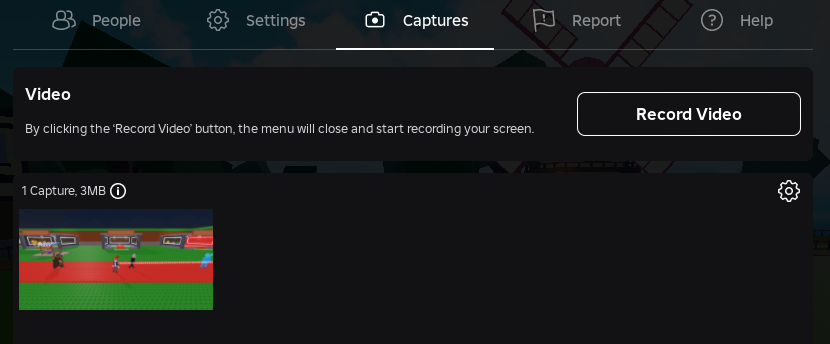
I sometimes encountered a problem when using Roblox Captures: it couldn't record video and displayed the message "Device does not support video recording".

I tried updating the Roblox application, but the problem sometimes persists. When Roblox Captures not working, I usually use third-party recording software such as OBS and EaseUS RecExperts for game capture.
Share this great guide on how to record in Roblox on Mac to your social media accounts.
How to Screen Record Roblox on Mac with Sound via EaseUS Recorder
The third-party screen recording utilities are better choices for recording on Mac, as Roblox's built-in recording feature is limited to Mac. EaseUS RecExperts can help you record Roblox on a MacBook Air, MacBook Pro, or other Mac device. This Mac screen recorder allows you to effortlessly capture any Roblox adventure with audio and webcam at the same time. The best screen recorder for Roblox also allows you to record long-term games without a time limit, watermark, or lag. You can also screen record on Mac with internal audio and voice chat.
Features:
- Automatically screen record on Roblox on Mac with its scheduled recording feature
- Capture gameplay in high FPS like 60fps, 120fps
- Edit videos with its built-in trimming feature
- Supports multiple games such as Steam Games and Minecraft.
Here is the tutorial for recording on Roblox on Mac:
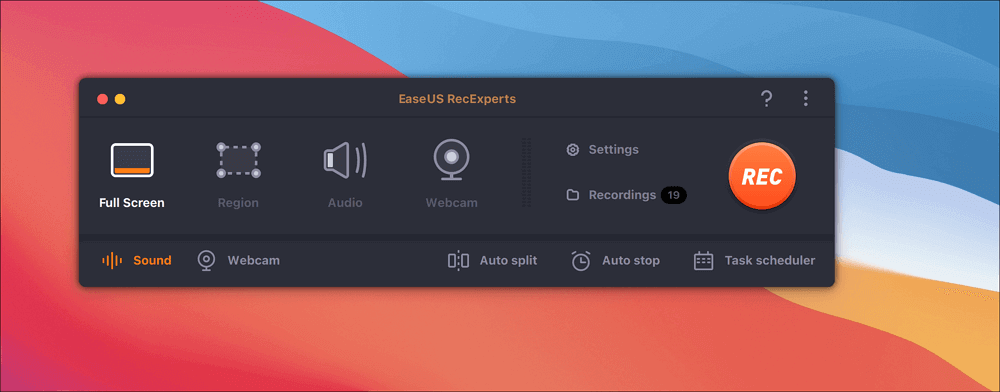
Step 1. Download and launch EaseUS RecExperts on your Mac. To capture the whole screen, click on the Full Screen button from the main interface. If you want to customize the recording area, choose the Region button.
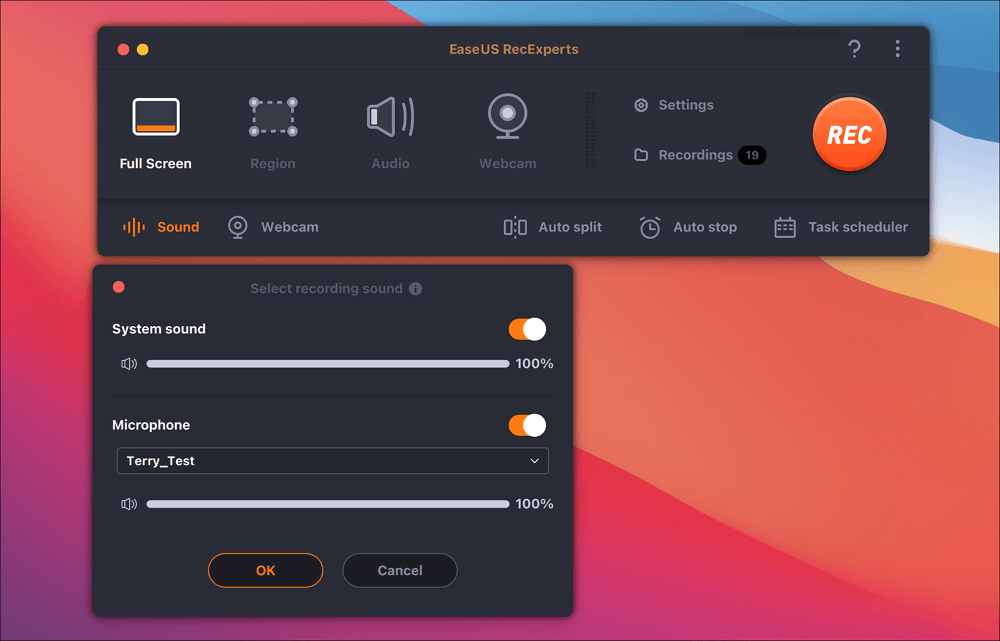
Step 2. To record Roblox with audio, hit the Sound icon from the bottom left side of the toolbar. The audio resources can be your external sound or system audio. Based on your needs, enable the target option.
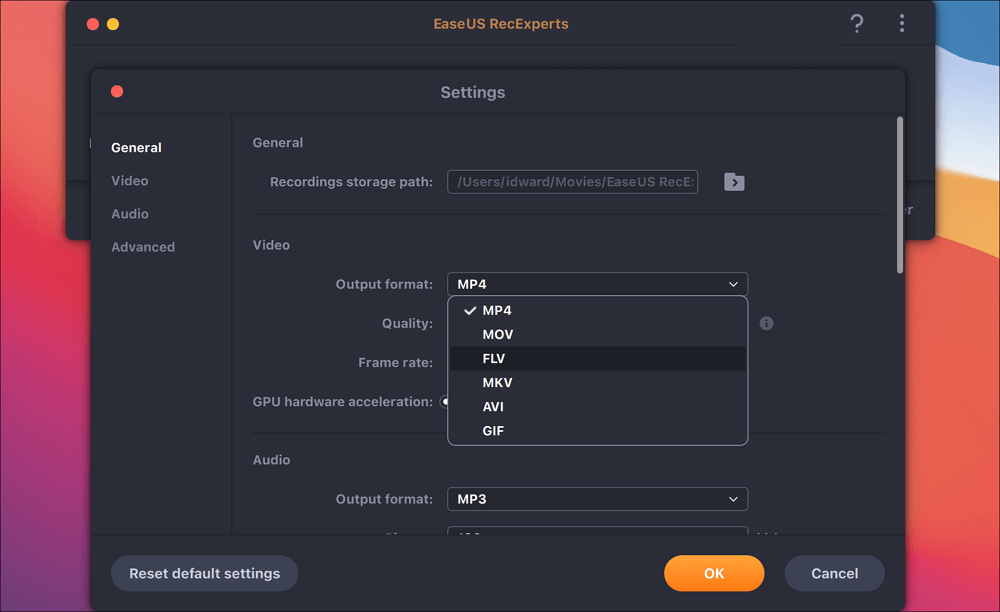
Step 3. Before capturing, you can change the output format of the recorded video by clicking Settings from the main interface. Then, scroll down the menu of Output format for Video. Choose the output type as you like.
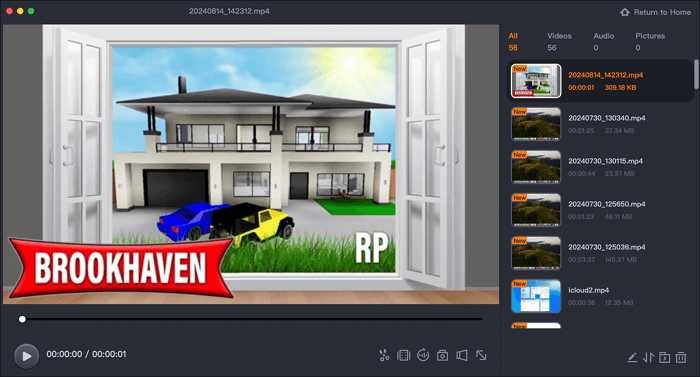
Step 4. Once done, click the REC button to begin recording. It captures anything displayed on your Mac screen. When you are done, click the Stop button. Then, you can watch the recorded video from Recordings.
Share this great guide on how to record in Roblox on Mac to your social media accounts.
If you are looking for free ways to record Roblox on Mac, you can use the macOS built-in recording function or choose OBS Studio. Below are detailed tutorials.
How to Screen Record on Roblox via Mac QuickTime Player
Using the QuickTime Player that comes with your Mac, you can easily and efficiently record Roblox screens without downloading or paying an additional third-party recording program. Its user interface is intuitive, so even first-time users can start recording quickly. You can use the built-in microphone to capture the Roblox game with sounds or your own game commentary.
Recorded videos are automatically saved to your desktop or a designated folder for further editing and sharing. However, QuickTime Player is only suitable for some basic screen recording tasks. Those who need more advanced features or customization options may need to consider using other professional screen recording software, such as EaseUS RecExperts and OBS Studio.
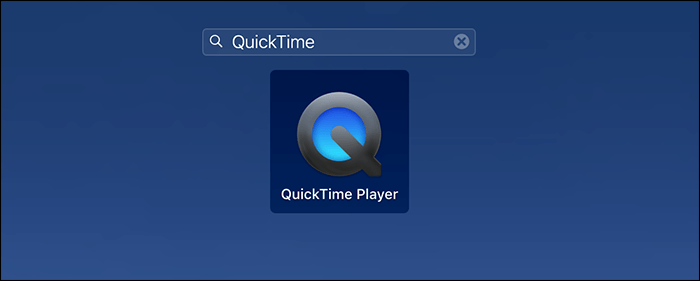
Step 1. Launch QuickTime Player on your Mac.
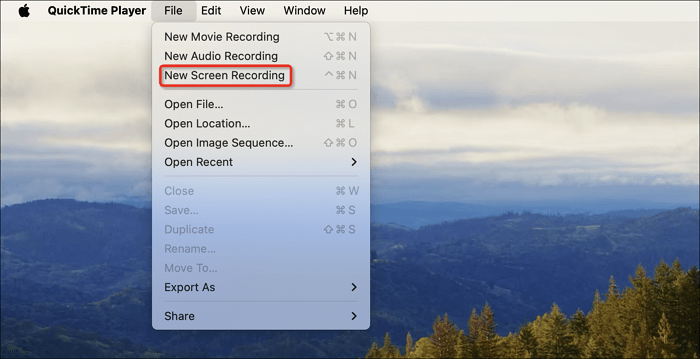
Step 2. Click the File menu and choose New Screen Recording.
Step 3. Press Shift+Command+5 to view its toolbar. Click on the Record button to start recording Roblox.

Step 4. Click the Stop button or press Command+Control+Esc to stop the recording.
Share this great guide on how to record in Roblox on Mac to your social media accounts.
How to Record Roblox Gameplay on Mac with OBS Studio
OBS Studio is an open-source screen recorder that is compatible with Mac, Windows, and Linux. With it, you can capture Roblox gameplay in HD and various formats like MP4 and MOV. The Roblox screen recorder for Mac also supports direct live broadcasts to multiple platforms, such as YouTube, Twitch, and TikTok.
Although it is one of the best free game recording software, its interface and settings are relatively complicated need to take a certain amount of time to learn how to use the OBS screen recorder. Here are the steps to capture Roblox on Mac with OBS Studio:
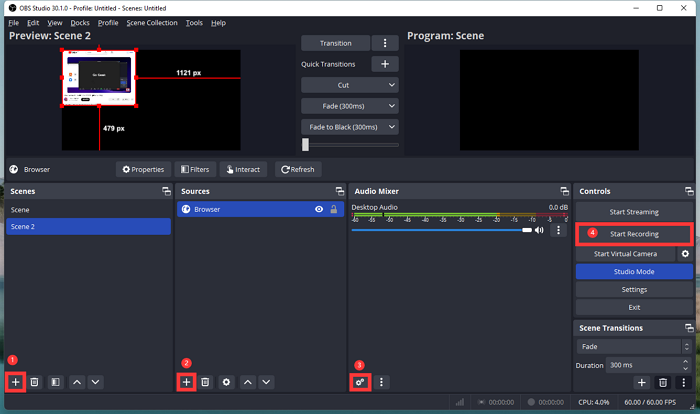
Step 1. Press the + icon to add a scene in the Scenes option.
Step 2. In the Sources option, press the + icon and choose Game Capture. In the pop-up interface, check the required properties. Then click on the OK button.
Step 3. In Audio Mixer, you can set up audio parameters to capture high-quality audio.
Step 4. Press the Start Recording button in the Controls option to begin the recording task.
Tips for Recording Roblox on a Mac
The above shows some of the best Roblox screen recorders for capturing high-quality game screens. If you want to record high-definition game videos with no lag or stuttering, the following suggestions cannot be ignored.
- 1️⃣Choose the proper resolution and frame rate: We recommend using 1080p or 4K resolution to ensure the clarity of the picture, and 60fps frame rate to capture the smooth game action.
- 2️⃣Set audio and camera parameters: Set the system sound, microphone, and camera parameters to ensure that you capture high-quality audio and character images.
- 3️⃣Keep your device fully charged: It's better for you to ensure that the device has sufficient power or keep it charged.
- 4️⃣Sufficient storage space: You must ensure you have enough space when recording long gameplay, which requires a lot of space.
- 5️⃣System performance: Roblox installs on 10.13 (High Sierra) and higher operating systems on Mac.
- 6️⃣Network requirements: A minimum 4-8 Mbps network connection is recommended.
Share this great guide on how to record in Roblox on Mac to your social media accounts.
Conclusion
With the above solutions, you can easily and efficiently record Roblox on a Mac for personal entertainment or sharing with others. Using a professional third-party recording program like EaseUS RecExperts can help you capture Roblox screens in high-definition and lossless mode. It can also perform advanced custom settings and editing, allowing you to output perfect recording content. It is highly recommended. Try these practical solutions now and start your recording plan.
FAQs about Recording Roblox on Mac
1. How do you screenshot on Roblox Mac?
To take screenshots on a Mac, you can enable its Captures feature and click the camera icon. Or you can use Mac's keyboard combinations. Press command-shift-3 to capture the full screen, and press command-shift-4 to select a part of the screen.
2. How do I record my Roblox gameplay?
Windows users can use the built-in recording feature to record gameplay on Roblox. Click on the menu icon in the upper left corner of the game screen and press on Captures. Click on the Record Video button to start recording. Once you've finished, you can click the Roblox icon and go to the Captures tab to view your recordings.
For Mac users, using QuickTime Player or choosing a professional game recording app like EaseUS RecExperts is a better choice.
3. How do I allow Roblox to use my microphone on Mac?
For Mac users, go to the system's privacy settings, find the microphone option, and ensure that Roblox has permission to use it.
4. How to record Roblox on Mac with audio?
Roblox Captures feature cannot record audio from voice chat or other in-experience sounds. Thus, to record Roblox on Mac with audio, you can use a professional game recorder like EaseUS RecExperts. This EaseUS recorder can capture both game sounds and chat voice, including system audio and mic. You don't need to install extra virtual audio driver. It makes it easy to record audio on Mac.
The information above was updated on November 10, 2025:
1. Updated key information regarding the Roblox Captures feature.
2. Updated product descriptions for different solutions.
EaseUS RecExperts

One-click to capture anything on screen!
No Time Limit, No watermark
Start Recording
