-
![]()
Daisy
Daisy is the Senior editor of the writing team for EaseUS. She has been working in EaseUS for over ten years, starting from a technical writer to a team leader of the content group. As a professional author for over 10 years, she writes a lot to help people overcome their tech troubles.…Read full bio -
Jane is an experienced editor for EaseUS focused on tech blog writing. Familiar with all kinds of video editing and screen recording software on the market, she specializes in composing posts about recording and editing videos. All the topics she chooses …Read full bio
-
![]()
Alin
Alin is an experienced technical blog writing editor. She knows the information about screen recording software on the market, and is also familiar with data cloning and data backup software. She is expert in writing posts about these products, aiming at providing users with effective solutions.…Read full bio -
Jean is recognized as one of the most professional writers in EaseUS. She has kept improving her writing skills over the past 10 years and helped millions of her readers solve their tech problems on PC, Mac, and iOS devices.…Read full bio
-
![]()
Jerry
Jerry is a fan of science and technology, aiming to make readers' tech life easy and enjoyable. He loves exploring new technologies and writing technical how-to tips. All the topics he chooses aim to offer users more instructive information.…Read full bio -
![]()
Rel
Rel has always maintained a strong curiosity about the computer field and is committed to the research of the most efficient and practical computer problem solutions.…Read full bio -
![]()
Gemma
Gemma is member of EaseUS team and has been committed to creating valuable content in fields about file recovery, partition management, and data backup etc. for many years. She loves to help users solve various types of computer related issues.…Read full bio -
![]()
Shelly
"I hope my articles can help solve your technical problems. If you are interested in other articles, you can check the articles at the bottom of this page. Similarly, you can also check my Twitter to get additional help."…Read full bio
Page Table of Contents
0 Views |
0 min read
Want to record streaming TV shows or gameplay from your TV onto your laptop? Whether you're using a Smart TV, console, or set-top box, this guide will show you how to capture TV screen on laptop using real, working methods in 2025, no tech skills required.
Is there a way to cast my TV screen to a windows PC? --- From Reddit
How to Record TV Screen with HDMI Capture Card
✅Best for: Smart TV users, gamers, or anyone who wants to capture high-quality TV output directly onto a laptop via HDMI
If you're using a Smart TV (e.g., to record Samsung TV), a set-top box, or even a gaming console like PS5 or Xbox, using an HDMI capture card is the most reliable way to record the screen. This hardware device acts as a bridge between your TV and your laptop, allowing the laptop to record real-time footage via HDMI connection.
Unlike older TV tuners that require analog signals or coaxial inputs, HDMI capture cards support digital output, ensuring better video quality, frame rate, and audio sync.
🛠️What You'll Need:
- A laptop with USB or USB-C port
- An HDMI capture card (e.g., Elgato, AVerMedia, or budget options)
- An HDMI cable
- A TV or console with an HDMI OUT port
- Screen recording software like EaseUS RecExperts
🚩How to record TV screen with an HDMI capture card:
Part 1. Connect Your TV or Console to Laptop
Step 1. Plug the HDMI cable from your TV/console into the HDMI IN port on the capture card.
Step 2. Plug the capture card's USB cable into your laptop.
Step 3. Open your screen recorder to view the live feed.
Part 2. Record TV Screen on Your Laptop or PC Using with EaseUS RecExperts
Once connected, open EaseUS RecExperts and select the external HDMI input as the recording source. Choose full screen or a specific region, and turn on audio as needed.
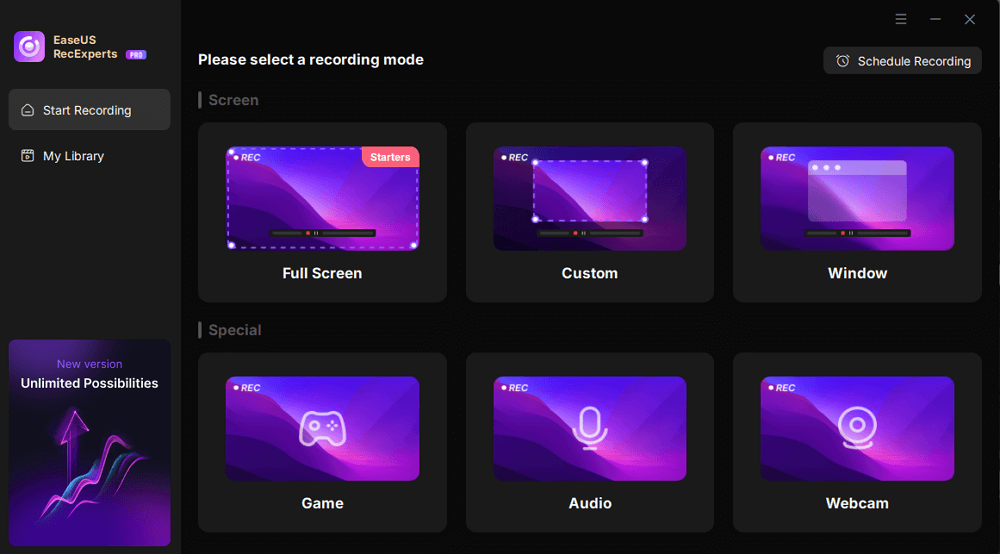
Step 1. Launch EaseUS RecExperts. Choose a recording mode such as Full Screen, Custom, or Window. For a smoother recording experience, we recommend selecting Full Screen, especially when capturing streaming videos, webinars, or content from platforms like YouTube, Netflix, or Zoom.
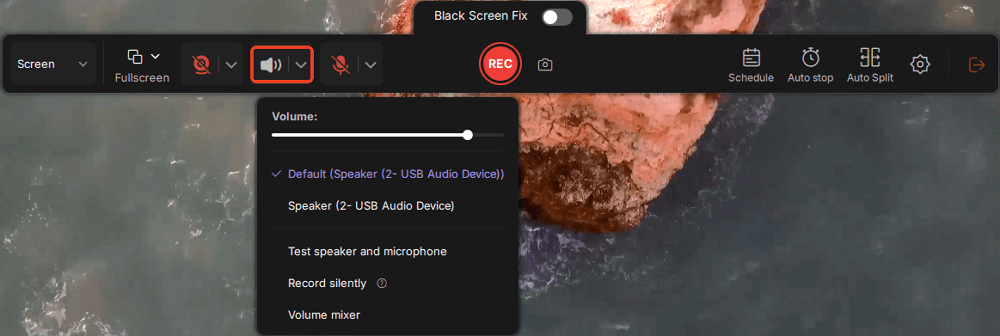
Step 2. Most videos include audio, so make sure to enable the system sound. Click the Speaker icon to turn on system audio, and use the small arrow beside it to select your preferred playback device. If you want to record without background distractions, enable the Record silently option - this will mute system output during recording, but still capture the internal audio of the video.
Step 3. Once everything is set, press the red REC button to begin recording. During the process, click the white Pause button if you need to take a break, or the red Stop button to finish and save your recording.
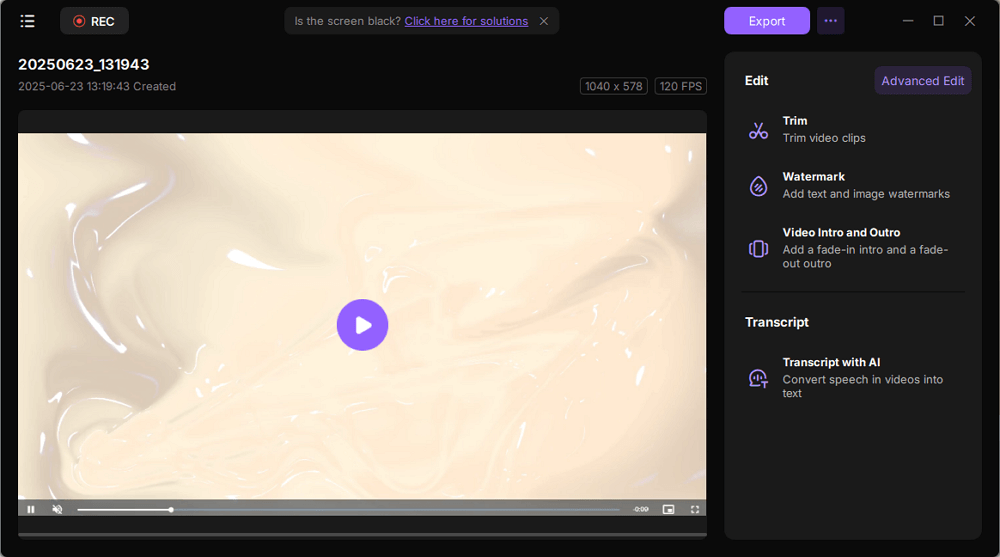
Step 4. After recording, you'll be taken to the preview window, where you can watch, split, delete, and organize your recordings. This is especially helpful when you're capturing long-form online meetings, streamed movies, or video tutorials, as it allows you to quickly edit and manage key moments.
- Editor's Tip
- If you see a black screen when recording content from streaming platforms, try EaseUS RecExperts' Black Screen Fix feature to resolve the issue. However, always respect copyright laws and the privacy rights of others when recording protected content.
Share this post if you find it helpful!
How to Capture TV Screen on Laptop with TV Tuner
✅Best for: Users with cable TV, analog signal sources, or older TVs without HDMI output
If your TV setup relies on cable TV, antenna, or analog signals, an external TV tuner is still a viable solution to record TV shows from antenna on your laptop. TV tuners convert television signals into digital output that can be recorded using screen recording software like EaseUS RecExperts.
Though not as common as HDMI capture cards today, tuners remain useful for specific users, especially those using Windows Vista/7/8 laptops or watching live TV via coaxial cables.
🛠️What You'll Need:
- A laptop with a USB port
- An external TV tuner (USB TV tuner or stick)
- Coaxial or AV cable from your signal source (antenna or cable box)
- Screen recording software like EaseUS RecExperts
🚩How to record TV screen with a TV tuner:
Part 1. Connect TV Signal to Your Laptop
Step 1. Connect the coaxial or AV cable from your signal source to the TV tuner's input port.
Step 2. Plug the TV tuner's USB output into your laptop.
Step 3. Most tuners come with software that scans and detects available channels. Complete this scan before recording.

Part 2. Record Your TV Screen on Laptop with EaseUS RecExperts
Once the live signal is displayed on your laptop, you can use EaseUS RecExperts to record the content just like you would with any other screen input.
- Editor's Tip
- TV tuners can sometimes show outdated resolutions or choppy feeds. Make sure to record in full screen mode and use EaseUS RecExperts' output settings to upscale resolution. Also, always double check if the content you're recording is permitted for personal use.
Share this post if you find it helpful!
How to Record TV Shows on Laptop in Windows Vista/XP [Legacy]
✅Best for: Users with older laptops still running Windows Vista or XP, using analog TV input sources
If you're using an old laptop with Windows Vista or XP, you may still be able to record TV content directly without third-party software - thanks to the now-discontinued Windows Media Center (WMC). While support has ended, many legacy systems still include this feature, which was designed to turn PCs into home entertainment centers.
This method works best with a TV tuner and a valid analog signal source (like cable or antenna). Although it's no longer supported on modern systems, it's a simple, offline solution for legacy device users.
🛠️What You'll Need:
- A Windows Vista/XP laptop with Windows Media Center installed
- A compatible external TV tuner (USB interface preferred)
- Signal source (antenna or coaxial from set-top box)
To check if you own a Windows Media Center on your computer, you need to click the "Type here to research" button on the down-left corner and enter the "Windows Media Center" in the search box. If the program pops up, you can use it to record a TV screen directly. If it doesn't, you need to download it from the Microsoft APP store and install it on your device.

🚩How to Record TV Shows with Windows Media Center:
Follow this guide, and you will be capable of recording the TV screen freely.
Step 1. Connect the external TV tuner to the computer by plugging the USB cable from the tuner into an available USB port on the PC.
Step 2. Attach the cable from the signal source to the external TV tuner.
Step 3. Program the available channels into the tuner by pressing the "Auto-Tune" or "Scan" button.
Step 4. Open the video recording software on the computer on your computer, in this case, Windows Media Center.
Step 5. Set the tuner to the desired channel for recording, using the tuner's control buttons or the remote control that typically comes with most external TV tuners.
Step 6. Click the "Record" button on the video recording software to begin capturing the show. Click "Stop" when you want to finish the recording.
Step 7. Click the "File" tab and click the "Save" button to store the show on your computer.
Share this post if you find it helpful!
Alternative TV Screen Recorder on Laptop
People who have some specific demands always want more options. Therefore, we also offer you some other screen recorders that can enable you to record your TV screen on a laptop. You may also improve your recordings by adding effects or cutting out unnecessary parts.
1. OBS Studio
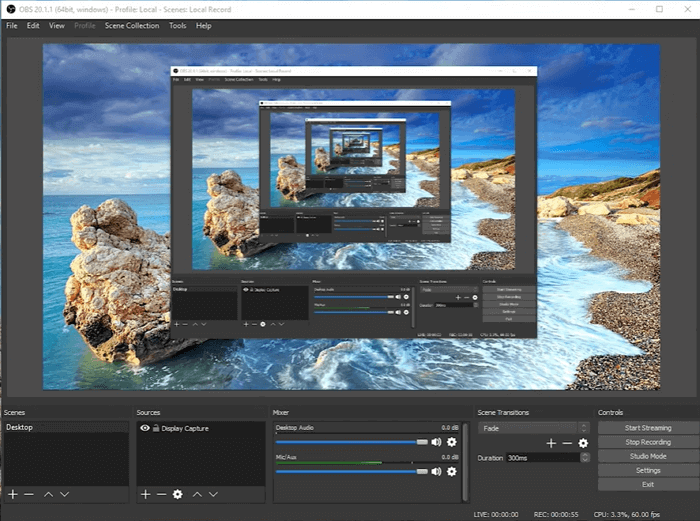
OBS or Open Broadcaster Software is a free open source screen recorder that offers recording and streaming in high definition, with no limits on your videos' length. Customizable hotkeys help control the recording, and an audio mixer allows you to produce videos with smoothly recorded sound.
OBS is also equipped with live-streaming capabilities that you won't find in major operating systems' default screen recorders. You can stream live on YouTube Gaming and Twitch, save projects, and convert your footage in FLV format.
Pros:
- Add video and audio from different sources
- Converts recorded files into a different format easily
- Add filters to your recordings
Cons:
- It has an overwhelming layout
- Sometimes the program continues to screen record even when it has been stopped
2. Camtasia
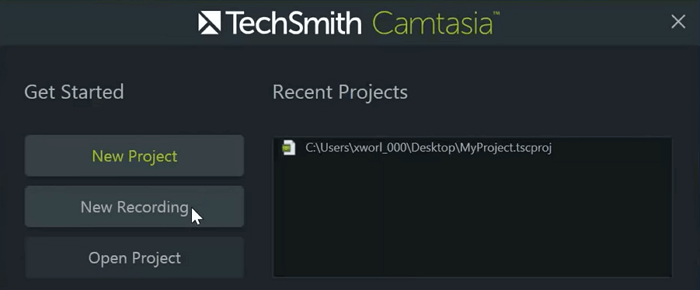
Camtasia is a robust screen recorder with an inbuilt video editor for both Windows and Mac. This tool can help you make a creative and neat video easily. It enables you to record your system screen and also an external web camera for live streaming videos. Besides, you can edit the recorded videos with the built-in video editor.
However, you will be required to pay a high amount of money before you can use its unique feature. Still, Camtasia is considered to be one of the best video recorders you find on our list. You may start with a template or record your screen and add a few effects.
Pros:
- It has many file-sharing options
- It can provide you a high-quality recorded video
- You can add music, sound, and markup to recorded videos
Cons:
- The pro version is too expensive
- The complex interface makes it difficult for beginners to operate it
Share this post if you find it helpful!
Bonus Tips: How to Record Your TV Screen with Your Phone
✅Best for: Quick mobile recordings of TV content or capturing moments when you don't have access to a laptop or capture card
Nowadays, many people want to record TV shows on their phones to watch anytime, anywhere. Using your phone's camera to record the TV screen directly is the easiest way. You can also use mobile screen recording apps like DU Recorder or built-in screen recorders on iPhone or Android to capture the phone screen if you are playing content on your phone.
🚩How to record TV screen with your phone camera:
Step 1. Set your phone on a stable surface or tripod facing the TV screen.
Step 2. Open the camera or screen recording app on your phone.
Step 3. Start recording the TV screen along with its audio.
Step 4. Stop recording when done and save the video to your phone.
- Editor's Note:
-
1. Some users try to mirror their TV screen to a phone and then record it using the phone's screen recorder.
2. However, this method usually doesn't work well due to DRM (digital rights management) protections on many streaming apps and smart TVs.
3. Even if the screen is mirrored, the phone's recorder often captures a black screen instead of the actual content.
4. Therefore, recording TV content directly on your phone is generally unreliable and not recommended.
5. For clear and reliable recordings, using a laptop with an HDMI capture card or dedicated recording devices is the best solution.
Share this post if you find it helpful!
Conclusion
Recording your TV screen with a laptop is easier than ever in 2025, thanks to flexible tools like HDMI capture cards, TV tuners, and screen recording software like EaseUS RecExperts. Whether you're capturing gameplay, saving live broadcasts, or backing up smart TV content, there's a solution for every need.
🚩Here's a quick comparison to help you choose:
|
Solution |
Best For |
Video Quality |
Notes |
|
Smart TV users, gamers |
High-quality, digital |
Supports full HD recording, works with most devices, requires capture card |
|
|
Users with cable/antenna TV |
Good (depends on tuner) |
Works on older TVs, compatible with Windows Media Center on older OS |
|
|
Legacy Windows users |
Good |
Only available on older Windows versions, discontinued on newer systems |
|
|
Quick, casual recording on the go |
Low to medium |
Limited by DRM, often fails on streaming content |
👉Recommendation:
- For most modern users, we recommend EaseUS RecExperts + HDMI Capture Card for the best balance of quality, compatibility, and user experience.
- For beginners or casual users, EaseUS RecExperts alone is sufficient for online or casted content.
- For legacy systems, stick with TV tuners or Windows Media Center.
Share this post if you find it helpful!
FAQs About How to Capture TV Screen on Laptop
If you still have some problems after reading this post, you can refer to those answers.
1. Can I record from TV to laptop?
Yes, you only need to follow these steps.
Step 1. Connect the external TV tuner to your laptop by plugging the USB cable, and attach the cable from the signal source to the external TV tuner. Then program the available channels into the tuner by pressing the Auto-Tune or Scan button.
Step 2. Launch EaseUS RecExperts, choose "Full Screen" as your recording mode, then select a screen area to record. You can decide to record the system sound, the microphone audio, or both of them.
Step 3. Click REC to start recording. You can customize the output folder freely.
2. How can I record TV to my computer?
Firstly, you can download EaseUS RecExperts. Secondly, launch it and click on "Full Screen". Thirdly, adjust the sound settings.
You can choose to record system sound, audio from the microphone, or both. Finally, click the REC button to start the recording process.
3. How do I record my screen on my laptop?
You can use EaseUS RecExperts to record yourself. Firstly, you need to install a webcam or use the built-in camera of your computer. Then launch the software and choose "Webcam". Then, you can click the REC button to start the recording if you adjust all the settings you need.
4. What's the difference between a TV tuner and HDMI capture card?
A TV tuner captures analog or cable signals, useful for older broadcast systems.
An HDMI capture card records high-definition digital output from smart TVs, consoles, or set-top boxes.
If you're using a modern setup, HDMI capture cards are the better choice.
Share this post if you find it helpful!
EaseUS RecExperts

One-click to capture anything on screen!
No Time Limit, No watermark
Start Recording
