-
![]()
Daisy
Daisy is the Senior editor of the writing team for EaseUS. She has been working in EaseUS for over ten years, starting from a technical writer to a team leader of the content group. As a professional author for over 10 years, she writes a lot to help people overcome their tech troubles.…Read full bio -
Jane is an experienced editor for EaseUS focused on tech blog writing. Familiar with all kinds of video editing and screen recording software on the market, she specializes in composing posts about recording and editing videos. All the topics she chooses …Read full bio
-
![]()
Melissa Lee
Alin is an experienced technical blog writing editor. She knows the information about screen recording software on the market, and is also familiar with data cloning and data backup software. She is expert in writing posts about these products, aiming at providing users with effective solutions.…Read full bio -
Jean is recognized as one of the most professional writers in EaseUS. She has kept improving her writing skills over the past 10 years and helped millions of her readers solve their tech problems on PC, Mac, and iOS devices.…Read full bio
-
![]()
Jerry
Jerry is a fan of science and technology, aiming to make readers' tech life easy and enjoyable. He loves exploring new technologies and writing technical how-to tips. All the topics he chooses aim to offer users more instructive information.…Read full bio -
Larissa has rich experience in writing technical articles. After joining EaseUS, she frantically learned about data recovery, disk partitioning, data backup, screen recorder, disk clone, and other related knowledge. Now she is able to master the relevant content proficiently and write effective step-by-step guides on various computer issues.…Read full bio
-
![]()
Rel
Rel has always maintained a strong curiosity about the computer field and is committed to the research of the most efficient and practical computer problem solutions.…Read full bio -
![]()
Gemma
Gemma is member of EaseUS team and has been committed to creating valuable content in fields about file recovery, partition management, and data backup etc. for many years. She loves to help users solve various types of computer related issues.…Read full bio
Page Table of Contents
Rel
Updated on Jun 18, 2024
0 Views |
0 min read
| Comparison | Audio Recording | Format Support | Effectiveness |
|---|---|---|---|
|
EaseUS RecExperts |
Microphone & Internal audio | All common formats | High - Simple Steps with rich advanced functions offered. |
|
Screenshot Toolbar |
Only Microphone | MP4, MOV | Medium - Simple steps with weak recording functionality. |
|
QuickTime Player |
Only Microphone | MP4, MOV | Medium - Simple steps with weak recording functionality. |
|
OBS Studio |
Microphone & Internal audio | More than 6 formats | Medium - Strong recording features but not novice-friendly. |
Note:
- Effectiveness refers to the experience when screen recording on MacBook Air with sound via the help of the corresponding tool/software.
- After considering the above 3 aspects together, we believe that the EaseUS RecExperts, the professional screen recorder, deserves the highest score.
Download EaseUS Screen Recorder
Download EaseUS Screen Recorder
Trustpilot Rating 4.7
When you want to record Twitter space, zoom meetings, or other on-screen activities on MacBook Air, it's important to learn how to screen record on MacBook Air with sound.
There are two types of sound sources on Mac: Built-in Microphone and system sound (internal audio). In this post, we'll introduce you to 4 screen and video recorders. No matter which kind of sound you want to record, or both, you can find useful tools in this article to help you record screens on Mac with audio.
Screen Record on MacBook Air with Sound Using EaseUS RecExperts
We believe that the best way to record video and audio on Mac is by using EaseUS RecExperts for Mac.
This specialized tool is essentially a screen recorder with no watermark and any time limits. It helps Mac users capture screens and videos in selected areas and provides various recording parameters to customize the recording plan.
It is also an excellent internal audio recorder. All you need is a few clicks before recording, and EaseUS RecExperts will record the microphone sound or capture the internal audio for you while recording the screen on Macbook M1/M2 or other models. So, if you have no idea about how to screen record on Mac with internal audio, download it and have a try!
Download EaseUS Screen Recorder
Download EaseUS Screen Recorder
Trustpilot Rating 4.7
Here are more functions EaseUS RecExperts can offer:
- Schedule recording with automatic features.
- Support all common video/audio formats.
- Trim videos and add more video effects.
- Take clear screenshots.
- Extract audio from videos.
Now, let's learn how to use EaseUS RecExperts to screen record on MacBook Air M1/M2 and other models with sound.
Step 1. Launch EaseUS RecExperts. Choose a recording mode from "Full Screen" or "Region". If you choose the second one, you will need to select the recording area manually.

Step 2. After selecting the recording mode, you need to choose which audio to record. To record the system sound, click on the loudspeaker sign; to record the microphone sound, click on the mic sign; to record no sound, select nothing.
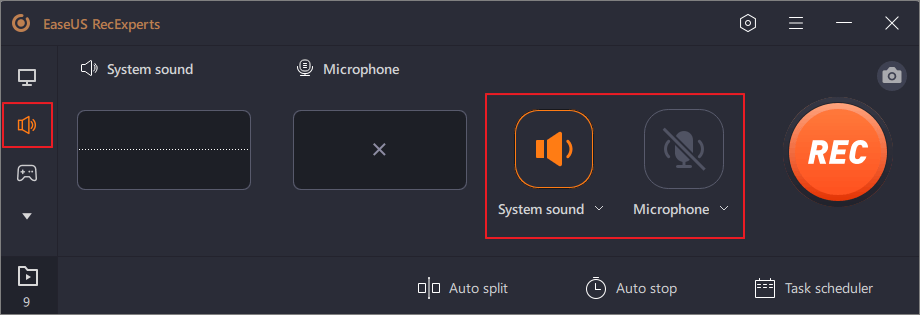
Step 3. Then, you can click the red "REC" button to start recording. If you want to pause the recording, click on the white "Pause" button; to end the recording, click on the red "Stop" button.
Step 4. After recording, the recording list window will open. Here you can view, split, delete, manage your recordings easily.

Screen Record on MacBook Air with Sound Using Screenshot Toolbar
Of course, if you don't want to use third-party screen and video recorders, the screenshot feature built into macOS can also help you record your screen.
And if your MacBook Air 2022 is configured with Mojave or above, you can use a hotkey combination to bring up the Mac screenshot toolbar and record the screen with sound using its built-in features.
Here are 3 Steps offered for you.
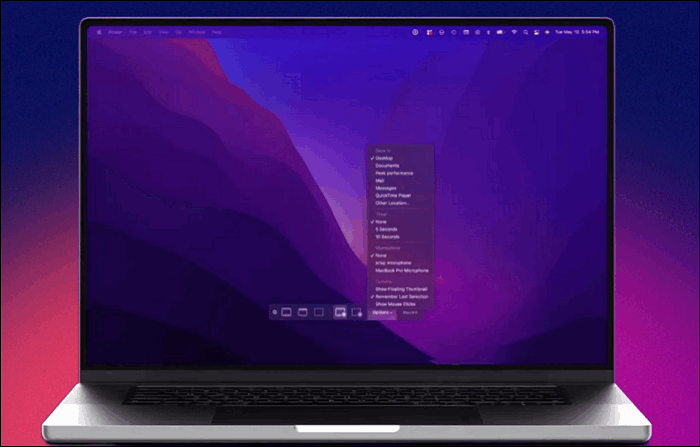
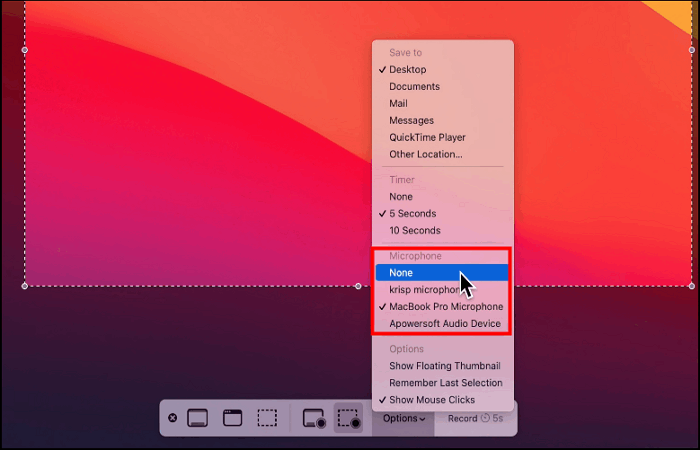
Step 1. Press Shift + Command + 5 shortcuts to run the Mac Screenshot Toolbar.
Step 2. Navigate to Option. Here you can change the save location, timer, and other personal custom settings. Choose a microphone you want to use when screen recording.
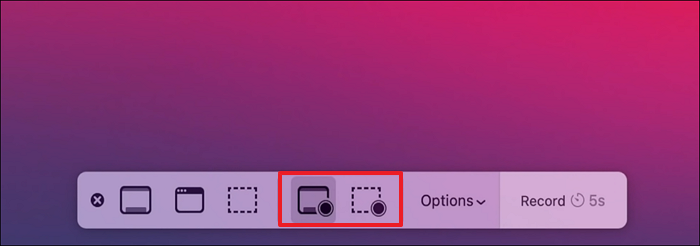
Step 3. Then you can hit the onscreen controls on the screenshot toolbar to decide whether to record the part of screen or the entire screen. Hit the Record to start the process.
It is worth pointing out that Apple does not allow users to record system audio using its built-in features for security reasons. In other words, you can not record internal audio on Mac when using Screenshot Toolbar or other built-in functions.
Because of that, if you'd like to record videos with sounds from YouTube, Instagram, TikTok, etc., on MacBook Air 2017 or other models, using a professional recording tool like EaseUS RecExperts is a better choice.
Screen Record on MacBook Air with Sound Using QuickTime Player
In addition to using the Screenshot Toolbar, it's also a good idea to use QuickTime Player, the local player built into MacBook Air, to screen record with sound.
Compared to the Screenshot Toolbar, QuickTime Player allows users to create new audio and offers a variety of customizable audio settings. For those who want to record podcasts on Mac, QuickTime can do them a good favor with its nice quality of audio recorded.
These 5 steps are provided for you to screen record on MacBook Air 2015 or other models with sound via QuickTime.
Step 1. Launch QuickTime Player on your MacBook Air 2015.
Step 2. Head to File> New Screen Recording.
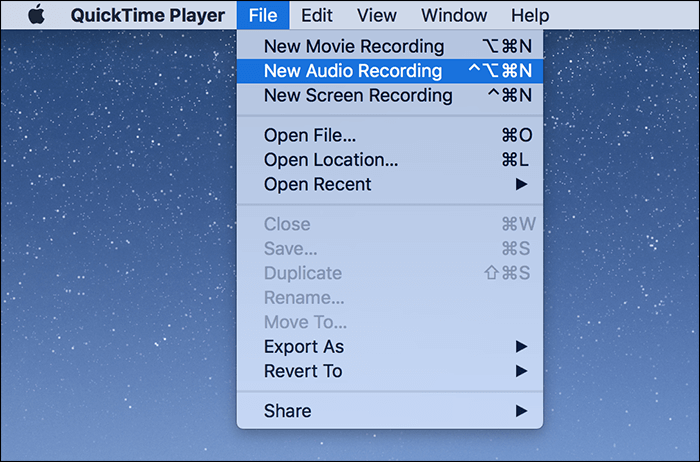
Step 3. Hit the downward arrow near the red Record button. You can find the Microphone settings here. Choose the Microphone you are preparing to use.
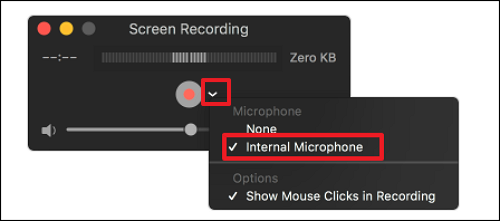
Step 4. Click the Record button to start recording. You can click anywhere once to start recording the whole screen. Or just choose an area of the screen to record.
Step 5. Hit the Stop button to stop recording, and save your recording. If you are not satisfied with the video, you can also trim the video in iMovie.

- Tip
-
Of course, the same as Screenshot Toolbar, QuickTime Player can't record internal audio. But you can additionally download a free macOS extension - SoundFlower.
Set Soundflower as your audio output device, choose the Soundflower as the microphone on QuickTime screen recording, and now you can screen record with internal sound via QuickTime now.
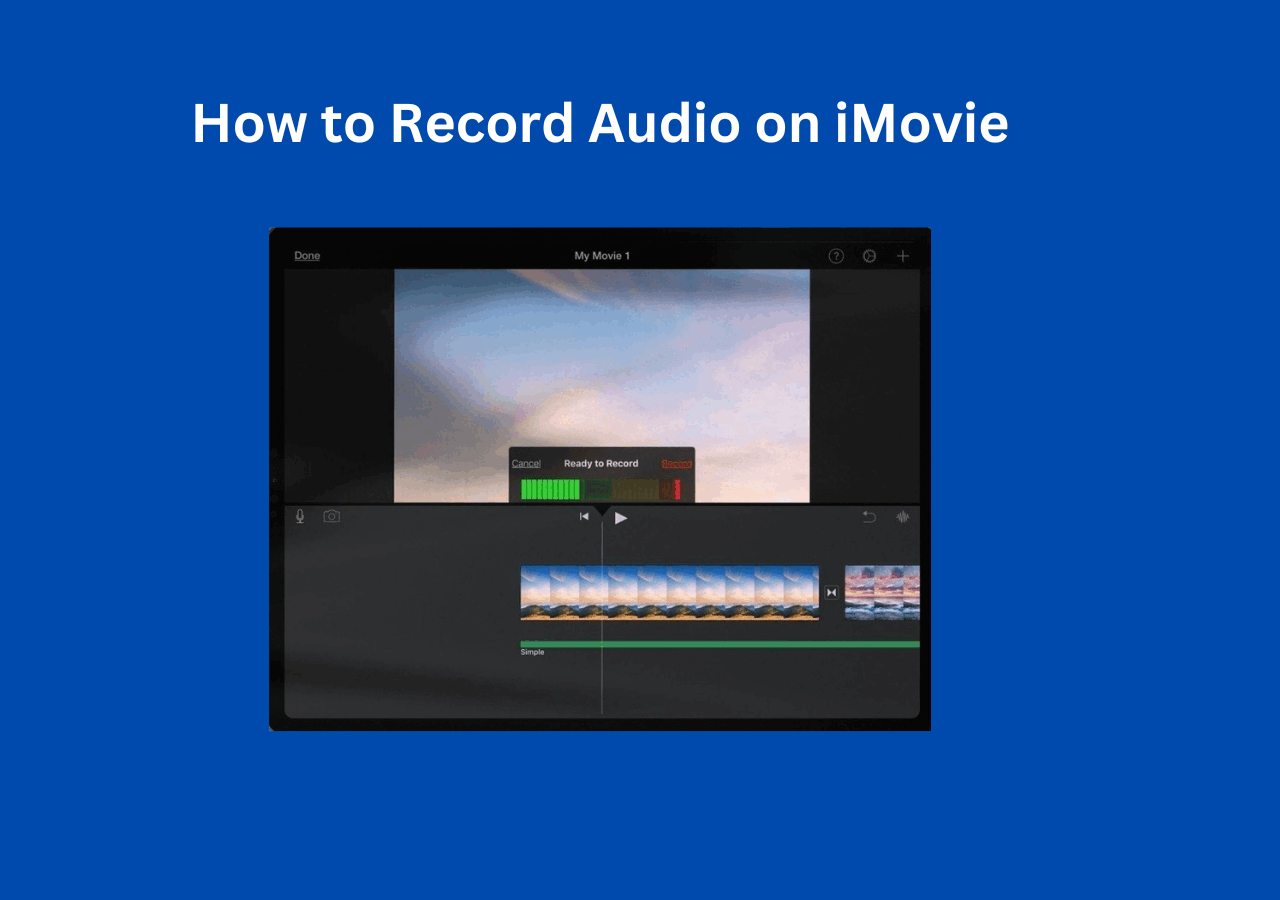
Besides Screenshot Toolbar and QuickTime Player, many Mac users also find that they can record screens on Mac using iMovie. But they report that iMovie can't screen record with sound.
In fact, iMovie can record audio, but compared with the first two built-in tools, the method of using iMovie to record audio is a bit more complicated. You can read the following article to learn the specific steps.
How to Record Audio on iMovie & Best Alternative
If you want to know how to record audio on iMovie, you can follow the steps provided by this post to record audio on iMovie on Mac, iPhone, and iPad.
Screen Record on MacBook Air with Sound Using OBS Studio
If you want to learn about tools that can help you record screens with sound, except EaseUS RecExperts, then OBS Studio is not to be missed.
OBS Studio is the best but free open-source screen recorder available. It can easily capture your PC screen with a microphone, system sound, and webcam for you and stream it to a number of platforms in real time.
Here is a useful tutorial on how to use the OBS record screen on Mac with audio.
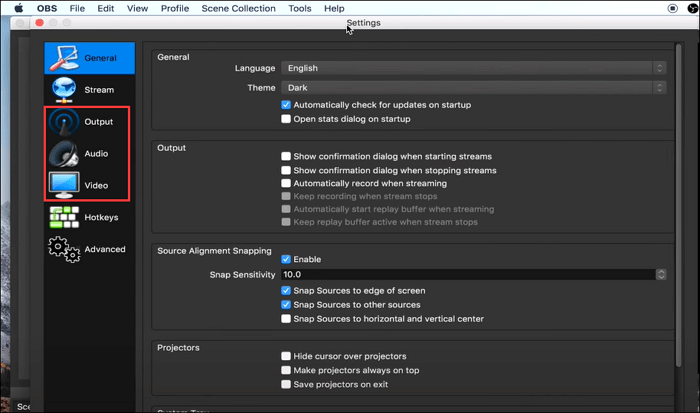
Step 1. Download the OBS Studio for Mac on your MacBook Air.
Step 2. Run OBS, and navigate to Settings. Adjust the audio and video options according to your needs.
Step 3. Hit the "+" icon and head to Display Capture in the pop-up box to create a new display, and hit OK.
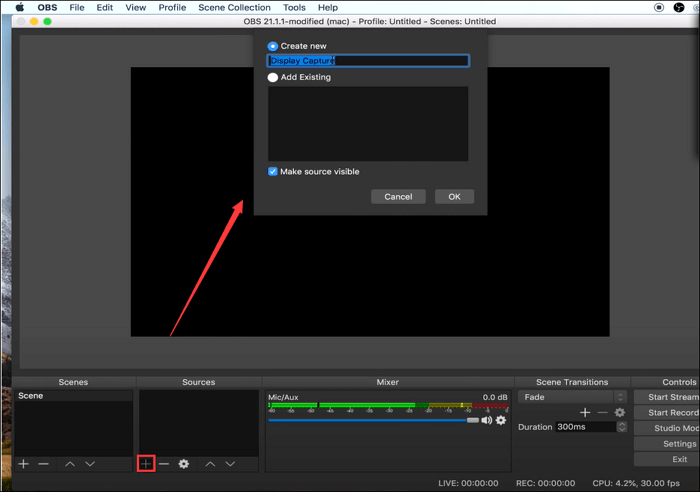
Step 4. Now you can select the Start Recording button to record the screen on Mac with sound now.
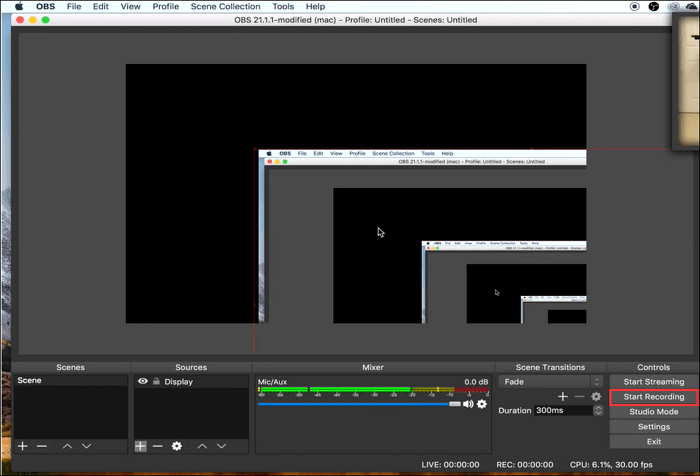
Step 5. Click the Stop Recording button when you want to end the process.
Conclusion
How to screen record on MacBook Air with sound? It is not a hard problem. You can use the Screenshot Toolbar and QuickTime Player, which are built-in tools of macOS, to record screens with microphones. But if you want to find the best screen recorder with audio on Mac for recording internal audio, we believe that EaseUS RecExperts is the right choice.
Download EaseUS Screen Recorder
Download EaseUS Screen Recorder
Trustpilot Rating 4.7
If you want to get more recording tips, do not miss these posts below!
FAQs
1. Why does my MacBook recording have no sound?
If your MacBook records no sound, there are many possible reasons.
Reason 1. The microphone is not connected to the computer.
Reason 2. Something is wrong with the MacBook's built-in microphone.
Reason 3. The switch for the recording sound option is not turned on.
Reason 4. You want to record internal sound, but currently, the Mac does not support recording system sound using its built-in tools.
Reason 5. The third-party recording tool is set up incorrectly.
2. How do I stop a recording on my MacBook Air?
You can stop a recording by hitting the Stop recording button, or just pressing the shortcut Command + Control + Esc.
EaseUS RecExperts

One-click to capture anything on screen!
No Time Limit, No watermark
Start Recording