-
![]()
Daisy
Daisy is the Senior editor of the writing team for EaseUS. She has been working in EaseUS for over ten years, starting from a technical writer to a team leader of the content group. As a professional author for over 10 years, she writes a lot to help people overcome their tech troubles.…Read full bio -
Jane is an experienced editor for EaseUS focused on tech blog writing. Familiar with all kinds of video editing and screen recording software on the market, she specializes in composing posts about recording and editing videos. All the topics she chooses …Read full bio
-
![]()
Alin
Alin is an experienced technical blog writing editor. She knows the information about screen recording software on the market, and is also familiar with data cloning and data backup software. She is expert in writing posts about these products, aiming at providing users with effective solutions.…Read full bio -
Jean is recognized as one of the most professional writers in EaseUS. She has kept improving her writing skills over the past 10 years and helped millions of her readers solve their tech problems on PC, Mac, and iOS devices.…Read full bio
-
![]()
Jerry
Jerry is a fan of science and technology, aiming to make readers' tech life easy and enjoyable. He loves exploring new technologies and writing technical how-to tips. All the topics he chooses aim to offer users more instructive information.…Read full bio -
![]()
Rel
Rel has always maintained a strong curiosity about the computer field and is committed to the research of the most efficient and practical computer problem solutions.…Read full bio -
![]()
Gemma
Gemma is member of EaseUS team and has been committed to creating valuable content in fields about file recovery, partition management, and data backup etc. for many years. She loves to help users solve various types of computer related issues.…Read full bio -
![]()
Shelly
"I hope my articles can help solve your technical problems. If you are interested in other articles, you can check the articles at the bottom of this page. Similarly, you can also check my Twitter to get additional help."…Read full bio
Page Table of Contents
Jean
Updated on Jun 09, 2026
0 Views |
0 min read
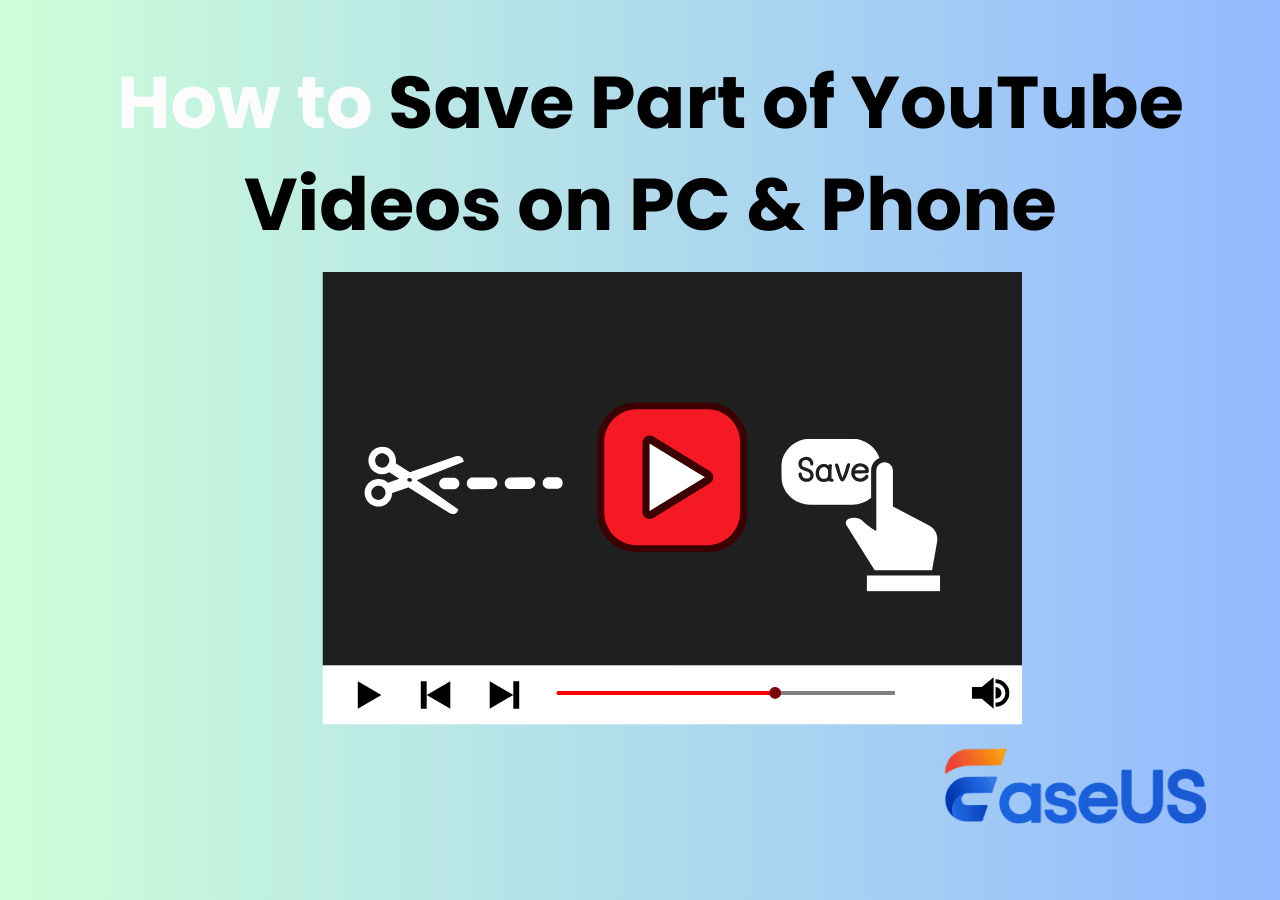
Are you trying to save a YouTube video on your computer without losing quality, or are you a creator wondering how do YouTubers record their gameplay, tutorials, or reviews for upload? No matter if you want to capture an existing video for personal viewing or record your own screen content to share on your channel, this guide will walk you through the best free ways to how to record YouTube videos on PC for free. Keep reading for practical solutions that work on Windows 11, 10, 8, 7, and macOS.
What's Your Biggest Struggle When Recording YouTube Videos on PC?
You can see how people vote.
-
Recording ends up with a black screen or no sound.
-
Video quality is too low (laggy, blurry, or not 1080p).
-
Free tools add watermarks or time limits.
-
Not sure which recorder or settings to choose.
Let's explore why these problems happen and how to fix them with the right tools in this guide.
Quick Answer: Can You Record a YouTube Video on Your Computer?
Yes, but the method depends on what you want to achieve and which system you use. If you're a viewer, you can record YouTube videos for offline study or reference (remember, personal use only). If you're a creator, you can use the same tools to record your gameplay, tutorials, or screen demos for uploading to YouTube.
🚩Here's a quick overview of the free options covered in this article. Choose the one that fits your needs best:
|
Method |
Platform |
Best For |
Pros |
Cons |
|
Windows & Mac |
Both saving YouTube videos and creating your own content |
Watermark-free, high-quality, flexible features |
Require installation |
|
| Xbox Game Bar |
Windows 10/11 |
Gamers recording gameplay for YouTube |
Built-in, easy to use, no extra software |
Limited desktop/File Explorer capture |
| Snipping Tool |
Windows 11 |
Quick clips or custom regions |
Native app, no installation, supports desktop capture |
No FPS/quality customization |
| QuickTime Player |
Mac |
Basic screen recording & external audio |
Pre-installed, simple interface |
No internal audio without extra setup |
| Online screen recorders |
Browser-based |
Quick captures without installing software |
Instant access, no downloads needed |
Internet-dependent, limited recording time/features |
Share this post to help more people!

How to Record YouTube Videos on Windows and Mac PC Perfectly
- Compatibility: Windows 7/8/8.1/10/11; macOS 10.13 and later
- Support video output format: MP4, MOV, FLV, MKV, AVI, and GIF.
- Best for: novice and professionals dealing with multiple recording scenarios and editing on computers
EaseUS RecExperts is a free screen and audio recorder that lets you easily capture the screen, sound, and webcam. Whether you want to save audio from YouTube, grab videos, or record a video for YouTube without black screen, you can use this YouTube recorder to capture wanted clips in simple clicks.
Moreover, it also lets you watch deleted YouTube videos, private clips, member-only videos, and blocked items.
⭐Key Features Users Care About Most:
- High-quality recording (1080p/4K, up to 144fps) ensures videos look clear and professional.
- Record both internal audio and your own voice simultaneously.
- No watermark or time limit, essential for creating clean, upload-ready videos.
- Flexible recording modes: full screen, window, custom region, or with webcam overlay.
- Basic editing & multiple export formats to trim, cut, and save recordings in MP4, MOV, AVI, etc.
👉Download EaseUS RecExperts for your Windows or Mac.
🚩Let's see how to record a YouTube video on PC now:
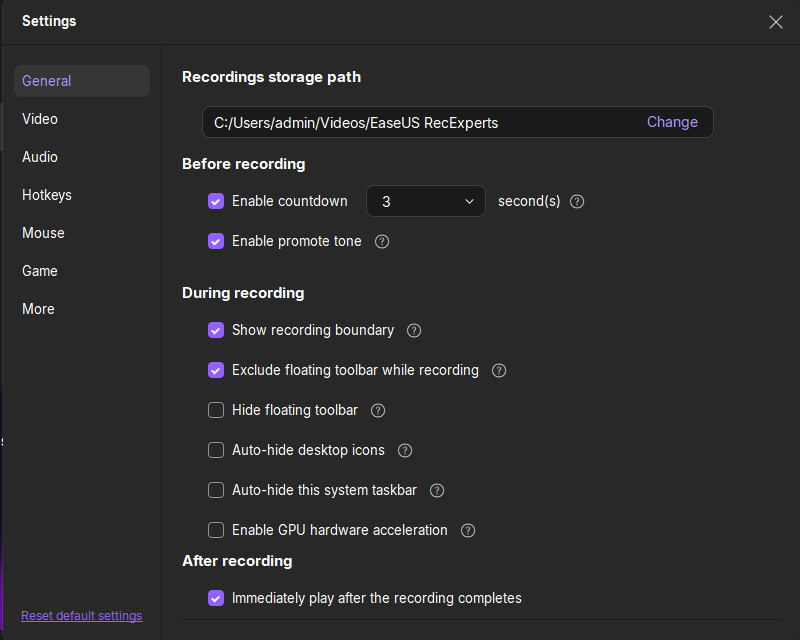
Step 1. Launch EaseUS RecExperts and adjust your recording settings.
Before you start recording, you can customize your settings by clicking the Menu icon (three horizontal lines) in the top-right corner and selecting Settings. From there, you can change the save location, video format, frame rate, audio format, and other preferences. All changes will be saved automatically.
Step 2. Choose a recording mode based on your needs.
On the main interface, you'll see several recording options: Full Screen, Custom, Window, Game, Audio, and Webcam. Simply click the one that matches what you want to record.

Step 3. Set up your webcam and audio sources.
In the toolbar, you can turn the Webcam, Speaker, and Microphone on or off by clicking their icons. If multiple devices are connected, click the small arrow next to each icon to choose your preferred input source.

Step 4. Start and control the screen recording.
Click the red REC button to begin recording. A floating toolbar will appear on your screen, where you can pause the recording using the pause icon or stop it by clicking the red square icon.
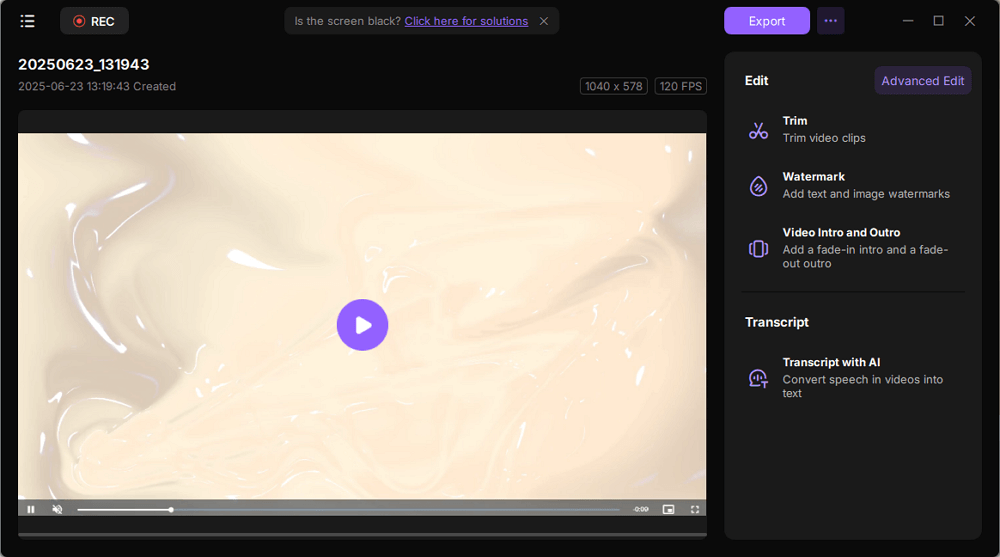
Step 5. Preview, edit, and manage your recordings.
Once you stop recording, you'll be taken to the preview window. Here, you can watch your video, trim it, add watermarks, transcribe audio to text, and organize your recordings. To record again with the same settings, just click the REC button in the top-left corner.
- Notice:
- If you want to record your screen on a Windows PC and upload the video to YouTube, we suggest using the Custom recording mode and selecting the 16:9 ratio, which is explicitly designed for YouTube.
Share this post to help more people!
How to Record a YouTube Video on Windows 10/11 PC with Xbox Game Bar
- Compatibility: Windows 10 22H2 or newer
- Support video output format: MP4
- Best for: recording gameplay and other windows (except desktop and File Explorer) in full-screen mode within 4 hours
Xbox Game Bar allows users to record Xbox series X gameplay and capture clips from other applications. You can use Game Bar to record YouTube videos and audio at the same time with a full-screen mode.
🚩Let's see how to capture a YouTube video on PC in Windows 10 and 11 with Game Bar:
Step 1. Open the YouTube video you want to record.
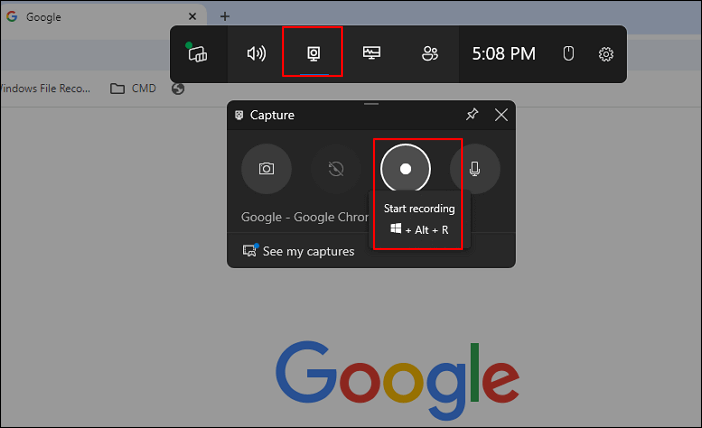
Step 2. Press the Win + G keys together to launch the widget and toolbar.
💡Note: Refer to Xbox Game Bar not opening if necessary.
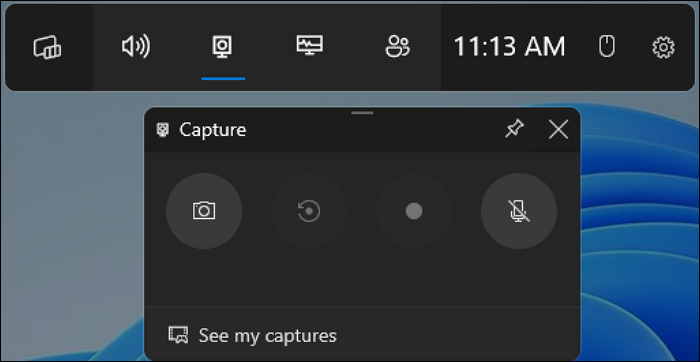
Step 3. In the popup, click Capture. You can turn off or on the microphone sound according to your needs.
Step 4. Click the recording button (white dot) or press the Win + Alt + R shortcut to start recording. Play the YouTube video.
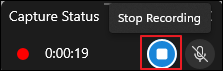
Step 5. To end the recording session, click the Stop Recording button or the Win + Alt + R shortcut again. You will see a Game clip recorded window.
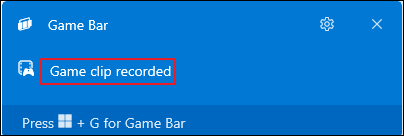
Step 6. Press the Win + G keys again. You can go to See my captures or C:\users\admin\Videos\Captures to see the recorded MP4 file.

💡Notes:
-
Do not switch the window when recording. Xbox Game Bar can record one window only at a time.
-
You cannot pause the recording session with Windows Game Bar.
-
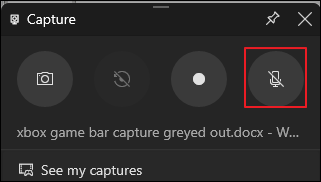
Do not capture the desktop and File Explorer; or you will find the Xbox Game Bar capture grayed out.
Share this post to help more people!
How to Capture Videos from YouTube on Win 11 Computer with Snipping Tool
- Compatibility: Windows 11 version 22000.0 or higher
- Support video output format: MP4
- Best for: taking screenshots, editing pictures, and recording videos within 30 minutes
The Snipping Tool in Windows 11 desktop and laptop computers newly adds a screen recording feature (not available on Windows 10).
This screenshot and recording tool lets users record screen Windows 11 of any region. However, each recording session of Snipping Tool can last only 30 minutes. When it reaches the length limit, the recording will end automatically. So, it would be best if you planned the time properly in advance.
🚩Let's see how to record a YouTube video on PC in Windows 11 with Snipping Tool:
Step 1. Open the YouTube video you want to record.
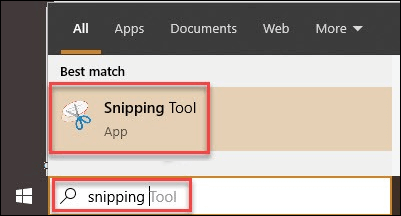
Step 2. Type Snipping Tool in the Search bar and click open from the list.
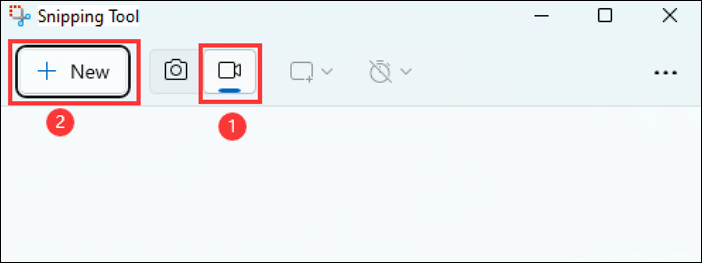
Step 3. Switch from the Snip tab to Record and click + New to initiate a new recording.
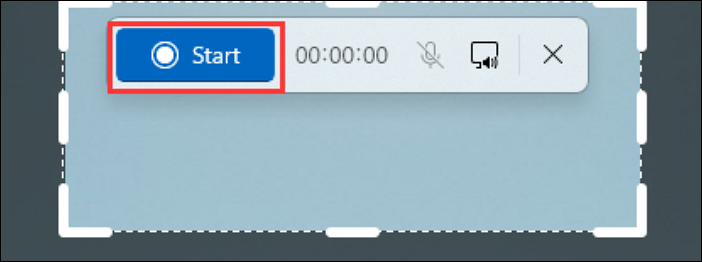
Step 4. Customize the area you want to capture and click Start. The recording will begin once the 3-second countdown timer ends.
Step 5. Click Stop to end the recording task. Usually, the recorded MP4 file will be saved to your computer automatically. If not, click the save button to select a location path for your recording.
💡Note:
1. We recommend manually saving the recording if the Snipping Tool's auto-saving is not working. The file will be lost if the auto-saving process is not finished properly.
2. Use Snipping Tool for short recording tasks only. Many users on Reddit reported that they had encountered unexpected data loss or corruption caused by the sudden shut down.
Share this post to help more people!
How to Record YouTube Videos on Mac with QuickTime Player
- Compatibility: Mac
- Support video output format: MOV
- Best for: recording screen with the external sound
QuickTime Player is a good choice for recording YouTube videos on MacBook. It lets users record the screen with a microphone instead of the system and app audio.
If you want to capture the internal sound from Mac computers, you can install free extra add-ons as the sound output device, such as BlackHole and SoundFlower.
🚩Let's see how to screen record a YouTube video on PC in macOS with QuickTime and plugin:
Step 1. Download BlackHole or SoundFlower to your Mac and install it.
Step 2. On your MacBook, navigate to System Preferences > Sound > Input. Select BlackHole 2ch or Soundflower (2ch) from the list to set it as your Mac's input device.
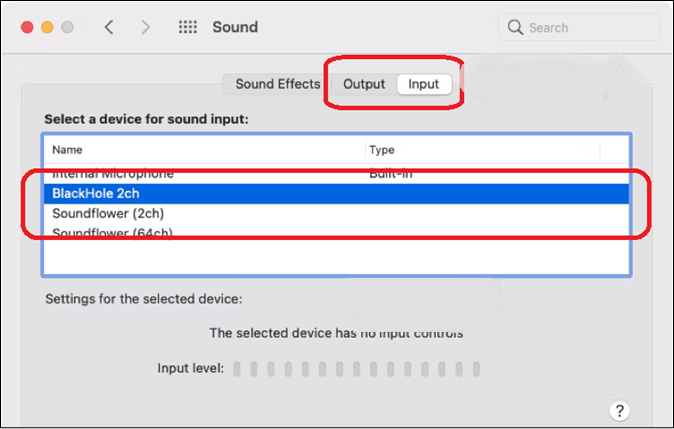
Step 3. Switch to the Output tab to repeat the operations and set it as your Mac's output device.
Step 4. Open the YouTube video you want to record.
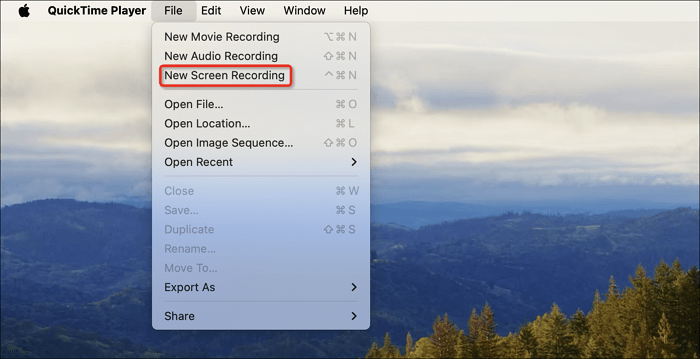
Step 5. Open QuickTime Player, go to File > New Screen Recording and select BlackHole 2ch or Soundflower (2ch) as the source.
Step 6. Now, you can start and stop the recording session.
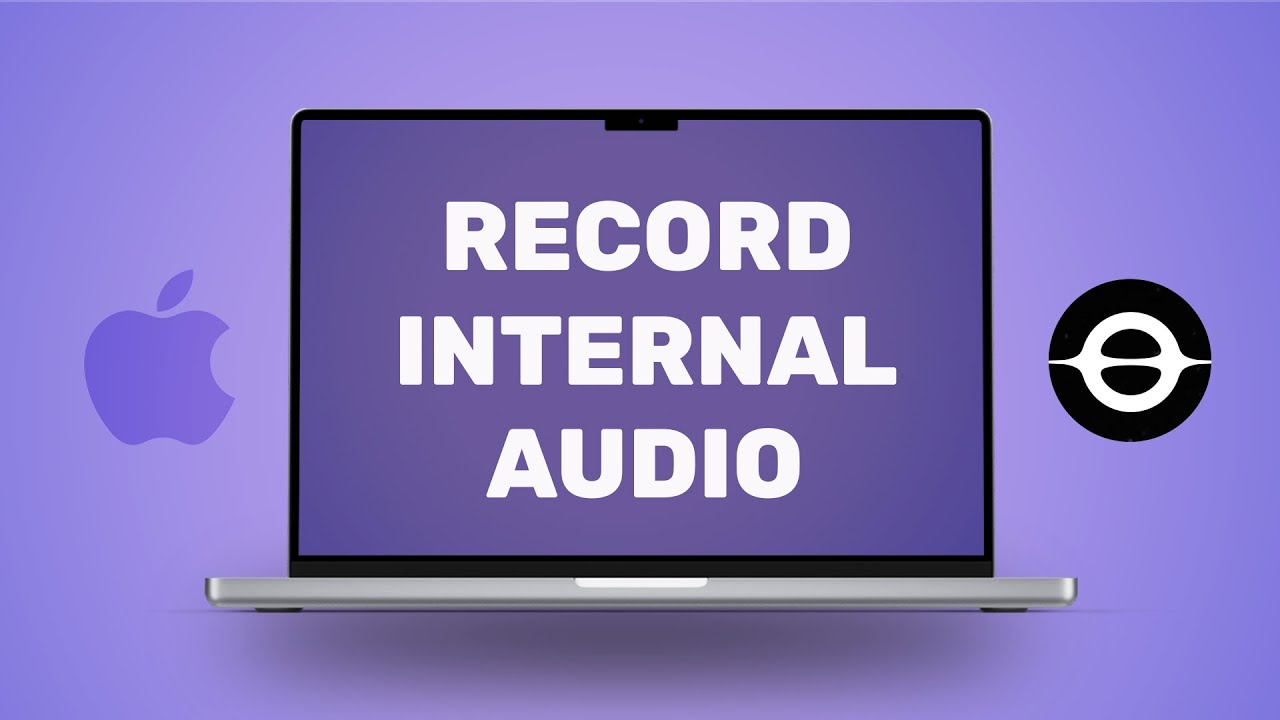
🚩Check this video tutorial for How to Record Internal Audio on Mac | BlackHole Tutorial if needed:
- 00:25 Download & Install it
- 00:55 Let's Configure it
- 02:16 How to Uninstall it
Share this post to help more people!
How to Record YouTube Videos Online for Free
- Compatibility: Windows, Mac, iPhone, and Android devices
- Support video output format: WebM
- Best for: recording screen and audio at the same time on web browsers
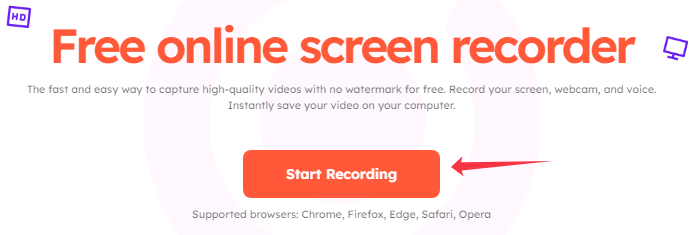
EaseUS Online Screen Recorder is a web-based tool that allows you to record screens and sounds from computers and mobile phones without a watermark. You do not need to download and install any software, extensions, or add-ons.
It is free and accessible on Chrome, Firefox, Edge, Safari, and Opera browsers.
To perform a YouTube video recording online for free, visit the website and initiate the task.
Final Thoughts
As for how to record a YouTube video on PC, there are many options, including third-party software, computer built-in tools, and web-based utilities. Each of these methods has its usage and limitations.
This article elaborates on these solutions in detail; you can choose some that interest you most.
For users who want the quickest and most efficient way, choose EaseUS RecExperts.
How Can I Record from YouTube for Free FAQs
Check more questions on how to record YouTube videos on PC for free.
1. How to record YouTube videos on Android phone?
To record YouTube videos on Android phones and tablets:
Step 1. Open the YouTube video you want to record.
Step 2. Swipe down from the top of your screen to access the Quick Settings panel.
Step 3. Look for a screen recorder option and tap the icon.
Step 4. Choose your settings, such as recording audio (if desired) and whether to show touches on the screen.
Step 5. Tap Start to begin recording and play the video.
Step 6. To stop recording, swipe down from the top of the screen, tap on the screen recorder notification, and then select Stop.
Step 7. The recording will be saved in your gallery or photos app.
2. How to record a YouTube video on your iPhone?
To record a YouTube video on your iPhone or iPad:
Step 1. Open the YouTube video you want to record.
Step 2. Swipe down from the screen's upper-right corner and find the screen recording button (a white solid circle within a circle). Tap on it.
- If there is no such option, go to Settings > Control Center > Customize Controls > Tap the green plus (+) button next to Screen Recording to add it to your Control Center.
- If you need to capture audio from your microphone, press and hold the screen recording button and tap the microphone icon to enable audio before starting the recording.
Step 3. Once the countdown is done, your screen will start recording. Play the YouTube video.
Step 4. To stop recording, open the Control Center again and tap the screen recording button, or tap the red status bar at the top of the screen and confirm that you want to stop recording.
Step 5. The recording will be saved in your photos app.
3. What screen recorder do YouTubers use?
- For Windows and Mac: EaseUS RecExperts, OBS, Snagit, Camtasia, Screencast-O-Matic
- For online: EaseUS Online Screen Recorder, Loom, Screencastify
- For iOS/Android: the built-in recorder, AZ Screen Recorder, DU Recorder, TechSmith Capture
4. How to upload a video to YouTube from PC?
To upload a video from your computer, follow these steps:
- Open YouTube and sign in to your Google account.
- Click the Create button (camera icon with a plus sign) at the top-right corner.
- Select Upload video.
- Drag and drop your video file or choose it manually from your PC.
- Add a title, description, thumbnail, and tags to optimize your video.
- Choose the visibility option (Public, Unlisted, or Private).
- Click Publish (or Schedule if you want it to go live later).
5. How to record YouTube videos using OBS?
OBS Studio is a free, open-source video recording software that works on Windows, Mac, and Linux. Here's how you can use it to record:
- Download and install OBS Studio from the official website.
- Open OBS and click the + under the Sources panel.
- Choose Display Capture (for full screen) or Window Capture (for a specific browser window).
- Adjust the recording area and settings as needed.
- Go to Settings > Output to select your recording format (e.g., MP4, MKV).
- Click Start Recording before playing the YouTube video.
- When finished, click Stop Recording.
Share this post to help more people!